
You’ll want a drop‑in Mopar JEGS unit for OEM looms, the HiRev 7,500 blue JEGS for high‑RPM builds, Premier Gear’s PG‑DM1977 as a reliable GM plug‑and‑play replacement, and the 4‑pin performance module (1875990) for classic Chevy/Buick/Pontiac fits. Make sure coils meet the ≥1.4 Ω primary requirement, use the correct ballast resistor, and mount/ground units to bare metal. Keep going and you’ll get fitment tips, coil tradeoffs, and wiring checks.
| JEGS Ignition Control Unit for Mopar 4/5-Pin |

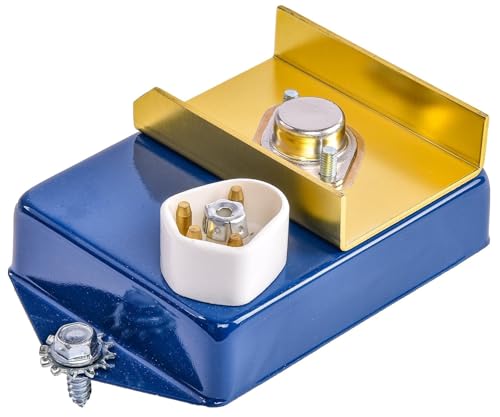
| Reliable OEM Replacement | Function: Ignition control unit (Mopar-style electronic ignition) | Mounting type: Bolt-on / chassis-mounted (case must be grounded) | Connector style: 4- or 5-pin wiring connector (screw-type connector noted) | VIEW LATEST PRICE | Read Our Analysis |
| JEGS HiRev 7,500 RPM Blue Ignition Control Unit |
| High-Rev Performance | Function: Ignition control unit (HiRev 7,500 RPM electronic ignition) | Mounting type: Bolt-on / chassis-mounted (case must be grounded) | Connector style: 4- or 5-pin wiring connector (Mopar-compatible harness) | VIEW LATEST PRICE | Read Our Analysis |
| Premier Gear Ignition Module Replacement for GM Vehicles |

| Best Vehicle Fit | Function: Ignition control module (GM replacement ignition control) | Mounting type: Bolt-on installation | Connector style: Male connector (vehicle-specific multi-pin connector) | VIEW LATEST PRICE | Read Our Analysis |
| 4-Pin Performance Ignition Module for 1974-1988 GM |

| Classic Muscle Upgrade | Function: Ignition module (4-pin performance ignition control) | Mounting type: Bolt-on installation | Connector style: 4-pin connector | VIEW LATEST PRICE | Read Our Analysis |
More Details on Our Top Picks
JEGS Ignition Control Unit for Mopar 4/5-Pin
In case you’re running a Mopar distributor loom and want a direct, no-modification swap, the JEGS Ignition Control Unit for 4/5-pin Mopar setups is the best choice — it plugs straight into OEM, JEGS, and Mopar Performance wiring pigtails and supports E-frame and oil-filled coils with primary resistance of 1.4 ohms or higher. You’ll get a 5,000 RPM cutoff (HIREV 7,500 option sold separately). Mount the silicone-bodied unit on bare metal with serrated screws or lock washers and ground the case. Use a ballast resistor, coat pins with silicone grease, and follow pre-start voltage and idle-stall checks to verify correct wiring.
- Function:Ignition control unit (Mopar-style electronic ignition)
- Mounting type:Bolt-on / chassis-mounted (case must be grounded)
- Connector style:4- or 5-pin wiring connector (screw-type connector noted)
- Coil compatibility requirement:Compatible with coils ≥ 1.4 Ω; OEM/oil-filled and E-frame acceptable; not for C-D/MSD coils
- Use of ballast resistor:Requires ballast resistor (2- or 4-pin); do not use without or unit will be destroyed
- Tested / meets OEM standards:Built to match Mopar OEM function (comparable to Mopar orange box) and specified voltages/tests given
- Additional Feature:5,000 RPM limiter
- Additional Feature:Silicone construction noted
- Additional Feature:Compact dimensions (5.4″x3.3″)
JEGS HiRev 7,500 RPM Blue Ignition Control Unit
Choose the JEGS HiRev 7,500 RPM Blue Ignition Control Unit should you want a drop-in, Mopar‑style electronic replacement that’s built in the USA and tuned for high-rev performance. You’ll get modern electronics in a Mopar OEM appearance that plugs into 4- or 5-pin Mopar, JEGS, and Mopar Performance looms. Ground the case, mount on bare metal with serrated screws or external-tooth lock washers, and snug the connector retaining screw. Use a ballast resistor (2- or 4-pin) and an OEM-spec coil with ≥1.40 ohm primary—high-performance 555-40105 recommended. Pre-start tests and spare looms are available; warranty through JEGS.
- Function:Ignition control unit (HiRev 7,500 RPM electronic ignition)
- Mounting type:Bolt-on / chassis-mounted (case must be grounded)
- Connector style:4- or 5-pin wiring connector (Mopar-compatible harness)
- Coil compatibility requirement:Compatible with coils ≥ 1.40 Ω; OEM/oil-filled and E-frame acceptable; not for C-D/MSD coils
- Use of ballast resistor:Requires ballast resistor (2- or 4-pin); do not use without or unit will be destroyed
- Tested / meets OEM standards:Built to modern electronics with Mopar OEM appearance; manufactured/assembled in USA with quality components
- Additional Feature:HiRev 7,500 RPM
- Additional Feature:Made in USA
- Additional Feature:Blue/chrome OEM styling
Premier Gear Ignition Module Replacement for GM Vehicles
Should you’re restoring or maintaining a GM V6 from the 1990s–2000s and need a reliable, direct-fit ignition control module, Premier Gear’s PG-DM1977 delivers a plug-and-play replacement built to meet or exceed OEM specs. You’ll get a brand-new, bolt-on unit engineered with premium components, male connector, and vehicle-specific fit for Impala, Camaro, LeSabre, LaCrosse, Regal, Grand Prix, Monte Carlo, Firebird, and many Pontiac, Oldsmobile, Buick, and Chevrolet models. It references OEM numbers like 10469470 and 12617924, measures 9.53 x 5.51 x 2.17 inches, weighs 11.2 ounces, and ships tested with warranty and a 30-day return option.
- Function:Ignition control module (GM replacement ignition control)
- Mounting type:Bolt-on installation
- Connector style:Male connector (vehicle-specific multi-pin connector)
- Coil compatibility requirement:Designed to meet OEM specs for specified GM coils (vehicle-specific fit)
- Use of ballast resistor:OEM-spec ignition module typically used with vehicle’s original ignition wiring (ballast/resistor system implied by OEM fit)
- Tested / meets OEM standards:Engineered to meet or exceed OEM specifications; tested for reliability and performance
- Additional Feature:Broad GM vehicle fitment
- Additional Feature:Multiple OEM cross-references
- Additional Feature:Bolt-on installation
4-Pin Performance Ignition Module for 1974-1988 GM
Should you own a 1974–1988 Chevrolet, Pontiac, Olds, or Buick and need a reliable replacement ignition module, the 4-Pin Performance Ignition Module (part 1875990) delivers OEM-level fit and durability. You’ll get a single black 4-pin module that replaces OE numbers LX301, DM1906, 1190357, 4419628, and 82369531. It controls ignition timing, helping prevent flameout and coil failure while maintaining stable engine operation. Built from metal and plastic, it’s manufactured under strict quality control, meets or exceeds OEM standards, and undergoes rigorous testing before shipping. Verify the vehicle’s part number before purchase; model/year alone might not suffice.
- Function:Ignition module (4-pin performance ignition control)
- Mounting type:Bolt-on installation
- Connector style:4-pin connector
- Coil compatibility requirement:Designed as OE-style replacement for GM ignition coils/modules (OEM-equivalent function)
- Use of ballast resistor:OE-style ignition module intended to integrate with original ignition wiring (ballast/resistor usage per vehicle OEM)
- Tested / meets OEM standards:Manufactured to meet or exceed OEM standards; rigorously tested prior to shipping
- Additional Feature:OE replacement numbers listed
- Additional Feature:1974–1988 model coverage
- Additional Feature:Metal-and-plastic construction
Factors to Consider When Choosing Performance Ignition Control Units
Upon selecting a performance ignition control unit, you’ll want to check coil compatibility and whether the unit requires a ballast resistor. Decide on the RPM limiter settings you need, and confirm mounting, grounding, and connector/harness fitment for your vehicle. Those factors will determine reliability and make installation smoother.
Coil Compatibility Requirements
Because ignition control units and coils work as a matched system, you need to verify several coil-specific factors before installing a performance module. First, confirm the module accepts your coil’s primary resistance—possibly require a minimum (about 1.4 ohm) to avoid overload. Next, guarantee the unit supports the coil type: oil-filled OEM-style and E-frame coils typically work, while capacitive-discharge-specific coils might not. Check whether the module expects a ballast resistor or specific ballast wiring to limit coil voltage. Verify the unit’s dwell/trigger behavior and max RPM align with the coil and engine to prevent weak spark or overheating. Ultimately, match connector/pinout and grounding requirements, and perform pre-start voltage tests to assure correct operating voltage.
RPM Limiter Selection
Pick an RPM limiter that reflects the real limits of your engine build, not a round-number wish—choose a setting at or just above the safe maximum revs based on stroke, rod ratio, valvetrain strength and piston integrity. You’ll commonly pick between 5,000 and 8,000+ RPM depending on those factors. Set the limiter a few hundred RPM below the onset of valve float or harmonic resonance to protect valves, springs, and rods. When you have a beefed-up valvetrain (stiffer springs, lightweight hardware), you can justify a higher limiter but validate with progressive testing. Finally, match limiter type to drivetrain tolerance: soft/lean-cut reduces shock; hard cuts can cause abrupt load spikes.
Ballast Resistor Necessity
Although ballast resistors are a small component, you should treat them as essential any time an ignition control specifies one — they drop coil voltage in RUN to roughly 7–9 V to protect the control electronics and set proper dwell. When choosing a performance ignition control, confirm the unit’s requirement for a 2‑pin or 4‑pin resistor and use the exact resistance the manufacturer calls for; wrong value raises coil current and can destroy the control or coil. Before starting, measure coil positive with ignition ON — it should sit near 7–9 V. Should it be higher, inspect the resistor, switch wiring, and for a shorted coil. A quick functional check: briefly disconnect one ballast connector at idle; a proper setup will stall immediately.
Mounting And Grounding
Ensuring a rock-solid mounting and ground is just as essential as the electronics themselves, since a poor ground will introduce noise, voltage drop, and intermittent faults. Mount the ignition control unit to a clean, unpainted, rust-free metal surface—firewall, bracket, or fender apron—so the case can make direct metal-to-metal contact. Use serrated-head screws or external-tooth lock washers and tighten hardware securely to keep low-resistance grounding and avoid intermittent connections. Verify continuity to chassis ground with a multimeter before finalizing installation. Don’t insulate the mounting area with paint, primer, or sealant, and inspect the ground point periodically for corrosion or loose fasteners. In case grounding looks marginal, fit a dedicated heavy-gauge ground strap from the unit case to battery negative or main chassis ground.
Connector And Harness Fitment
When you mate a performance ignition control unit to your vehicle, confirm the connector pin count, layout, and terminal type match the wiring so you get a direct, vibration‑resistant fit without splicing or improvised adapters. Check 4‑pin vs 5‑pin layouts, connector gender, and terminal style (screw, blade, male/female) to avoid loose connections or terminal swaps. Verify the wiring‑loom retaining clip and locking mechanism align so the plug stays secure under vibration. Match wiring loom wire colors and pin functions (power, ground, coil +, ballast, tach) to the unit’s pinout to prevent misrouting. In the event of replacing an old unit, inspect insulation, connector corrosion, and available wire length to decide whether new terminals or a fresh wiring loom are needed for long‑term reliability.
Voltage Pre‑Startup Checks
After confirming connector fitment and harness integrity, check the system voltage at the coil positive with the ignition in RUN before you try to start the engine. Use a reliable digital voltmeter and read between coil positive and a good chassis ground with ignition in RUN (not START). Systems with a ballast resistor should show about 7.0–9.0 volts. In the event you see notably above 9 volts, shut the ignition off and inspect the ballast resistor, ballast wiring, coil primary for shorts, and ignition switch wiring before starting. Make certain the ignition control unit housing has a solid ground on clean bare metal; poor grounding gives false readings and erratic behavior. A quick sanity check: disconnect a ballast-resistor connector while idling—correct wiring will stall the engine instantly.
Coil Primary Resistance
While you’re selecting a performance ignition control unit, coil primary resistance is a critical spec because it directly controls how much current the module must handle; coils below roughly 1.4 ohm pull much more current and can overheat or damage many electronic modules. You should measure primary resistance with an ohmmeter at the coil’s primary terminals (cold, disconnected) and compare that to the ignition unit’s minimum and recommended range. Many modules require about 1.4 ohm minimum to avoid excessive thermal stress. Higher-resistance coils cut current and heat but can reduce spark energy, so balance resistance with coil design and required spark intensity. Should you fit a low-resistance, high-output coil, verify the unit and any ballast resistor can handle the extra current or upgrade.
High‑Performance Coil Options
Having checked coil primary resistance, you now need to pick a high‑performance coil that matches both the ignition control unit and your engine’s demands. Choose coils with at least about 1.4 ohms primary resistance so you do not overload solid‑state units. For high‑rev use, pick coils specified to operate reliably above your target RPM—look for ratings beyond 5,000–7,500 rpm should you be running hard. Match coil type to the ignition: oil‑filled or E‑frame for points‑style or electronic systems, and avoid coils built for C‑D systems. Prefer coils engineered for faster secondary rise time and higher energy delivery to maintain spark at high RPM and under load. Finally, verify compatibility with ballast resistor schemes and that primary/secondary specs won’t exceed the unit’s voltage or current limits.
