You can tighten bike brakes with a few simple tools. Checking your brake type and testing tension matter for your safety. Only 1% of bike accidents happen because of defective brakes:
Contributory factor attributed to vehicle | Number | Per cent |
|---|---|---|
Defective brakes | 189 | 1 |
Regular brake checks boost confidence and give you reliable stopping power.
Key Takeaways
Regularly check your bike brakes before every ride to ensure they work properly. This boosts your confidence and safety.
Use basic tools like Allen keys and a Torx wrench to tighten your bike brakes. Keep these tools handy for quick adjustments.
Adjust brake tension using the barrel adjuster and cable clamping bolts. Proper tension ensures effective braking and safety.
Tools Needed
Basic Tools
You do not need a fancy toolbox to tighten your bike brakes. Most riders use a few simple tools that fit in a small bag. Here is what you should have on hand:
Metric hex wrenches (Allen keys): These are the most important tools for brake adjustments. Sizes from 3 mm to 10 mm work for most bikes, but you will use 4 mm, 5 mm, and 6 mm the most.
Torx T25 wrench: Some disc brakes, like Shimano BR-MT520, need this tool for alignment.
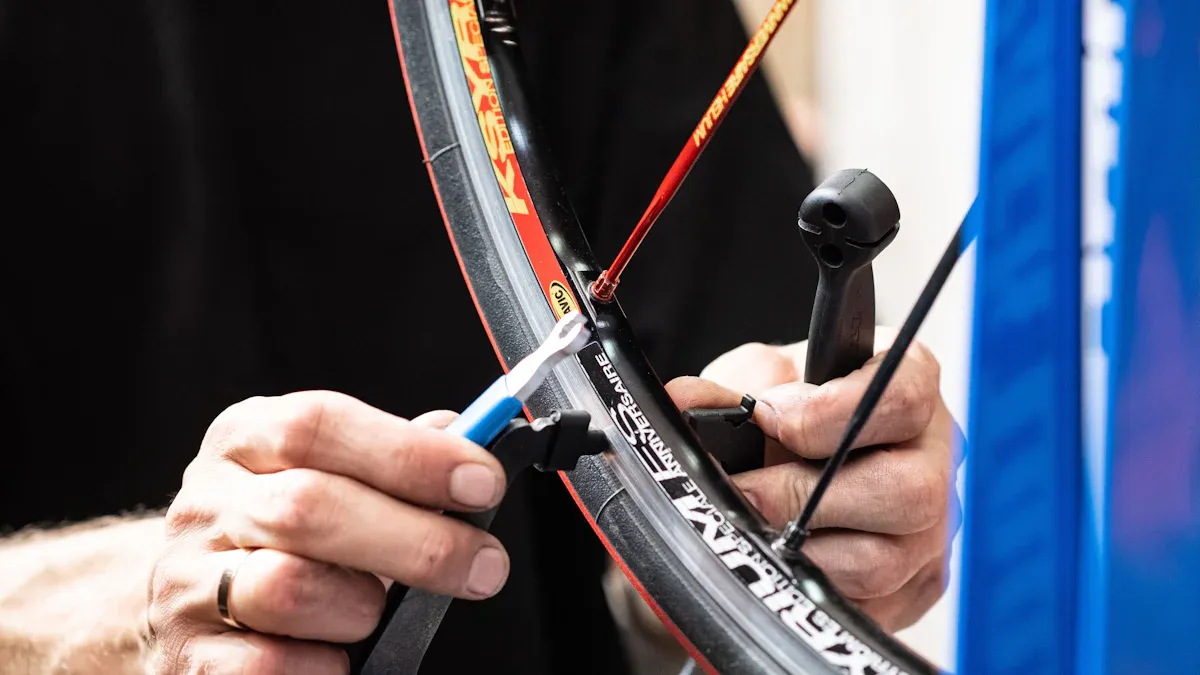
Bike tire levers: These help if you need to remove the wheel to check the brakes.
Clean rag: Wipe down brake parts before you start.
Bike stand (optional): This holds your bike steady while you work.
You can find these tools at any bike shop or online. Keeping them in your kit makes quick fixes easy.
Safety Tips
You want your bike to stop when you need it. Good brakes keep you safe. Here are some tips to follow every time you work on your brakes:
Check your brakes before every ride to make sure they work well.
Keep your bike in good shape. Look at the brakes and tires often.
Carry your tools and supplies with you, especially on long rides.
Learn simple maintenance tasks. This helps you spot problems early.
Tip: Regular brake checks give you peace of mind and help prevent accidents. A well-maintained bike is a safe bike!
Tighten Bike Brakes
Brake Type
You need to know what kind of brakes your bike uses before you tighten bike brakes. Each type has a different setup and adjustment method. Here’s a quick guide:
Brake Type | Description |
|---|---|
Side-Pull Caliper Brakes | Use two curved arms that pivot above the wheel, clamping brake pads onto the rim when engaged. |
Center-Pull Caliper Brakes | Feature symmetrical arms for balanced braking, ensuring even tension on both arms. |
U-Brakes | Mounted directly to the frame or fork, offering a lower-profile setup, ideal for BMX bikes. |
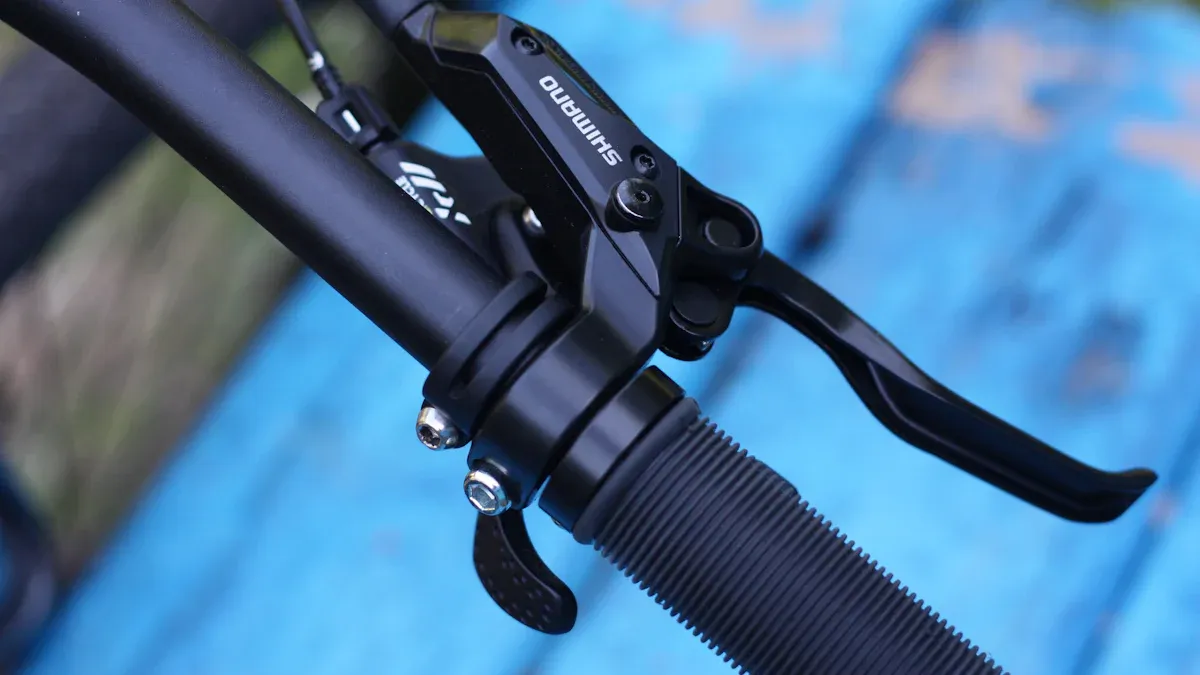
V-Brakes | Known for powerful stopping capability, with a design that allows for easy maintenance and operation. |
Disc brakes look different. You’ll see a metal rotor attached to the wheel hub and a caliper that squeezes the rotor. Rim brakes use pads that press against the wheel rim. Always check your brake type before you start any bike maintenance.
Tip: Check your brakes before every ride. Adjust them every 1,200 to 1,800 miles or every 1 to 2 years for best performance.
Test Tension
You want your brakes to feel just right—not too loose, not too tight. Here’s what to look for:
Brake Tension Condition | Signs |
|---|---|
Loose | Spongy braking, insufficient power |
Tight | Quicker engagement of brake pads |
Squeeze the brake lever. If it pulls all the way to the handlebar or feels soft, the tension is too loose. If it barely moves and the brake pads grab too quickly, it’s too tight. Good tension means the lever moves about halfway before the brake pads touch the rim or rotor.
Adjust Bike Brakes
You can tighten bike brakes using a few simple steps. The process depends on your brake type, but most bikes use a barrel adjuster and cable clamping bolts. Here’s what you need to do:
Barrel Adjuster
The barrel adjuster sits where the brake cable enters the lever or caliper. Turn it counterclockwise to tighten bike brakes and take up slack in the cable. This helps if your brakes feel loose after some use.Set the barrel adjuster halfway if you want easier wheel removal later.
Use the barrel adjuster to fine-tune cable tension after installation or as cables stretch.
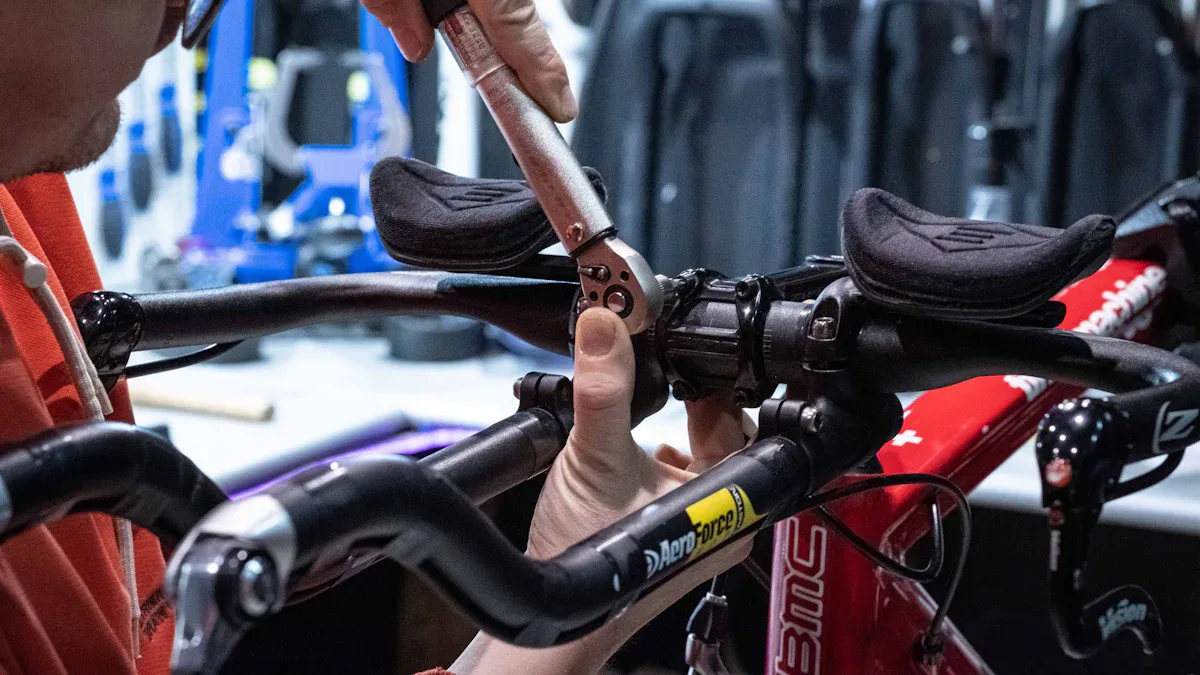
Cable Clamping Bolts
If the barrel adjuster isn’t enough, use an Allen key to loosen the cable clamping bolt. Pull the cable tighter, then retighten the bolt.Make sure the inboard pad sits correctly in the caliper.
Rotate the caliper arm back a bit, clamp the cable, and tighten the bolt.
Move the outboard pad close to the rotor, but don’t let it rub.
Disc Brakes
For disc brakes, follow these steps:Find the brake caliper near the fork or frame.
Locate the pad adjustment screws.
Use a 4mm Allen key to turn the screw counter-clockwise for more clearance.
Spin the wheel to check clearance.
Make sure the brake pads contact the rotor firmly when you pull the lever.
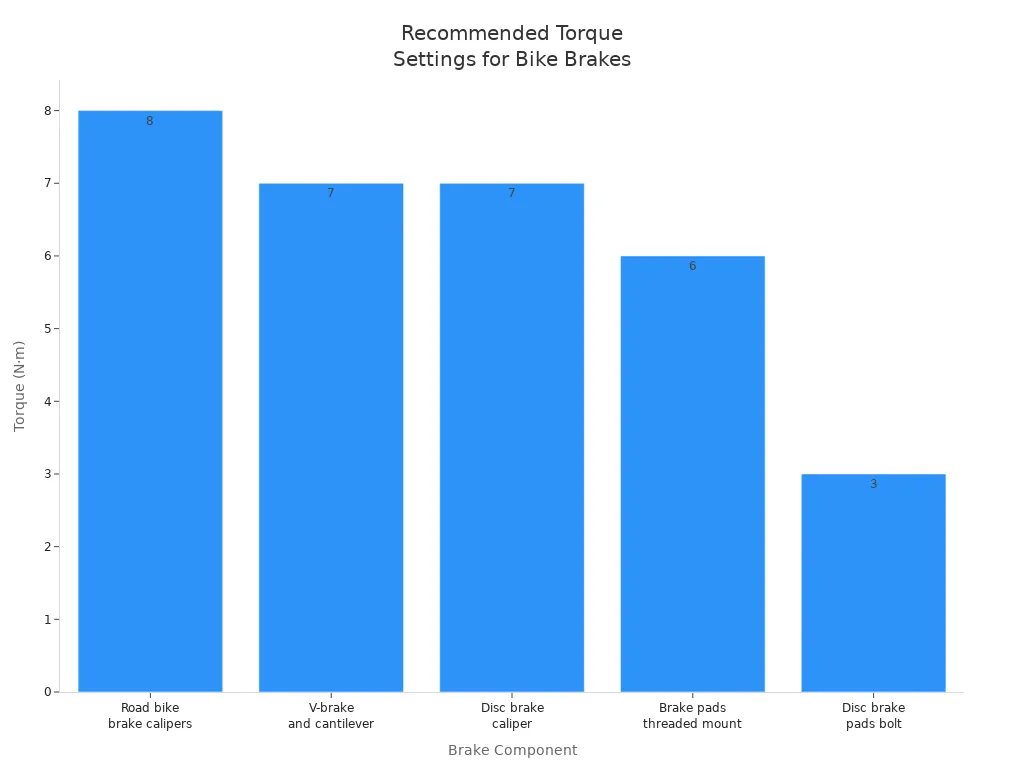
Note: Use the right torque for each bolt. For example, tighten road bike brake calipers to 8 N⋅m, V-brakes to 7 N⋅m, and brake pads to 6 N⋅m.
Fine-Tune Pads
Brake pads need to sit in the right spot for safe stopping. Here’s what you should check:
Hold the brake lever so the pads touch the rim or rotor.
With the lever squeezed, tighten the 4mm brake shoe bolt.
Angle the pads slightly so the front touches first (toe-in). This helps reduce noise and gives even pressure.
Make sure most of the pad sweeps the rim or rotor. Pads wear faster if only a small area makes contact.
Max out the contact area so most of your pads sweep the disk. Pads will wear faster with less contact.
Misaligned brake pads can cause uneven wear, squeaking, and longer stopping distances. If you see one side wearing down faster, realign the pads right away.
Test Brakes
After you tighten bike brakes, always test the brakes before riding. Here’s what to do:
Test the brakes in a safe, open area.
Make sure the brakes feel sharp and firm.
Check if the brakes stop you quickly.
If the brakes feel unresponsive, use the barrel adjuster for small tweaks.
If you still have problems, visit your local bike shop.
Troubleshooting
Sometimes, things don’t go as planned. Here are common issues and what you can do:
Caliper Alignment
Loosen the mounting bolts.
Center the caliper over the rotor.
Tighten the bolts and check pad clearance.
Pad Clearance
For hydraulic brakes, make sure pistons retract evenly.
For mechanical brakes, set the fixed pad 0.3mm from the rotor and adjust cable tension.
Rotor Warping
Spin the wheel to spot any wobble.
Use a rotor truing tool to straighten small bends.
Cable Problems
Look for frayed, rusty, or stiff cables. Replace them if needed.
Signs include delayed braking, sticky levers, or noise.
Loose Brakes After Adjustment
Squeeze the brake lever and secure it with a zip tie overnight.
If brakes still feel loose, get a professional to bleed hydraulic brakes.
Common Mistakes
Broken or bent cables: Inspect and replace as needed.
Misaligned pads: Adjust so pads hit the rim or rotor squarely.
Improper tension: Use the barrel adjuster to fine-tune.
Tip: Change your brake pads at least once a year, or sooner if they look thin, make noise, or lose power. Regular bike maintenance keeps you safe and your bike running smoothly.
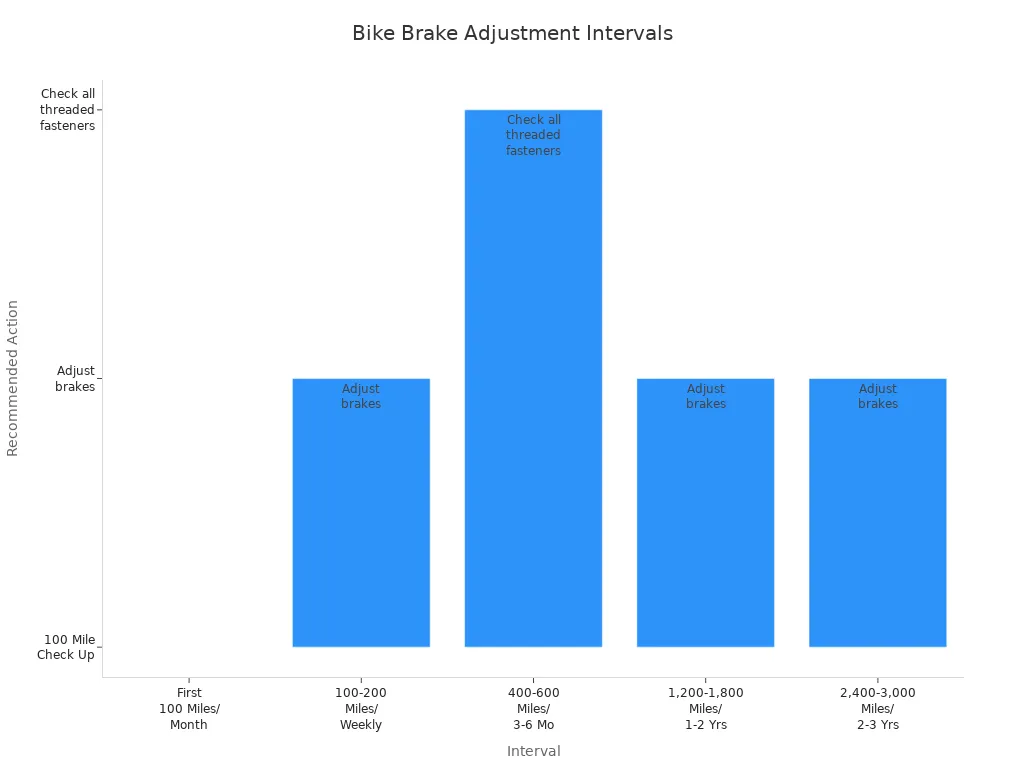
You can keep your bike safe by checking and tightening your brakes often. Follow these steps for smooth stopping and better control. Regular brake maintenance helps you avoid accidents and saves money. Here’s when you should recheck your brakes:
Interval | Action |
|---|---|
After First 100 Miles/Month | 100 Mile Check Up |
Every 100 – 200 Miles/Weekly | Adjust brakes |
Every 400 – 600 Miles/3-6 Mo | Inspect and lubricate |
Every 1,200 – 1,800 Miles/1-2 Yrs | Adjust brakes |
Every 2,400 – 3,000 Miles/2-3 Yrs | Adjust brakes |
Tip: If you ever feel unsure, check guides made for beginners or ask a bike shop for help. Your safety always comes first!
FAQ
What tools do you need to tighten bike brakes?
You need Allen keys, a Torx wrench, tire levers, and a clean rag. These tools help you adjust and check your brakes at home.
What should you do if your brakes still feel weak after tightening?
You should check the cables and pads. If they look worn or thin, you may need to replace the brake pads for better stopping power.
What happens if you ignore brake maintenance?
You risk slow stopping, squeaky noises, or even brake failure. Regular checks keep you safe and help your bike last longer.