Your vehicle’s engine cooling system plays a critical role. It prevents your engine from overheating. A collapsed radiator hose is a serious danger. This problem needs your immediate attention. Ignoring a radiator hose collapse can lead to severe engine damage. Did you know that cooling system issues cause about 50 percent of all engine failures? When a hose collapses, it means a vacuum has formed inside your cooling system. This guide provides 10 essential fixes and preventative steps.
Key Takeaways
A collapsed radiator hose means a vacuum formed in your cooling system. This problem needs quick attention to prevent engine damage.
A faulty radiator cap is a common cause of hose collapse. It fails to let air into the system as coolant cools and shrinks.
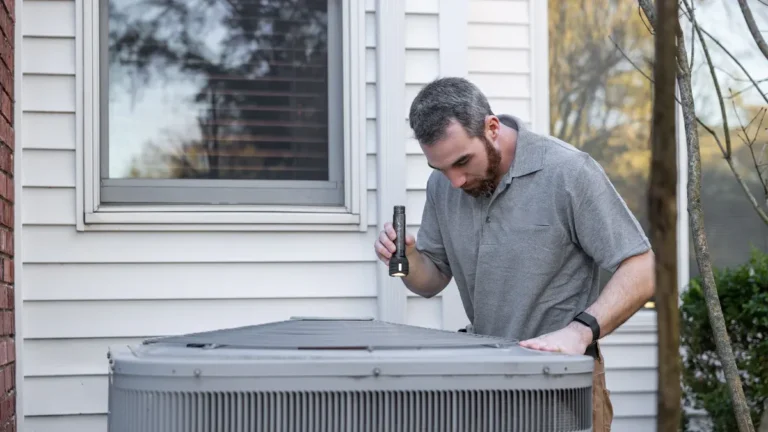
Regularly check your radiator hoses for damage. Look for leaks, softness, or swelling. Replace damaged hoses to keep your engine safe.
Air trapped in the cooling system can cause problems. Bleed air out after any cooling system work to ensure proper coolant flow.
A head gasket issue can put too much pressure in your cooling system. This can cause hoses to collapse. Get professional help for this complex repair.
Understanding Radiator Hose Collapse
When you see a radiator hose collapse, it means a vacuum has formed inside your cooling system. This vacuum pulls the hose inward. It causes the hose to flatten. This happens when the hot coolant cools down. The coolant shrinks. This creates a low-pressure area. Your cooling system needs to let air back in to prevent this. If it cannot, the hose collapses. This is a clear sign of a problem.
Diagnosing Radiator Hose Collapse
You can easily spot a radiator hose collapse. Look at your hoses when your engine is cool. A hose that appears flattened or collapsed indicates an issue. You will see the hose looks squashed. This visual cue tells you something is wrong with your cooling system’s pressure regulation. Do not ignore this sign. It means your engine is at risk of overheating.
Key Causes of Hose Collapse
Several issues can cause a radiator hose collapse. A vacuum relief valve in your radiator cap is very important. It lets air into the system as the coolant contracts. This prevents the hose from collapsing. If this valve fails, air cannot enter. Then, a vacuum forms. This vacuum pulls the hose flat.
Other problems also create this vacuum. Leaking cooling system components can cause it. A faulty or incorrect radiator cap is a common culprit. It might not open at the right pressure. This prevents proper cooling. Local low-pressure zones can also form. These zones happen from moving parts inside the system. High flow velocity of coolant combined with sudden changes in direction can also drop pressure. This can lead to a blown hose. You need to fix these issues quickly. A collapsed radiator hose means your cooling is not working right.
Fix 1: Replace Faulty Radiator Cap
A faulty radiator cap is often the main reason your radiator hose collapses. This cap does more than just seal your cooling system. It also regulates pressure. When your engine cools down, the coolant shrinks. This creates a vacuum inside the system. The radiator cap has a special vacuum valve. This valve should open. It allows coolant from the overflow tank to return to the radiator. If this vacuum valve fails, it cannot let air back in. This creates an excessive vacuum. This strong vacuum pulls the hose walls inward. It causes the hose to collapse. You need to address this issue quickly.
Inspecting Radiator Cap Function
You should inspect your radiator cap regularly. Look for any signs of damage. Check for a worn-out rubber seal or a bent spring. These issues can prevent the cap from working correctly. You can also have your mechanic test the cap. They use a special tool to check its pressure holding ability. Most passenger vehicles use radiator caps with pressure ratings around 13 PSI, 14.5 PSI, or 16 PSI (1.1 bar). Make sure your cap matches your vehicle’s specifications. The correct pressure regulation is vital for your cooling system.
Installing a New Radiator Cap
Replacing a faulty radiator cap is a simple fix. First, ensure your engine is completely cool. Never open a hot radiator. Twist the old cap counter-clockwise to remove it. Make sure you match the new cap’s pressure rating to your vehicle’s requirements. An incorrect cap can cause more problems. Install the new cap by twisting it clockwise until it clicks into place. This small step can prevent future hose collapse and protect your engine.
Fix 2: Inspect for Cooling System Leaks
A leak in your cooling system can cause a radiator hose to collapse. Even a small leak can prevent the system from holding proper pressure. This leads to a vacuum when the engine cools. You must find and fix any leaks to prevent further issues.
Visual Leak Detection
You can often spot leaks by looking for signs of dried coolant. Check around all hose connections. Look under your vehicle for puddles. Common locations for serious cooling system leaks include:
Radiator Cap: It can leak or fail completely. This compromises the tight seal your cooling system needs.
Expansion Tank: The tank itself, its cap, or connecting hoses can crack and leak.
Head Gasket: A blown head gasket can cause coolant to mix with motor oil. This leads to severe overheating.
Radiator: Over time, metal radiators can rust. They develop leaks, especially at the bottom.
Water Pump: Leaks can occur from the pump itself. They can also come from the radiator hose connecting to it.
If a radiator hose collapses when the engine is cold, but returns to its normal shape after you remove the pressure cap, the problem is likely with the radiator cap or the coolant recovery system. This suggests a faulty cap or recovery system can indirectly cause the appearance of a collapsed hose.
Pressure Testing the Cooling System
A visual inspection might not reveal all leaks. You should perform a pressure test on your cooling system. This test involves attaching a special pump to the radiator neck. You then pump air into the system. Watch the pressure gauge. If the pressure drops, you have a leak. For modern vehicles, the recommended pressure level for a cooling system pressure test is typically between 13 and 16 psi. This test helps you find hidden leaks. It ensures your cooling system maintains the correct pressure. This prevents future hose collapse.
Fix 3: Replace Damaged Radiator Hoses

If you find a damaged radiator hose, you must replace it. A compromised hose can lead to a blown hose, causing significant engine damage. You should consider replacing both the upper and lower radiator hoses if one shows signs of wear. This proactive step ensures your cooling system remains reliable.
Assessing Hose Condition
You need to regularly inspect your hoses for signs of wear. Look for these visual cues that indicate a damaged hose needs replacement:
Coolant Leaks: You might see green fluid seeping from under your vehicle. It often has a slightly sweet smell. This indicates a leak that could come from the radiator hose.
Collapsed Radiator Hose: A hose that looks flattened or caved in suggests it is too soft or weakened. This impairs coolant transfer.
Broken Radiator Hose: This includes various forms of damage. Look for swelling, holes, cracks, or a hose that feels excessively soft.
You should also feel the hoses. A healthy hose feels firm but flexible. If it feels mushy, brittle, or swollen, it is time for a new one. These conditions weaken the hose structure. They make it prone to collapse or bursting.
Proper Hose Replacement
Replacing a radiator hose is a straightforward task. First, make sure your engine is cool. Drain the coolant from your radiator. Use pliers or a screwdriver to loosen the clamps holding the old hose in place. Carefully remove the old hose. Clean the connection points on the radiator and engine. Install the new hose, ensuring a snug fit. Tighten the clamps securely. Refill your cooling system with the correct coolant mixture. Bleed any air from the system. This ensures proper cooling and prevents a future blown hose.
Fix 4: Address Thermostat Issues
Your engine’s thermostat controls coolant flow. It helps maintain the correct engine temperature. A faulty thermostat can disrupt your entire cooling system. This disruption can lead to pressure imbalances. These imbalances can contribute to hose collapse. You must ensure your thermostat works correctly.
Testing Thermostat Operation
You can test your thermostat. First, check your engine temperature gauge. If your engine runs too hot or too cold, your thermostat might be faulty. A common test involves removing the thermostat. You place it in a pot of water on a stove. Heat the water. Watch the thermostat. It should open as the water heats up. It should close as the water cools. Standard operating temperatures for vehicle thermostats typically fall between 195 and 220 degrees Fahrenheit. If your thermostat does not open or close properly, you need to replace it. This ensures proper engine cooling.
Correct Thermostat Installation
Installing a new thermostat requires care. First, drain some coolant from your radiator. Locate the thermostat housing on your engine. Remove the bolts holding the housing. Take out the old thermostat. Clean the housing and engine surfaces thoroughly. Install the new thermostat. Make sure you place it in the correct direction. Most thermostats have an arrow or “front” marking. Use a new gasket or O-ring. Tighten the housing bolts evenly. Refill your cooling system with the correct coolant. Bleed any air from the system. This step is crucial for effective engine cooling.
Fix 5: Flush Cooling System and Replace Coolant
A coolant flush cleans your entire cooling system. It removes rust, scale, and other debris. These particles restrict coolant flow. This causes hot spots and pressure issues. A clean system ensures efficient cooling. It helps prevent hose collapse.
Draining Old Coolant
You need to drain the old coolant. First, make sure your engine is completely cool. Place a large drain pan under the radiator drain plug. Open the drain plug. Let all the old coolant drain out. You can also remove the lower radiator hose for faster draining. Close the drain plug or reattach the hose. Dispose of the old coolant properly. It is toxic.
Refilling with Proper Coolant Mix
Refilling with the correct coolant mix is crucial. Your car’s owner’s manual tells you the right type. Coolants come in different types: Organic Acid Technology (OAT), Inorganic Additive Technology (IAT), and hybrid types. Mixing incompatible IAT and OAT coolants can cause severe damage. It forms a gelatinous substance. This blocks your cooling system. Do not rely on coolant color to identify its type. Colors are not reliable anymore. Some advanced coolants are safe for all engines.
For common vehicles, a 50:50 mix of antifreeze and water is often recommended. This is especially true in colder areas. In very warm climates, you might use a 30% antifreeze to 70% water ratio. Manufacturers generally recommend the 50:50 mix for broad use. This ensures optimal coolant quality and protection. Maintaining good coolant quality is essential. Fill the radiator slowly. Make sure the coolant level is correct. Bleed any air from the system. This ensures proper coolant flow and effective cooling. Check your coolant level again after a few drive cycles.
Fix 6: Inspect Water Pump Integrity
Your water pump is vital for your engine’s cooling system. It circulates coolant throughout the engine. A failing water pump can cause serious overheating. It can also lead to pressure problems. These problems contribute to hose collapse. You must check your water pump regularly.
Checking for Water Pump Leaks
You should look for signs of a leaking water pump. Inspect the area directly below the pump. You might see puddles or streaks of coolant. The coolant can be green, orange, or pink. This depends on the type you use. A small leak can quickly become a big problem. It reduces the amount of coolant in your system. This affects your engine’s ability to cool itself. Check the weep hole on the water pump. This small hole allows coolant to escape if the internal seal fails. If you see coolant coming from this hole, your water pump needs replacement.
Listening for Abnormal Noises
Listen to your engine for unusual sounds. These noises can signal a failing water pump.
Rattling noise: This sound often means bad bearings inside the pump. A bent or broken impeller shaft can also cause it. Worn bearings are a common reason for water pump failure.
Clicking or squeaking noise: Worn bearings can also make these sounds. You might hear them when your engine idles. They can be clearer after you turn off the engine and loosen the tensioner.
High-pitched squeals or chirps: These are often early signs of bearing wear.
Whining: This sound can also mean bearings are wearing out. It might sound like a serpentine belt whine.
Rumbles and grinding: These sounds happen in more severe cases. Other parts, like a serpentine belt, might also be affected by the water pump failure.
Address these noises quickly. A failing water pump compromises your entire cooling system.
Fix 7: Clear Radiator Obstructions
Your vehicle’s radiator needs clear pathways. Obstructions, both inside and out, can severely impact your cooling system’s efficiency. A blocked radiator cannot properly dissipate heat. This leads to higher engine temperatures and potential hose collapse. You must ensure your radiator is free from debris.
Cleaning Radiator Fins
External debris often clogs your radiator fins. Leaves, bugs, dirt, and road grime can build up. This layer acts as an insulator. It prevents air from passing through the radiator. This reduces the radiator’s ability to cool the coolant. You can clean the fins yourself.
First, ensure your engine is cool.
Use a soft brush or a low-pressure air hose.
Gently remove debris from the front of the radiator.
Always spray from the front towards the engine. This pushes debris out.
Avoid high-pressure washers. They can bend the delicate fins. Bent fins also restrict airflow.
Regular cleaning helps your cooling system work its best.
Checking for Internal Blockages
Internal blockages are more serious. Rust, scale, and old coolant deposits can build up inside the radiator. These blockages restrict coolant flow. This reduces the amount of heat the radiator can transfer. You might notice your engine running hotter than usual.
You can check for internal blockages during a coolant flush. As you drain the old coolant, look for particles or discoloration. Very dirty or sludgy coolant indicates internal issues. A professional can also perform a reverse flush. This forces water through the radiator in the opposite direction of normal flow. It helps dislodge stubborn deposits. Maintaining proper coolant quality prevents these internal blockages. This ensures efficient cooling and protects your engine.
Fix 8: Bleed Air from Cooling System
Air trapped in your cooling system can cause serious problems. These air pockets prevent proper coolant flow. They create hot spots in your engine. This leads to overheating and can contribute to hose collapse. You must remove all air from the system after any cooling system work. This ensures your engine cools correctly.
Proper Air Purging Techniques
Bleeding air from your cooling system is a crucial step. You need to do this carefully.
First, make sure your engine is completely cool. This prevents burns from hot coolant.
Remove the radiator cap. If your vehicle has an overflow tank, remove that cap instead. The cap is usually at the highest point of the coolant system.
Place a funnel with the correct adapter into the radiator filler neck. Slowly pour coolant until it reaches the ‘full’ marker. You can squeeze the top radiator hose to help expel trapped air. If your system has a bleed valve, loosen it while filling. Tighten it once a steady stream of coolant flows out.
Leave the funnel in place. Start the engine. Set the A/C to its hottest setting to circulate coolant. Let the engine run for several minutes. Occasionally rev the engine to 3,000 RPMs. This helps dislodge air bubbles. Monitor the coolant level in the funnel. Top up if it drops as air bubbles ‘burp’ out.
Once the coolant level stabilizes, turn off the engine. Let it cool completely. Top up the coolant to the correct level. Do not overfill. Remove the funnel and replace the radiator cap.
Ensuring Full Coolant Circulation
Air pockets prevent efficient coolant flow. They can cause your temperature gauge to read incorrectly. This makes you think your engine is not overheating when it actually is. An alternative method involves jacking up the front end of your vehicle as high as possible. This makes the radiator neck the highest point in the system. It helps air escape more easily. Using a ‘spill-proof’ funnel kit can also simplify the filling process.
You can also crack the bleeder screw on top of the thermostat housing. Fill until coolant flows out. Another trick is to crack the top heater hose at the firewall. Repeat the filling process until coolant flows out. This hose is often the highest point in the cooling system. Ensuring full coolant circulation protects your engine from damage. It keeps your cooling system working efficiently.
Fix 9: Check for Clogged Suction Port
A clogged suction port can specifically cause your lower radiator hose to collapse. This happens because the water pump struggles to pull coolant from the radiator. When the pump tries to draw coolant, but a blockage restricts the flow, it creates a strong vacuum. This vacuum can pull the lower radiator hose inward, causing it to flatten. You need to ensure a clear path for coolant to prevent this issue.
Inspecting Lower Hose Connections
You should carefully inspect your lower radiator hose and its connections. Look for any visible kinks or signs of external damage on the hose itself. Feel the hose when the engine is cool. It should feel firm but flexible. If it feels unusually soft or mushy, it might be weak and prone to collapse. Also, check the connection points where the hose attaches to the radiator and the water pump. Look for any debris caught around these areas. Sometimes, internal debris can accumulate at the connection, acting as a partial blockage.
Clearing Suction Port Blockages
You need to clear any blockages in the suction port. First, drain your cooling system. Then, disconnect the lower radiator hose from both the radiator and the water pump. Inspect the port on the radiator where the hose connects. Look inside for any rust, scale, or foreign objects. You can use a flashlight to see clearly. If you find debris, carefully remove it. You can use a small brush or a pick. Be gentle to avoid damaging the radiator. Also, check the water pump inlet port. Ensure it is free from obstructions. A thorough flush of the radiator can help dislodge internal debris. This ensures a smooth flow of coolant. A clear suction port prevents the lower radiator hose collapse and keeps your cooling system working efficiently.
Fix 10: Consider Head Gasket Repair
A head gasket issue can cause significant problems for your engine’s cooling system. This problem often leads to pressure imbalances. These imbalances can contribute to radiator hose collapse. A damaged head gasket allows combustion gases to enter the cooling system. This creates excessive pressure. This pressure can overwhelm the system. It prevents proper cooling. You must address a head gasket failure promptly. This prevents further engine damage.
Diagnosing Head Gasket Failure
Diagnosing a head gasket failure requires careful attention. You might notice white smoke from the exhaust. You could also see coolant loss without visible leaks. Several definitive tests help confirm this issue.
Compression Test: This test checks cylinder pressure. If two adjacent cylinders show 0 psi compression, a leak exists between them. This indicates a head gasket failure.
Exhaust Gas Analyzer Test: This test checks for combustion gases in your coolant. You insert an exhaust probe into the radiator of a warm, running engine. Soaring combustion gas levels confirm a head gasket or cracked head issue.
Cost-effective Block Tester: This tool also detects exhaust gases in the cooling system. You idle a warm engine. Ensure low coolant levels. Force radiator gases through a test fluid for about one minute. The fluid changes color (blue to green or yellow) if exhaust gases are present.
Some opinions suggest a ‘bubble test’ as a diagnostic aid. However, this test is not definitive. Experts also state no single test can definitively prove head damage.
Professional Repair Considerations
Head gasket repair is a complex job. It often requires specialized tools and expertise. This is not a DIY task for most people. The engine’s cylinder head must be removed. This allows access to the gasket. The head might also need machining. This ensures a flat surface. The cost of this repair can be substantial. It depends on your vehicle’s make and model. You should seek professional help for this repair. A proper repair ensures your engine’s longevity. It restores your cooling system’s integrity. This prevents future hose collapse.
Your engine cooling system is vital. Ignoring radiator hose collapse leads to severe consequences. If coolant escapes from a compromised hose, your engine can overheat quickly. This causes head gasket failure, warped engine parts, and even complete engine failure. Proactive maintenance, especially for your radiator cap and hoses, is key. Timely fixes prevent costly engine damage. Regularly inspect your radiator and other cooling system components. Address any trouble signs fast. This keeps your radiator and engine cooling properly.
FAQ
Why does my radiator hose collapse when the engine cools?
Your engine cools. The coolant inside shrinks. This creates a vacuum. Your radiator cap has a special valve. If this valve fails, it cannot let air into the system. The vacuum then pulls the hose flat.
Can I drive with a collapsed radiator hose?
No, you should not drive with a collapsed hose. It restricts coolant flow. This causes your engine to overheat quickly. You risk severe engine damage. Fix it immediately.
How often should I inspect my radiator hoses?
Inspect your radiator hoses regularly. Check them during every oil change. You can also check them at least twice a year. Look for cracks, softness, or swelling. Early detection prevents bigger problems.
What is the difference between a collapsed hose and a burst hose?
A collapsed hose flattens inward. A vacuum inside your cooling system causes this. A burst hose ruptures. Too much internal pressure causes this. Both indicate serious cooling system problems.