

You can replace an instrument panel dimmer with a reliable OE-feel switch that fits and lasts. Choose parts that match connector type, amperage, and mounting for a clean installation. Brands like Wells WVE, A-Premium, Ford-style units, and GM Genuine Parts offer PA66/GF30 or ABS housings and low-resistance contacts.
I’ll cover fitment tips, wiring checks, and warranty expectations to help pick the best dimmer and avoid common installation headaches.
| Wells WVE Instrument Panel Dimmer Switch (1990–1994) |
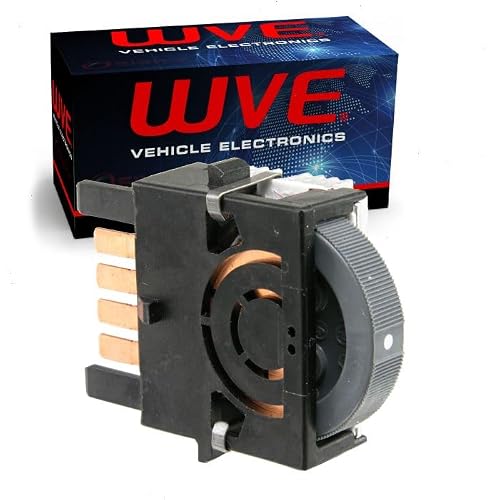
| Classic Replacement | Function: Controls instrument panel dimming | Fitment / Compatibility: Specific GM trucks/SUVs (1990–1994 Chevy/GMC/K-series listed) | Direct-fit / Replacement: Direct replacement; factory-style replacement | VIEW LATEST PRICE | Read Our Analysis |
| A-Premium Headlight Dimmer Switch for Dodge & Chrysler |
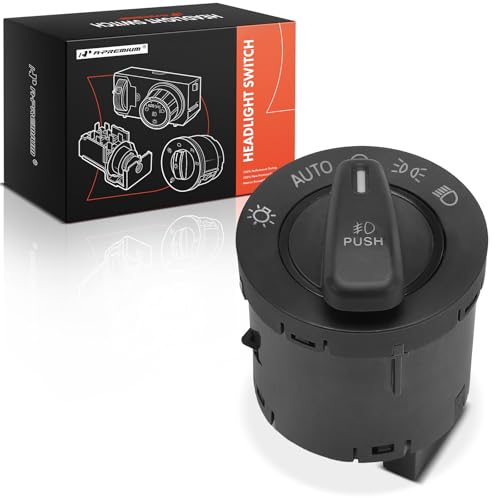
| Direct-Fit Upgrade | Function: Headlight/ instrument panel dimmer control | Fitment / Compatibility: Chrysler/Dodge models (2011–2019 ranges: 300, Town & Country, Charger, Durango, Grand Caravan, Journey) | Direct-fit / Replacement: Manufactured to OE specification; direct-fit plug-and-play | VIEW LATEST PRICE | Read Our Analysis |
| Headlight Switch for 2003–2006 GM Trucks and SUVs |

| Reliable OEM Substitute | Function: Headlight switch with instrument panel dimmer function | Fitment / Compatibility: GM trucks/SUVs (2003–2007 Silverados, Sierras, Escalades, Avalanches, etc.) | Direct-fit / Replacement: Designed as replacement; tested for trouble-free installation | VIEW LATEST PRICE | Read Our Analysis |
| Dash Instrument Panel Dimmer Switch for Ford Trucks |

| Heavy-Duty Fit | Function: Instrument panel brightness (dimmer) control | Fitment / Compatibility: Ford trucks/SUVs (Expedition, F-250/350/450/550 Super Duty; 2011–2017 ranges) | Direct-fit / Replacement: Plug-and-play; connects to factory harness; mounts in original position | VIEW LATEST PRICE | Read Our Analysis |
| GM Genuine Parts Instrument Panel Dimmer Switch (D1537J) |

| GM-Approved OEM | Function: Adjusts instrument panel brightness (dimmer) | Fitment / Compatibility: GM vehicles (GM Genuine Parts; OEM/ACDelco fit, specific GM applications) | Direct-fit / Replacement: GM OE specification; GM-recommended replacement part | VIEW LATEST PRICE | Read Our Analysis |
More Details on Our Top Picks
Wells WVE Instrument Panel Dimmer Switch (1990–1994)
Should you want a straightforward, factory-style fix for the instrument panel in an initial 1990s Chevy or GMC truck, choose the Wells WVE Instrument Panel Dimmer Switch because it matches the original fit and feel. You’ll find this part made for 1990 through 1994 Chevrolet and GMC models like the Blazer, C1500, C2500, C3500, K15, and K1500. It’s a genuine Wells WVE unit that comes with original packaging and hardware. You can swap it in as a direct replacement, and you should confirm fitment on Amazon before you buy. It controls panel dimming and keeps your dash working like new.
- Function:Controls instrument panel dimming
- Fitment / Compatibility:Specific GM trucks/SUVs (1990–1994 Chevy/GMC/K-series listed)
- Direct-fit / Replacement:Direct replacement; factory-style replacement
- Connector / Installation Type:OEM-style replacement (requires vehicle-specific connector confirmation)
- Material / Construction:(Not explicitly stated) Genuine Wells WVE part construction (OEM-quality)
- Warranty / Quality Assurance:Genuine Wells WVE part (implied OEM quality; packaging/hardware included)
- Additional Feature:Includes original packaging
- Additional Feature:Hardware included
- Additional Feature:Confirmed fit
A-Premium Headlight Dimmer Switch for Dodge & Chrysler
Should you drive a Dodge or Chrysler and want a reliable, factory-fit dimmer switch that installs in minutes, the A-Premium Headlight Dimmer Switch is a smart choice because it matches original equipment specs and uses a plug-and-play connector for a solid fit. You’ll appreciate the OE-style connector and direct-fit design whenever you swap the switch quickly without special tools. It’s made from durable PA66 and GF30 plastics and uses superior metal conductors for low resistance. Part numbers include HLS1619, 1S11711, 56046258AB, and others, and A-Premium backs it with a one-year unlimited-mileage guarantee.
- Function:Headlight/ instrument panel dimmer control
- Fitment / Compatibility:Chrysler/Dodge models (2011–2019 ranges: 300, Town & Country, Charger, Durango, Grand Caravan, Journey)
- Direct-fit / Replacement:Manufactured to OE specification; direct-fit plug-and-play
- Connector / Installation Type:OE-style connector; plug-and-play (no special tools)
- Material / Construction:PA66 + GF30 plastics; superior metal conductor
- Warranty / Quality Assurance:One-year unlimited-mileage guarantee; tested prior to shipment
- Additional Feature:Multiple cross-reference numbers
- Additional Feature:PA66 + GF30 plastics
- Additional Feature:One-year unlimited-mileage
Headlight Switch for 2003–2006 GM Trucks and SUVs
In case you drive a 2003 to 2006 GM truck or SUV and want a reliable replacement that brings back automatic headlights, this headlight switch is a great choice. You’ll get a switch listed under part numbers like 19381535 and 15194803, so you can match it to your old unit before you install. It restores the auto headlight function and works with your instrument panel dimmer. It fits Silverados, Sierras, Escalades, Avalanches, and more. The switch is tested for easy, trouble free installation. A three month warranty and responsive seller support give you extra peace of mind.
- Function:Headlight switch with instrument panel dimmer function
- Fitment / Compatibility:GM trucks/SUVs (2003–2007 Silverados, Sierras, Escalades, Avalanches, etc.)
- Direct-fit / Replacement:Designed as replacement; tested for trouble-free installation
- Connector / Installation Type:Standard replacement connector (confirm identical before install)
- Material / Construction:(Not explicitly stated) Standard OEM-grade materials for headlight switch
- Warranty / Quality Assurance:Three-month warranty; seller support available
- Additional Feature:Auto headlight function
- Additional Feature:Multiple OEM part numbers
- Additional Feature:Three-month warranty
Dash Instrument Panel Dimmer Switch for Ford Trucks
In case you drive a Ford Super Duty or Expedition and you’ve been fighting dim or unresponsive dash lights, this BC3Z-11691-AA dimmer switch is made for you. You’ll get a plug-in, push-button replacement that mounts in the original position and connects to the factory wiring, so installation is easy and fast. It controls instrument panel brightness with a smooth button action and reliable feedback, rated for 12 volts and 5 amps. The ABS-bodied switch fits 2011–2016 F-250 through F-550 and 2015–2017 Expedition. It runs in normal temperatures, resists light moisture, and promises long service life.
- Function:Instrument panel brightness (dimmer) control
- Fitment / Compatibility:Ford trucks/SUVs (Expedition, F-250/350/450/550 Super Duty; 2011–2017 ranges)
- Direct-fit / Replacement:Plug-and-play; connects to factory harness; mounts in original position
- Connector / Installation Type:Plug-in connector; mounts to factory harness
- Material / Construction:ABS plastic housing; blade terminals
- Warranty / Quality Assurance:Manufacturer specs and durability data provided (IP44 rating noted) — implied quality backing by seller LLYZFED
- Additional Feature:IP44 rated
- Additional Feature:5 Amp / 12V spec
- Additional Feature:Push-button ON–OFF
GM Genuine Parts Instrument Panel Dimmer Switch (D1537J)
Should you want a dimmer switch that fits your GM vehicle like it came from the factory, the GM Genuine Parts D1537J is a solid pick that won’t leave you guessing about fit or function. You’ll get an OE spec part made via ACDelco and backed through GM, so you can trust its fit, function, and durability. It’s a touch control, push button unit that adjusts instrument panel brightness with simple on off operation. The screw terminal connector and metal contacts give reliable connections. It’s small, light, and color matched in ebony with blue lagoon accents for a clean look.
- Function:Adjusts instrument panel brightness (dimmer)
- Fitment / Compatibility:GM vehicles (GM Genuine Parts; OEM/ACDelco fit, specific GM applications)
- Direct-fit / Replacement:GM OE specification; GM-recommended replacement part
- Connector / Installation Type:Screw terminals / OEM connector style (GM OE connectivity)
- Material / Construction:Metal contacts; OEM-grade materials (GM/ACDelco)
- Warranty / Quality Assurance:Backed by General Motors; manufacturer’s warranty available via customer service
- Additional Feature:GM OEM part number
- Additional Feature:Ebony + Blue Lagoon color
- Additional Feature:Backed by GM warranty
Factors to Consider When Choosing Instrument Panel Dimmer Switches
When you pick an instrument panel dimmer switch, you want one that matches your vehicle compatibility and fits the original mounting and connector layout. Consider build material quality and electrical specifications so the switch lasts and works safely with your wiring and lights. Also consider installation ease, since a straightforward swap saves time and reduces frustration.
Vehicle Compatibility
For a replacement dimmer switch to work without headaches, pick one that explicitly names your vehicle’s make, model, and year range so the electrical pinout and mounting line up correctly. You’ll want to confirm the connector type and number of terminals match your wiring, such as blade versus screw terminals and 2 or 3 pins. Also check that the switch supports your lighting features, like manual dimming only or integration with automatic lights and multiplexed clusters. Match the rated voltage and amp capacity to your dash circuit so you don’t overload anything. If possible, compare the switch’s mounting style and basic dimensions to the original so panel alignment and operation feel right. These steps keep installation smooth and stress low.
Fit And Form
You already looked at vehicle compatibility, and now you’ll want to make sure the new dimmer switch will actually fit and feel right in your dashboard. First confirm physical dimensions, mounting style like panel clip, screw, or push-fit, and actuator type such as knob, push-button, or rocker so it snaps into the opening cleanly. Also verify connector type and terminal style, whether plug-in lead, blade, or screw, so you won’t need splices or adapters. Pay attention to orientation, bezel shape, and number of positions so the control lines up and won’t block nearby controls. Check rated current, voltage, and contact configuration to match original function. Finally confirm housing compatibility with dash heat, humidity, and vibration to avoid premature failure.
Build Material Quality
Confidence in a dimmer switch comes from the parts you can’t see, and the materials they use tell you how long the switch will last. You want housings made from high temperature, wear resistant plastics like PA66 or glass filled nylons so the unit resists melting, warping, and abrasion under the dash. At the same time metal contacts and conductors should be silver or copper alloys with corrosion resistant plating to keep conductivity high and heat low during long use.
Look for reinforced actuator materials and metal shafts with smooth detents so buttons and knobs stay solid through thousands of cycles. Check insulation and connector materials rated for about minus ten to plus one hundred Celsius to handle oil humidity and temperature swings. Solid housing stiffness and strain relief protect solder joints from vibration and intermittent faults.
Electrical Specifications
After checking the build materials that keep a dimmer switch from melting or rattling apart, electrical specs tell you how the switch will actually perform in your car. You should match the rated operating voltage to your vehicle, usually 12 V, so the switch works reliably and doesn’t fail prematurely. Next, check the continuous current or amp rating. Pick a switch with amps higher than your instrument cluster draw so it won’t overheat. Then look at circuit type and contact configuration to make sure features like multi-way control or auto-dimming work with your wiring. Also focus on contact materials and conductor quality because plated, low-resistance contacts keep lights steady. Finally, review temperature and ingress ratings since heat, moisture, and vibration affect real world performance.
Installation Ease
As soon as you want a fast, hassle-free install, pick a dimmer switch that fits like the original and plugs right in. You’ll save time if the connector type and pin count match your vehicle, so you won’t splice or rewire. Aim for OE style mounting and retaining clips so the switch drops into the factory opening without drywalling or bezel work. Also choose units labeled direct-fit or tool-free and with clear wiring diagrams or labeled terminals to cut errors. Check electrical ratings like 12 V and at least the OEM amp rating so you don’t need extra relays or fuses. Finally, confirm whether the part needs programming or BCM relearn steps since that can add a dealer visit or a simple service task.
Warranty And Support
Whenever you’re choosing a dimmer switch, look closely at warranty and support so you won’t get stuck in case something goes wrong. You want to know how long repairs or replacements are covered, whether it’s 90 days, a year, or a lifetime. Also check for mileage or usage limits because some warranties exclude high-mileage or commercial use. Next, see what the warranty actually covers: parts only, parts and labor, or incidental damage from a failing switch. Then confirm claim procedures and response time, including required documents, who pays return shipping, and typical resolution speed. Finally, make sure support is easy to reach via phone, email, or dealer network and that the warranty is backed through the manufacturer for reliable fulfillment.
OEM Versus Aftermarket
As you’re deciding between OEM and aftermarket dimmer switches, start considering fit and function so you don’t end up with a switch that looks right but acts wrong. You want a plug-and-play swap, so OEM parts usually win on exact fit, connector type, and electrical ratings. They also come with stronger warranties and tested durability, so you’ll feel safer installing them. Aftermarket parts can save money and add styles like different actuators or colors, but quality varies a lot. Check voltage, current, mounting dimensions, connector and terminal style before you buy. Also match circuit type and contact type so dimming works without flicker. Should you be unsure, compare specs side‑by‑side and choose the part that matches your car’s needs.
Environmental Durability
Whenever you select an instrument panel dimmer switch, consider about the real world where your car lives and how the switch must endure day after day. You want a switch rated for the temperature swings you face, say −20°C to 100°C, so plastics won’t crack and contacts won’t fail. Also check IP or dust and moisture resistance like IP44 or higher whenever your cabin sees condensation, splash, or dust. Prefer flame retardant, UV stable plastics and corrosion resistant plated copper alloy contacts to keep parts working and bright. Match current and voltage ratings to your 12 V system and pick a 3 to 5 A or stronger continuous rating. Finally, verify thermal cycling, salt spray, and vibration testing for real world peace of mind.
