A dead car battery can really throw a wrench in your day. It’s a surprisingly common issue, and you might be shocked to discover that battery problems are responsible for over half of all car breakdowns. This guide will teach you how to safely jumpstart a car. You’ll get clear, step-by-step instructions on how to jumpstart a car using jumper cables and another working vehicle. Safety is paramount when you jumpstart a car. This guide will empower you to jumpstart a car with confidence and get back on the road.
Key Takeaways
Always use good jumper cables. They need thick wires and strong clamps for safety.
Connect the red cable to positive terminals first. Then, connect the black cable to the working car’s negative terminal and the dead car’s engine block.
Let the working car run for 5-10 minutes. This charges the dead battery before you try to start it.
Remove the black cables first. Then, remove the red cables. This prevents sparks and damage.
Drive your car for at least 15-30 minutes after a jump. This helps recharge the battery fully.
Prepare for a Safe Jump Start
Before you attempt to jump a car, you must gather the right tools and take important safety steps. Proper preparation makes the process smooth and safe.
Gather Equipment
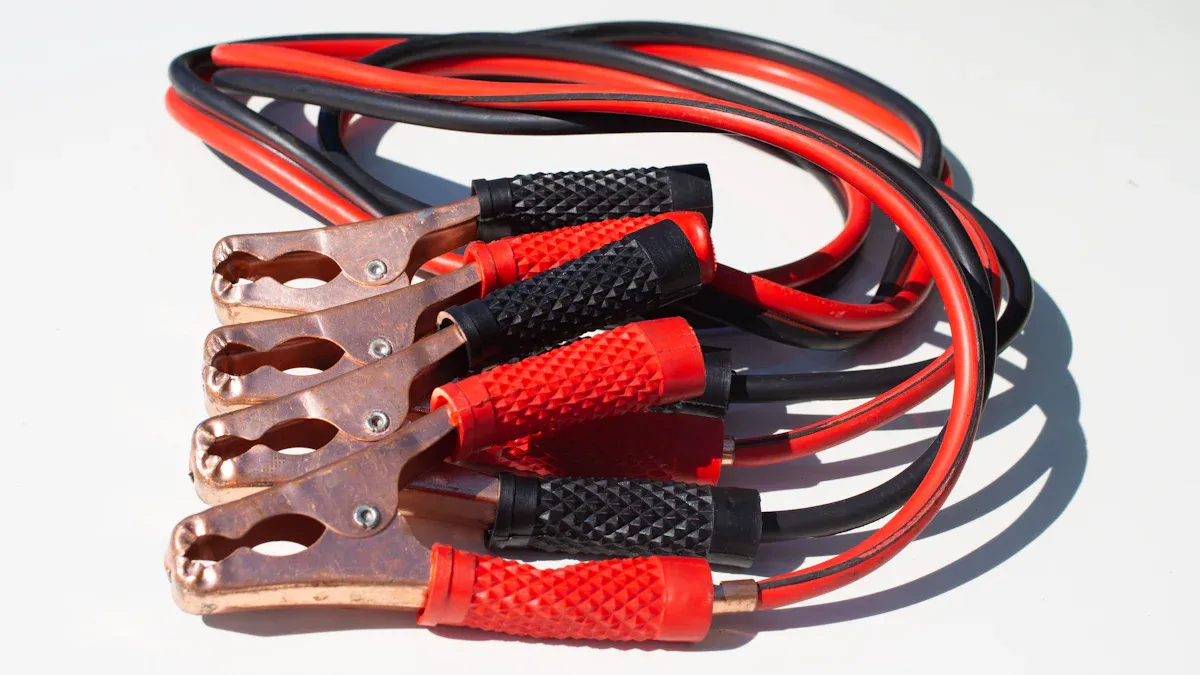
You need a good set of jumper cables. These are also known as booster cables. The quality of your jumper cables matters a lot. Look for cables with thick-gauge wire. Lower gauge numbers mean thicker wires. Thicker wires carry more current effectively. Copper wiring offers superior conductivity. Also, choose heavy-duty clamps. These clamps should have strong springs and sturdy teeth for a secure connection. Clear red (+) and black (-) markings are essential for correct connections. Cables between 16-20 feet give you enough length to position vehicles.
Here are recommended jumper cable specifications:
Vehicle Size/Type | Recommended Gauge | Amperage |
|---|---|---|
Most Vehicles | 6-gauge or 4-gauge | N/A |
Vehicles with Larger Engines | 2-gauge | N/A |
Heavy-duty Vehicles (e.g., diesel trucks) | 1-gauge | Higher end of 600-800+ amps |
Compact Cars & Smaller Vehicles | N/A | 200-400 amps |
Sedans & SUVs | N/A | 400-600 amps |
Larger Vehicles (trucks, vans, larger engines) | N/A | 600-800+ amps |
Ensure Safety
Safety is your top priority when you jump start a car. Improper jumpstarting can cause serious problems. For example, incorrect cable connections can lead to electrical surges. These surges can damage your car’s computer (ECU) and other sensitive parts. Using faulty equipment also risks electrical surges. An overvoltage from the donor vehicle can overload the electrical system. Always wear gloves and eye protection. Make sure you work in a well-lit area.
Position Vehicles
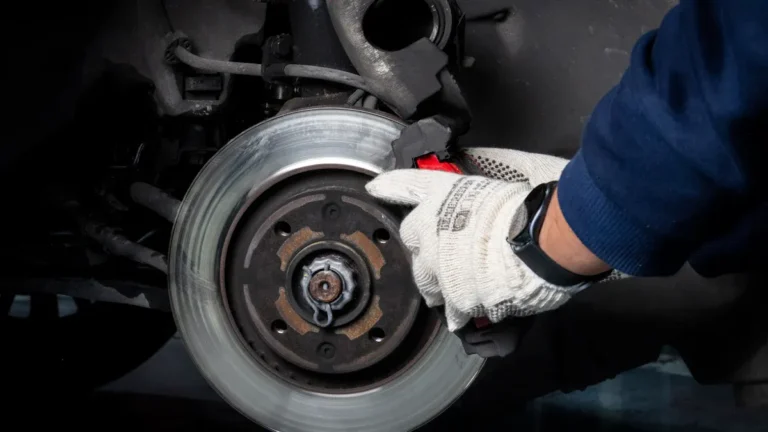
You need to position the working car and the car with the dead battery correctly. First, turn off both vehicles. Engage both parking brakes. Then, move the working car so its battery is close to the dead battery. The vehicles should be about 18 inches apart. This distance ensures they do not touch. Touching vehicles can create a short circuit. Do not let the vehicles touch. Locate both batteries. Remove any plastic covers if necessary.
Connect Jumper Cables Correctly
Connecting jumper cables correctly is the most critical step when you jump-start a car. Incorrect connections can cause serious damage or injury. Pay close attention to each step.
Identify Terminals
Before you connect any cables, you must correctly identify the positive and negative battery terminals on both vehicles. Look for clear markings on each battery.
Indicator | Positive Terminal | Negative Terminal |
|---|---|---|
Signs | Plus sign (+) stamped on the case | Minus sign (-) stamped on the case |
Colors | Red (often accompanied by a red cable) | Black (often accompanied by a black cable) |
Covers | Red protective cover (or black with a red +) | No specific cover mentioned, but cable is black |
You must avoid reversing the polarity. Connecting the battery terminals incorrectly can lead to severe problems.
One 1998 Taurus had its battery connected backward. The owner reported these complaints: “Wipers, fuel gauge, and power windows inoperative. Power steering feels stiff.” The car needed several module replacements to fix the damage. The car would still start, but it had many other problems.
Reversing polarity can damage many car components:
Powertrain control module (PCM)
Several fuses and relays
Wiring not rated for high-voltage circuits
Alternator
Sensors
The battery itself can fizz out and leak toxic acid
A fire hazard can occur due to components catching fire and creating smoke
Incorrect connections also pose other dangers:
Electrical shorts
Overheating
Fire or explosion
Battery failure (degradation of internal components, loss of capacity and cycle life)
Equipment damage (sensitive electronics like ECUs and BMS may fail or malfunction)
Chemical leakage (damaged battery cells may leak hazardous materials)
Disruption of critical operations and infrastructure, especially in medical, robotics, and security system applications.
Danger | Description | Application Impact |
|---|---|---|
Fire & Explosion | Incorrect current flow causes rapid heating, gas buildup, and potential ignition. | Threatens medical devices, industrial robots, and security systems. |
Battery Failure | Internal components degrade, leading to loss of capacity and cycle life. | Reduces reliability in consumer electronics and industrial platforms. |
Equipment Damage | Sensitive electronics, such as ECUs and BMS, may fail or malfunction. | Interrupts infrastructure and automation processes. |
Chemical Leakage | Damaged battery cells may leak hazardous materials. | Risks environmental contamination and health hazards. |
Overcharging, Swelling, Rupture | Caused by incompatible chargers or reverse connection, leading to power loss and reduced lifespan. | Endangers users, valuable equipment, and infrastructure. |
Gradual Discharge and Damage | Chemical processes are disrupted, causing gradual discharge and potential damage to battery components. | Affects battery function and longevity. |
Malfunction or Damage to Devices | Loads may malfunction or be damaged; sensitive electronics like ECUs and alternators can be harmed. | Leads to incorrect operation of connected devices. |
Sparks | Risk of sparks due to incorrect current flow. | Immediate safety concern. |
Connect Red Cable
You will use the red jumper cables for the positive connections. Follow these steps carefully:
First, connect one red clamp to the positive (+) terminal of the dead battery. Ensure the connection is firm and secure.
Next, connect the other red clamp to the positive (+) terminal of the working battery. Make sure this connection is also tight.
Connecting the red cable to the wrong terminal can cause serious problems. These include:
Causing a dead short (an electrical circuit with high amperage and low resistance).
Generating sparks.
Melting the jumper cables.
Potentially damaging the batteries of both vehicles.
Potentially damaging the electronic systems of both vehicles.
Connect Black Cable
The black jumper cables are for the negative connections and grounding. This step is crucial for safety.
Then, connect one black clamp to the negative (-) terminal of the working battery.
Finally, connect the other black clamp to an unpainted metal surface on the engine block or frame of the dead car. Keep it away from the battery and moving parts. This creates a safe ground connection.
For grounding the black cable, an unpainted metal surface on the engine block or frame of the dead vehicle is suitable. Look for these spots:
Bolts connected to the vehicle’s frame.
Studs connected to the vehicle’s frame.
Screws connected to the vehicle’s frame.
Most bare metal on the vehicle’s body.
This grounding method helps prevent sparks near the dead battery. A dead battery can release hydrogen gas. This gas is highly flammable.
Start the Vehicles
You have connected the jumper cables. Now, you need to get power flowing between the vehicles. This is the moment you begin to jump-start a car. This process requires patience.
Start Donor Car
Go to the working vehicle. Start its engine. Let the donor car run for 5 to 10 minutes. This allows the working car’s alternator to send a charge to the dead battery. This initial charge helps prepare the dead battery to accept a full jump. You are essentially giving the dead battery a head start. This step is crucial for a successful jump.
Start Dead Car
After the donor car has run for several minutes, you can try to start the dead car. Turn the ignition key in the dead car. If the engine cranks and starts, congratulations! You have successfully completed the jump. Let the jumpstarted car run for a few minutes. This helps stabilize its electrical system.
What if the car won’t jump start immediately? Do not panic. Turn off the ignition in the dead car. Wait a few more minutes. Let the donor car continue to run. This gives the dead battery more time to receive a charge. Then, try to start the dead car again. Sometimes, a deeply discharged battery needs more time to receive enough charge to turn over the engine. If it still does not start after several attempts, you might have a different issue. The problem might not be just a dead battery. If your car won’t jump start, you might need professional assistance. This is a common scenario when you try to jumpstart a car. You might need to try another jump.
Disconnect Jumper Cables
You have successfully started your car. Now, you must carefully disconnect jumper cables. This step is just as important as connecting them. You need to follow a specific order to avoid sparks or damage.
Remove Black Cable First
You will remove the black cables first. This is a crucial safety step. First, locate the black clamp connected to the unpainted metal surface on the dead car. Remove this clamp. Then, go to the working car. Remove the black clamp from its negative (-) battery terminal.
When removing jumper cables after a jump-start, the first cable to remove is the chassis negative clamp from the boosted vehicle. This is part of the reverse order of disconnection, which also includes removing the negative clamp from the booster vehicle and then the positive clamps from both cars.
This order prevents accidental short circuits. It also minimizes the risk of sparks near the battery. A battery can release flammable hydrogen gas.
Remove Red Cable Last
After removing both black cables, you will remove the red cables. This is the final step to disconnect the jumper cables. Go to the working car. Remove the red clamp from its positive (+) battery terminal. Finally, remove the red clamp from the positive (+) battery terminal of the car you just helped jump.
You always remove the black cable before the red cable. Removing the red cable first can create serious risks.
Electrical shorts
Damage to the vehicle’s battery
Personal injury
The positive terminal is ‘hot,’ and electricity comes from it, making it dangerous to handle incorrectly. This is why it’s crucial to disconnect the black (negative) terminal first to avoid potential hazards. You have now completed the jump.
After Jumpstarting Your Car
You successfully jumpstarted your car. Now, you need to take a few more steps. These steps help ensure your car stays running and prevent future problems.
Recharge Battery
After a jump, you should drive your car. Run it for at least 15 to 30 minutes. This allows the alternator to recharge the battery. If your battery was completely dead, drive for 30 minutes to an hour. Driving charges the battery more effectively than letting the car idle. This helps your battery regain enough power to start your car next time.
Address Battery Issue
You need to find out why your car needed a jump. Watch for signs your battery is not holding a charge. Your car might run for only a minute after a jump and then stop. The battery may show no power even after hours of charging. You might also need to jump your car more often than usual. If you frequently need to jump your vehicle, it signals a deeper problem.
Many things can cause your battery to die repeatedly. Short trips do not give the battery enough time to recharge. An old battery loses its ability to hold a charge. Batteries older than three years often struggle. A parasitic drain means parts of your car draw power when the engine is off. Extreme temperatures also affect battery life. A faulty charging system, like a bad alternator, will not recharge the battery. Corroded terminals or bad battery cables can stop power flow. Neglecting maintenance or leaving your car unused for long periods also causes issues. Sometimes, you might just leave lights on.
Consider having your battery and charging system checked by a mechanic. A replacement car battery usually costs $100 to $250. Compact cars are cheaper. Trucks and SUVs need more expensive, higher-capacity batteries. Standard lead-acid batteries are common and affordable. AGM batteries cost more but last longer. The total cost depends on your vehicle type, battery type, brand, and installation labor.
You now have the skills to jump-start a car. This guide showed you how to jump safely. Remember preparation, correct jumper cables connection, and overall safety. Always use caution when you jump. Consult your vehicle manual for specific details. After a successful jump, get your battery and charging system checked. This prevents future incidents. You can avoid another jump with proper maintenance.