Book Appointment Now

How to take off a bike pedal

You can take off a bike pedal with the right tool and a little know-how. Always check the thread direction for each pedal. Many beginners make mistakes like starting at an angle, skipping grease, or using the wrong tool. Stay patient and your bicycle will thank you.
Key Takeaways
Use the right tool, like a pedal wrench or Allen key, for safe and easy pedal removal.
Know the thread direction: turn the right pedal counterclockwise and the left pedal clockwise to avoid damage.
Always clean and grease the threads before reinstalling pedals to prevent seizing and ensure smooth operation.
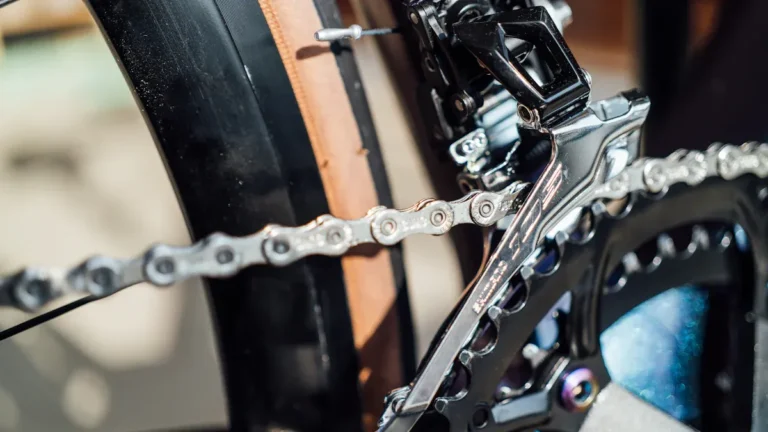
Tools to Remove Pedals

Pedal Wrench or Allen Key
You need the right tool to remove pedals without hassle. Most pedals work with either a pedal wrench or a 6mm or 8mm Allen key. A pedal wrench has a long handle and thin jaws, which gives you great leverage and a secure grip. This makes it easier and safer, especially if the pedal feels tight. An Allen key works well for modern pedals with a hex socket on the back. If you use a long-handled Allen key, you get more leverage and less strain on your hands. Avoid adjustable wrenches or pliers. These can slip and damage your pedal or crank arm.
Tip: Keep some grease or anti-seize handy for future pedal installs. It helps prevent sticking.
Preparing the Bike
Set up your bike and workspace before you start. Find a well-lit area with enough space to move around. Gather all your tools and keep them close. You can use a bike repair stand to hold your bike steady. If you don’t have one, lean your bike against a wall or turn it upside down, resting it on the seat and handlebars. Place a towel or cardboard under contact points to protect your bike’s finish. This setup keeps your bike stable and your hands safe.
Safety Before You Remove
Safety comes first. Shift your chain onto the largest chainring to protect your hands from sharp teeth. Wear gloves to improve your grip and avoid cuts. Make sure your bike stays steady while you remove the pedal. If possible, ask someone to hold the bike for extra stability. Using the right tool and technique keeps you safe and prevents damage to your bike.
How to Take Off Bike Pedals

Pedal Thread Direction
Before you start to take off your pedals, you need to know which way to turn each one. The right pedal uses a standard thread. You loosen it by turning counterclockwise. The left pedal is different. It has a reverse thread, so you loosen it by turning clockwise. This design stops the pedal from unscrewing while you ride your bike. If you turn the wrong way, you can damage the threads. Most bicycles use this system, no matter the brand or model. The left-hand thread is there because of mechanical precession. That means the pedal stays tight while you pedal.
Tip: Always double-check the direction before you try to remove a pedal. If you feel resistance, stop and check again.
Remove Right Pedal
You can take off the right pedal by following these steps:
Place your bike in a stable position. Use a repair stand or lean it against a wall.
Find the right pedal. It sits on the side with the chain.
Choose your tool. Use a pedal wrench or an Allen key. If you use an Allen key, insert it into the back of the pedal axle.
Position the crank arm at 6 o’clock for the Allen key or 9 o’clock for the pedal wrench. This gives you better leverage.
Hold the pedal steady. Push the tool down in an anti-clockwise direction. The pedal will start to loosen.
Keep turning until the pedal comes off. You may need to use a little force if it feels tight.
If you have a road bike, mountain bike, or e-bike, the steps are almost the same. Some e-bikes may have special instructions, so check your manual if you are unsure.
Remove Left Pedal
The left pedal comes off in a different way. Here’s how you do it:
Move to the left side of your bike.
Pick up your pedal wrench or Allen key.
Insert the tool into the pedal axle.
Set the crank arm at 6 o’clock for the Allen key or 9 o’clock for the pedal wrench.
Push the tool down, but this time turn it clockwise. The left pedal has a reverse thread.
Keep turning until the pedal comes off.
Note: Turning the left pedal the wrong way can strip the threads. Always remember: right pedal, counterclockwise; left pedal, clockwise.
Tips for Stuck Pedals
Sometimes pedals get stuck. Dirt, rust, or road grime can make it hard to take off a pedal. Here are some ways to loosen pedals without hurting your bike:
Use penetrating oil like PB Blaster or Liquid Wrench. Spray it on the pedal threads and wait a few minutes.
Try heat. Warm the crank arm with a hairdryer or heat gun. This can help break the bond.
Use a rubber mallet. Tap the wrench handle in the direction you need to loosen the pedal.
Add leverage. Slide a metal pipe over your wrench handle to make it longer.
Never force a stuck pedal. You could damage the crank arm. If nothing works, visit your local bike shop.
Alert: If your crank arm is carbon fiber, do not use heat. You could ruin the material.
Cleaning Pedal Threads
After you remove pedals, clean the threads on both the pedal and the crank arm. Use a rag to wipe away dirt, grease, or leftover oil. This step stops corrosion and keeps your bike running smoothly. If you see any damage, like stripped threads, you can fix it with a pedal tap or a Helicoil kit. Always check for signs of cross-threading. If you notice resistance or trouble tightening, clean up the threads before you install new pedals.
Lubricant Name | Description |
|---|---|
Park Tool Anti-Seize Compound | Protects threads, reduces friction, stops corrosion. |
Copper Grease | Good for long-term use, prevents pedals from seizing. |
Beeswax | Natural option, works if you have no other lubricant. |
Before you put pedals back on, add a layer of grease or anti-seize compound. This keeps the threads safe and makes it easier to take off pedals next time. Clean and grease the threads every time you install pedals. This simple step helps prevent seizing and cross-threading.
Tip: Use waterproof grease for extra protection. Always tighten pedals to the recommended torque, like 40 Nm for Look Keo pedals. This keeps them secure and stops thread damage.
You’ve got this! To safely remove bike pedals, just follow these steps:
Grab the right tool for your pedals.
Check the thread direction—right pedal loosens counterclockwise, left pedal clockwise.
Avoid cross-threading by starting straight.
Tip: When reinstalling, add grease and hand-tighten first. Check pedal tightness every month for smooth rides.
FAQ
How do I know which pedal is left or right?
Look for an “L” or “R” stamped on the pedal spindle. The right pedal sits on the chain side. The left pedal sits on the opposite side.
What if my pedal won’t budge?
Try some penetrating oil. Let it soak for a few minutes. Use a longer wrench for more leverage. If it still sticks, visit your local bike shop.
Tip: Don’t force a stuck pedal. You could damage your crank arm.
Can I reuse old pedals after removal?
Yes, you can reuse them. Just clean the threads and add fresh grease before reinstalling. Check for damage first to keep your ride safe.