
Your car uses a Secondary Air Injection Pump. This pump is an important part of your vehicle’s emissions system. It pushes fresh air into the exhaust. This air helps burn any unburnt fuel. It also makes your catalytic converter work efficiently. This process reduces harmful pollutants from your tailpipe. A failing pump can cause various issues. This guide will help you diagnose these problems. You can also find easy ways to fix them. Addressing SAIP problems promptly is important. It ensures environmental compliance and maintains your vehicle’s performance.
Key Takeaways
The Secondary Air Injection Pump (SAIP) helps your car reduce harmful pollution, especially when the engine is cold.
Watch for signs like the ‘Check Engine Light’ turning on, strange engine noises, or failing an emissions test to know if your SAIP has a problem.
You can often fix SAIP issues yourself by checking fuses, hoses, and electrical connections.
Ignoring a broken SAIP can cause more damage to your car and make you fail emissions tests.
Fixing SAIP problems quickly keeps your car running well and helps protect the environment.
Secondary Air Injection Pump System
What the SAIP Does
You have a Secondary Air Injection Pump (SAIP) in your car. This pump helps your engine run cleaner. It usually sits inside your vehicle’s frame rail. During a cold start, your engine computer turns on an electric pump. This pump creates positive pressure. It sends this pressurized air to a Kombi valve, also called a combination valve. A switching solenoid, controlled by the engine computer and engine vacuum, opens the Kombi valve.
Once open, the valve lets the pressurized air flow into the catalytic converter or the exhaust pipe. This happens behind the exhaust valves. An air pump, sometimes called a smog pump, supplies fresh, pressurized oxygen. It delivers this oxygen to the exhaust stream. This happens through the header or exhaust manifold, or before the catalytic converter. The spinning vanes of the air pump force air into a diverter valve. During acceleration, air goes through the diverter valve, a check valve, an air injection manifold, and then into the exhaust stream.
Why the SAIP is Important for Emissions
The SAIP is very important for clean air. Car makers first used this system in the 1960s. It helps reduce harmful emissions. These emissions include hydrocarbons (HC) and carbon monoxide (CO). These pollutants come from fuel that does not burn completely.
This often happens when your engine is cold. The SAIP system significantly reduces HC emissions by 46% to 88%. It also cuts CO emissions by 37% to 93%. This system is especially helpful for gasoline engines. It reduces high amounts of CO and unburned HC. These are produced during cold starting because of a rich fuel-air mixture.
Key Components of the SAIP System
Your Secondary Air Injection Pump system has several key parts. These parts work together. You will find an air pump, which is the main component. There are also air injection drivers. These control the pump. Other parts include air switching valves and pressure sensors. You might also have a secondary-air valve and a solenoid switching valve. If the air does not come from the intake system, there will be an air filter.
SAIP Failure Symptoms
When your Secondary Air Injection Pump system has problems, your car will show certain signs. You need to know these signs. They help you find and fix issues quickly.
Check Engine Light On
The most common sign of an SAIP problem is your Check Engine Light turning on. Your car’s computer constantly checks the SAIP system. If it finds a fault, it will light up the warning on your dashboard. This tells you something is wrong.
Common Diagnostic Trouble Codes
When your Check Engine Light comes on, your car stores a Diagnostic Trouble Code (DTC). A very common code for the secondary air injection system is P0410. This code means “Secondary Air Injection System Malfunction.” Another important code is P0411, which means “Secondary Air Injection Incorrect Flow Detected.” Many other codes can point to SAIP issues.
Air Flow / Pressure Sensor Circuit Codes:
P2431 – Air Flow / Pressure Sensor Circuit Range / Performance Bank 1
P2432 – Air Flow / Pressure Sensor Circuit Low Bank 1
P2433 – Air Flow / Pressure Sensor Circuit High Bank 1
P2436 – Air Flow / Pressure Sensor Circuit Range / Performance Bank 2
P2437 – Air Flow / Pressure Sensor Circuit Low Bank 2
P2438 – Air Flow / Pressure Sensor Circuit High Bank 2
P106B – Pressure Sensor Correlation / Evap. Pressure Sensor
Electrical Codes:
P0412 – SAIS Switching Valve ‘A’ Circuit Malfunction Bank 1
P0415 – SAIS Switching Valve ‘B’ Circuit Malfunction Bank 2
P0418 – SAIS Circuit/Relay ‘A’ Circuit Malfunction Bank 1
P0419 – SAIS Circuit/Relay ‘B’ Circuit Malfunction Bank 2
Mechanical Codes:
P2445 – Pump Stuck OFF Bank 1
Engine Performance Issues
You might notice some changes in how your engine runs. Some drivers report their engine runs a bit rough when cold. This happens during the first moments of startup. The engine might “hunt” in RPM or “stutter.” These symptoms often appear after the Check Engine Light comes on. A failing system can also cause higher emissions during cold starts and warm-up. This is because the catalytic converter takes longer to get hot enough to work well.
Unusual Engine Noises
Listen for strange sounds from your engine bay. A failing Secondary Air Injection Pump can make a loud whirring or grinding noise. This sound is often most noticeable during a cold start. It usually lasts for a minute or two.
Failed Emissions Test
A broken SAIP system will likely cause you to fail an emissions test. The system’s monitor will show a “Not Ready” or “incomplete” status. This means your car cannot pass the smog test. Testers also check your O2 sensor readings. If the O2 sensor voltage does not drop to near zero when the SAIP runs, it shows a problem.
Initial SAIP Diagnosis
You can start diagnosing your Secondary Air Injection Pump system with some basic steps. This helps you pinpoint the problem. You can often find simple issues this way.
Tools for Diagnosis
You need specific tools to diagnose your SAIP system. A hand-held vacuum pump is very useful. You use it to test vacuum-operated combination valves. This pump helps you see if the valve opens and closes correctly. It ensures the valve seat responds to inputs. It also confirms the valve closes positively. A scan tool also helps. You can use it to turn the air pump on and off. You can also command the control solenoid to cycle open and closed. However, a physical check is often more effective for many issues.
Checking OBD-II Codes
Your first step should be checking for trouble codes. You use an OBD-II scanner for this. Plug the scanner into your car’s diagnostic port. This port is usually under the dashboard. The scanner will show any stored codes. Look for codes like P0410 or P0411. These codes tell you the system has a malfunction. Write down any codes you find. They give you a starting point for your diagnosis.
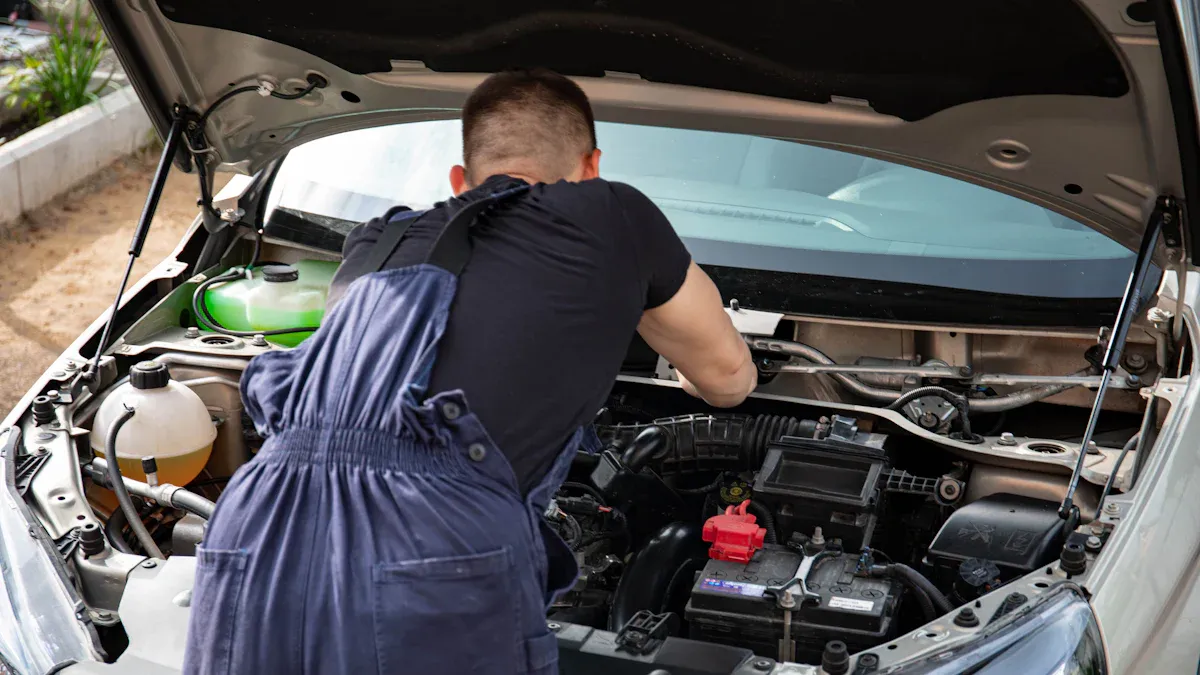
Visual Inspection of the SAIP
You should perform a thorough visual inspection. Look at the Secondary Air Injection Pump itself. Check for any obvious damage. Look for cracks in the housing. See if any wires are frayed or disconnected. Inspect the hoses connected to the pump. They should not have any tears or kinks. Also, check for signs of corrosion. Water intrusion can cause corrosion. This often affects valves.
Locating SAIP Components
You need to know where the SAIP components are. The main pump often sits inside your vehicle’s frame rail. You might find it near the front bumper or fender. Follow the hoses from the pump. They lead to the air switching valves and the combination valve. These valves are usually on or near the exhaust manifold. Knowing where these parts are helps you inspect them more closely.
Detailed Secondary Air Injection Pump Diagnosis
You have moved past the initial checks. Now, you will perform a more detailed diagnosis of your Secondary Air Injection Pump system. This helps you pinpoint the exact problem.
Testing Fuses and Relays
You need to check the electrical power supply to your Secondary Air Injection Pump. This starts with fuses and relays. You need a scan tool to properly diagnose the system. This tool lets you command the system on. This is essential for verifying the operational status of both the pump and the solenoid. While relays are located on the pump and in the fuse block, using a scan tool to activate the system is the primary way to test these components, including the relays indirectly. You can also visually inspect the fuse for the SAIP system. Look for a broken wire inside the fuse. You can also test the relay by listening for a click when the system activates or by swapping it with a known good relay.
InspectIng Hoses and Vacuum Lines
The hoses and vacuum lines carry air and vacuum signals throughout the system. You must inspect them carefully.
Cracked suction lines are a common issue. These cracks can appear anywhere, from under the intake manifold to around the valve cover. They prevent proper suction needed to open the exhaust valve.
Hoses can melt from engine heat. This creates large holes and often leads to “air flow too low” codes.
Smaller hoses, especially those running towards the back of the engine and to electric valves under the intake, become brittle. They can completely break off over time. Always look for any signs of damage, kinks, or disconnections. A small leak in a vacuum line can cause big problems.
Checking Electrical Connections
You need to check all electrical connections related to the SAIP system. Look for corrosion on the terminals. Make sure all connectors are securely plugged in. Damaged or corroded wiring can prevent the pump or valves from working correctly. Sometimes, water intrusion can lead to corroded valve connections, which can trigger a P0410 code.
Testing the SAIP Motor
You need to confirm your Secondary Air Injection Pump motor is receiving power and functioning.
First, check for power supply to the secondary air injection pump through its relay. The ECU controls this relay.
Next, verify the integrity of the relay feed circuit. A fuse or fusible link protects this circuit.
Examine the control circuit for load-sensing circuits. The ECU uses these to monitor the combination valve solenoid. Check for shorts to ground.
Look for generic diagnostic trouble codes (DTCs) like P0412 to P0419. These codes indicate issues in these circuits.
Also, identify manufacturer-specific codes. These typically point to problems in the relay driver and pump motor circuits. You can often hear the pump run during a cold start. If you do not hear it, or it sounds weak, further electrical testing is necessary.
Diagnosing the Air Switching Valve
The air switching valve directs air from the pump to the exhaust. It is a critical component.
A faulty one-way check valve is a common problem. This valve can allow condensation (water) to enter the air pump. This leads to the pump locking up, overloading the electrical circuit, pump failure, or blown fuses.
Hot engine exhaust can also cause damage. High temperatures can damage the wiring and connections within the secondary air injection system. This affects the switching valve’s operation. Inspect the valve for physical damage or corrosion. You can often test these valves with a hand vacuum pump to see if they open and close properly.
Examining the Combination Valve
The combination valve, also known as the Kombi valve, controls the flow of air into the exhaust.
If the secondary air pump operates and blows air, but the combination valve does not open or open fully, it is likely faulty. You need to replace it.
You can test the combination valve without removing it. Ensure the engine is cold. Disconnect the hose from the secondary air pump to the combination valve. Blow hard into the hose. You should feel initial resistance, then air passing into the exhaust. If air cannot pass or passes very slowly, the valve needs replacement.
Verify the functionality of the solenoid that supplies vacuum to the combination valve. Ensure the vacuum line connecting them is intact. A broken vacuum line is a common cause of issues.
If you have a scan tool, use its output diagnostic test mode. Operate the solenoid and pump. Disconnect the vacuum line from the combination valve. Attach a hand vacuum pump and apply vacuum. Listen for the valve opening and closing. Confirm it holds vacuum until released. With the valve closed (no vacuum), you should feel resistance when blowing through the hose from the secondary air pump. With the valve open (vacuum applied), there should be no resistance. For Toyota vehicles, you might use Techstream, a DLC breakout box, and a multi-meter for advanced diagnosis, especially when dealing with corroded valves that often trigger a P0410 code due to water intrusion.
Easy SAIP Fixes
You can fix many common Secondary Air Injection Pump (SAIP) problems yourself. These fixes can save you money and get your car running right again.
Replacing Fuses or Relays
Your SAIP system relies on working fuses and relays. You should always check these first.
You might find a blown fuse for pump bank 1. You replace the fuse, and it immediately blows again upon cold start-up. This tells you something else is wrong.
If a fuse blows right away, you need to look deeper.
Replace any blown fuses connected to the SAIP system.
Watch if the fuses blow again after you replace them.
If fuses keep blowing, you need to check the air injector pump itself for a problem. It might be faulty.
Repairing Damaged Hoses
Hoses are vital for carrying air in the SAIP system. They can get old, crack, or melt.
Look for cracks in the suction lines. These can be anywhere, even under the intake manifold.
Check for melted hoses. Engine heat can cause large holes. These holes often lead to “air flow too low” codes.
Inspect smaller hoses. They can become brittle and break off.
You can often repair small cracks with electrical tape for a temporary fix. For larger damage, you must replace the hose. Make sure the new hose fits tightly.
Cleaning Electrical Contacts
Corroded electrical contacts can stop your SAIP system from working. You need to clean them. The contacts on the plug connected to the air injection pump often need cleaning.
Mechanical Cleaning: Use a brass or steel brush to scrub away rust. For sensitive contacts, use a nylon brush. Be careful not to cause damage.
Chemical Cleaning: You can use mild acids like vinegar. Other cleaners, like baking soda for battery terminals, also work. Always rinse off cleaning materials completely. Strong cleaners can harm other metal parts.
Addressing a Stuck Valve
A stuck air switching valve or combination valve causes many SAIP issues.
Common Causes of a Stuck Air Switching Valve (P2443 Code):
The SAI system control valve is faulty.
A vacuum hose is clogged or disconnected.
The air pump is damaged.
There are wiring problems.
The PCM (Powertrain Control Module) has failed or needs a software update.
How to Address a Stuck Air Switching Valve (P2443 Code):
Professional help is often best. These repairs can be complex. They can also lead to more problems if you do them wrong.
If you have experience, use vehicle-specific repair guides. Chilton or ALLDATA subscriptions offer good information before you try repairs.
One car owner spent $2200 to fix a stuck air injection system switching valve. They wished they knew about a bypass system as another choice before paying for the repair.
SAIP Bypass Kit Option
You might consider an SAIP bypass kit. This kit offers an alternative to replacing the entire air injector. However, you must understand the rules.
Modifying an emission system, like with an air injection pump (AIP) bypass kit, is usually not legal in states that require smog checks. In states without these rules, it might not be a big problem. Moving the intake for AIPs often does not change how the system works. A bypass kit, however, does change its function. States like California are very strict. Any change, even if it does not affect how the system works, could make you fail a visual inspection. The text does not discuss how such a kit affects performance.
When to Seek Professional Help
You can fix many SAIP issues yourself. However, some problems need a professional mechanic. Knowing when to seek expert help saves you time and prevents further damage.
Complex Electrical Problems
You might face complex electrical problems with your Secondary Air Injection Pump system. These issues often need a professional. They have specific expertise. They can diagnose problems like:
Short circuits or open circuits in control wiring.
Oxidized or heat-damaged connectors.
Failed air pump relays.
Defective engine control units (though this is rare).
Electrical ground issues affecting operation. Professionals use advanced OBD2 diagnostic tools. They perform resistance and continuity tests. They also adapt the system after replacing components. These tasks are usually beyond typical DIY repairs.
Internal Pump Failure
Sometimes, the pump itself fails internally. You cannot fix these issues yourself. Look for these signs:
A multimeter reading is too high or shows infinite resistance. This means a broken coil winding or internal wiring fault. You need a replacement.
Electrical resistance is out of specification. You cannot repair this.
Persistent grinding noises continue. You cannot fix them by repairing gears or the motor.
The pump fails to start. This happens even when you connect it directly to battery power.
Internal impeller damage or a clogged air valve exists. You cannot clean this.
Check engine codes persist despite all your troubleshooting efforts.
Hard-to-Access Components
Some parts of the system are hard to reach. For example, replacing both Air Switching Valves can be difficult. You might need to remove the intake manifold. This depends on your engine size. Such jobs are often best left to mechanics. They have the right tools and experience.
Persistent Issues After DIY
You might try to fix the problem yourself. You follow all the steps. But the issues still remain. The Check Engine Light stays on. Your car still shows symptoms. This is a clear sign. You should seek professional help. They can find the root cause. They will ensure your vehicle runs correctly.
Driving with a Failing SAIP
You might wonder if you can drive your car with a broken Secondary Air Injection Pump (SAIP). While your car may still run, ignoring this problem has serious consequences. You face environmental harm, risk further damage to your vehicle, and will fail emissions tests.
Environmental Impact
When your secondary air system does not work properly, you release more harmful pollutants. Emissions increase during cold starts and warm-up times. Without this pump, more toxic gases escape into the environment. Unburned fuel is more toxic than gases from burned fuel. You should not release it outside. This system helps reduce air pollution and prevents an emissions test failure. The California Environmental Protection Act relates to the development of this system. This highlights its important environmental purpose.
Risk of Further Damage
Ignoring a failing SAIP can lead to more expensive repairs. You put other parts of your car at risk.
Pressure Sensor: This component often gets damaged. Extreme exhaust exposure occurs when the secondary air injection pump system fails.
Wiring: Damage to the wiring can happen. Rodents sometimes cause this external damage.
Vehicle Computer: If you ignore a damaged pressure sensor for a long time, your vehicle’s computer can sustain damage.
Emissions Test Failure
A malfunctioning SAIP system will almost certainly cause you to fail an emissions test. Your car’s diagnostic system will show a “Not Ready” or “incomplete” status for the SAIP monitor. This means your vehicle cannot pass the required smog check. You must fix the SAIP issue to meet environmental standards.
Your secondary air injection pump (SAIP) is vital. It reduces harmful pollutants like carbon monoxide and unburned hydrocarbons, especially during cold starts. This system also warms your catalytic converter faster. Watch for signs like the pump not starting, a charred smell, melted electrical contacts, or a P0410 code.
You can diagnose issues by checking fuses, hoses, and electrical connections. Many fixes are simple. Replacing an SAIP can be a DIY task for beginners. Parts typically cost $150 to $400. Always address SAIP problems promptly. This keeps your vehicle clean and efficient. For complex issues, seek professional help.
FAQ
What happens if you drive with a bad SAIP?
You release more harmful pollutants into the air. Your car also risks further damage to other components. You will fail your emissions test. Address the problem quickly to protect the environment and your vehicle.
Can you just remove the SAIP system?
Removing the SAIP system is usually illegal in states with smog checks. It modifies an emission control system. You might fail a visual inspection. A bypass kit changes the system’s function. This is not allowed in strict states.
How much does it cost to fix an SAIP?
Replacing the SAIP parts typically costs $150 to $400. This is for the parts alone. Labor costs will add to this price. Complex repairs, like replacing valves, can cost more. You can save money by doing simple fixes yourself.
How often should you check your SAIP?
You should check your SAIP system if your Check Engine Light comes on. Also, listen for unusual noises during cold starts. Regular vehicle maintenance often includes a visual inspection of hoses and connections. This helps catch problems early.


