Properly adjusted bike brakes are crucial for your safety and overall cycling performance. I know well-maintained brakes give me confidence and control on every ride. Learning to adjust bike brakes is a fundamental skill every cyclist can master. This skill saves money and ensures a safer journey. I will show you how to tighten bike brakes and achieve optimal brake function with clear, actionable steps.
Importance of Brake Adjustment
Rider Safety and Control
I know rider safety is paramount. Properly adjusted bicycle brakes are your first line of defense on the road. They provide reliable stopping power. This directly reduces the risk of cycling accidents. Regular brake adjustments prevent accidents. They enhance my riding experience. I find early detection of brake issues reduces accident risk. It also ensures a smooth cycling experience. Faulty brakes increase stopping distance. This raises the risk of collisions and loss of control. Well-maintained brakes allow for smooth and confident stopping. This is crucial for my safety.
Enhanced Riding Performance
Well-adjusted brakes do more than just keep you safe. They significantly improve your riding performance. I experience better control over my bike. My responsiveness to changing road conditions increases. When my brakes are sharp, I can navigate turns with more confidence. I can also manage descents more effectively. This precision allows me to ride faster and more efficiently. It makes my overall cycling experience much more enjoyable.
Component Longevity
Regular brake adjustment also extends the lifespan of your bike’s components. When brakes are out of alignment, they can cause uneven wear on brake pads and rotors or rims. This leads to premature replacement. I find that keeping my brakes properly adjusted prevents this. It saves me money in the long run. It also ensures my bike parts last as long as they should. This means less time in the shop and more time on the road.
Tools for Brake Adjustment
To effectively adjust your bike brakes, you need the right tools. I find having these items ready makes the job much smoother. You do not need a huge collection of specialized equipment for most adjustments.
Essential Hand Tools
For basic bike brake adjustments, I primarily use a set of Allen wrenches. These are often called hex keys. They come in various sizes. I find these tools are sufficient for many common braking systems. You do not need specialized or “fancy tools” for these tasks. I also keep a good cable cutter handy. This is especially useful when I replace old brake cables. A third-hand tool can also be helpful for rim brakes. It holds the pads against the rim while I adjust the cable tension.
Specialized Bike Tools
Sometimes, I need more specialized tools for advanced adjustments. For example, truing brake rotors requires precision. I use a Park Tool DT-2C Rotor Truing Fork for this. It helps me straighten bent rotors. When I work on hydraulic brakes, I sometimes need to press the pistons back. I use a Park Tool PP-1.2 Hydraulic Piston Press for this. This tool is designed specifically for pressing hydraulic brake pistons. It helps spread the brake pads. This is crucial for advanced maintenance tasks. It ensures the brake caliper functions correctly.
Cleaning Supplies
Clean brakes perform better. I always have some cleaning supplies ready. Isopropyl alcohol is excellent for cleaning brake surfaces. It removes dirt and grease without leaving residue. I also use clean rags. These help me wipe down components. They ensure everything is spotless before and after adjustments.
Bike Brake System Basics
Before I adjust my brakes, I find it helpful to understand the basic types and parts. Knowing these helps me troubleshoot issues more effectively. I see two main categories of bike brakes: rim brakes and disc brakes.
Rim Brake Types
Rim brakes work by squeezing pads against the wheel’s rim. I commonly encounter two main types: cantilever brakes and V-brakes. Cantilever brakes were popular on older mountain bikes. They allowed for wider tires. I know V-brakes are a type of direct-pull cantilever. They have longer arms. This gives them more stopping power. However, I have noticed V-brakes often have thinner pads. These pads wear out faster than cantilever pads. For example, V-brake pads might last only a few hundred miles on a touring bike. Cantilever pads can last thousands of miles. I also find V-brakes can sometimes squeal loudly. This happens especially on heavier bikes. Cantilever brakes offer more flexibility. I can adjust their mechanical advantage by changing the transverse cable length. V-brakes have a fixed mechanical advantage.
Disc Brake Types
Disc brakes use a rotor attached to the wheel hub. Pads squeeze this rotor to stop the bike. I work with two main types: mechanical disc brakes and hydraulic disc brakes.
Feature | Hydraulic Disc Brakes | Mechanical Disc Brakes |
|---|---|---|
Braking Power | Superior, more consistent, and powerful. | Good, but generally less powerful. |
Modulation/Feel | Excellent, offering precise control. | Decent, but lacks fine control. |
Maintenance | Requires occasional fluid bleeding. | Easier; cable replacement is straightforward. |
Cost | Higher initial cost. | Lower initial cost. |
I find hydraulic disc brakes offer superior braking power. They give me more consistent stopping. Their modulation is excellent. This means I can control my braking force very precisely. Mechanical disc brakes use a cable, just like rim brakes. They are simpler to maintain. I can easily replace their cables. However, they generally offer less power and feel compared to hydraulic systems.
Key Brake Components
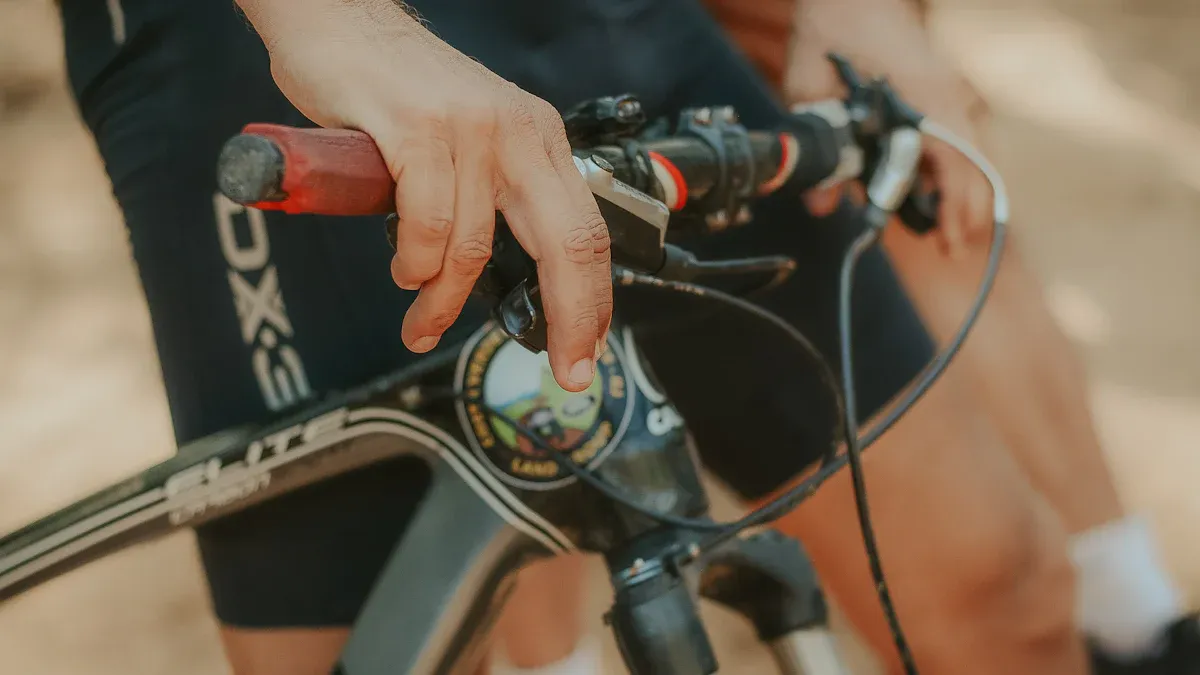
Every brake system has several key parts. I always check these when I work on my brakes. First, I have the brake levers on my handlebars. These are what I squeeze. Then, there are the cables or hydraulic hoses. These transmit my force to the brake caliper. The brake caliper holds the brake pads. These pads press against either the rim or the rotor. The rim or rotor is the surface that actually stops the wheel.
How to Tighten Bike Brakes: Rim Brakes
I find adjusting rim brakes a straightforward process. It requires attention to detail. This section will guide you through each step. You will learn how to tighten bike brakes effectively.
Initial Inspection and Cleaning
Before I start any adjustments, I always perform an initial inspection. I check the brake pads for wear. I look for any debris embedded in them. I also inspect the rim’s braking surface. It should be clean and free of grease or dirt. I use isopropyl alcohol and a clean rag to wipe down the pads and rims. This ensures maximum stopping power. A clean system responds better to adjustments.
Barrel Adjuster Cable Tension
The barrel adjuster is my go-to for minor cable tension tweaks. I locate this adjuster. It sits approximately 7 inches above the brake levers. I use it to fine-tune the brake cable tension. I can either tighten or loosen this barrel adjuster. Turning it clockwise loosens the cable. This moves the pads further from the rim. Turning it counter-clockwise tightens the cable. This brings the pads closer. I make small adjustments. Then I test the lever feel.
Caliper Cable Tension Adjustment
Sometimes, the barrel adjuster is not enough. I need to make a more significant adjustment to the cable tension. This involves working directly at the brake caliper.
I use an Allen key to turn the bolt anticlockwise. I am careful not to remove it completely. This action frees the cable for adjustment.
The caliper should move away from the wheel once the bolt is loose. I pull the cable outwards to tighten the brake. I allow the cable to retract inwards to loosen it. For V-brakes, I ensure the pads are a few millimeters from the rim.
I screw the caliper bolt back up securely. I do this after achieving the desired pad position and cable tension.
I use the barrel adjuster for final tweaks to the brake tension if further adjustments are needed. This helps me get the perfect lever feel.
Brake Pad Alignment
Proper brake pad alignment is crucial for efficient braking. It also prevents rim wear.
For threaded stud pads, I use different width spacers. These position the brake arm relative to the rim. I inspect the bike for wider and narrower spacers. I understand their orientation. I can move these spacers inboard or swap them outboard. This achieves the ideal caliper arm angle. The angle should be close to vertical when the pad strikes the rim. When I install new pads, I pay close attention to the spacer orientation. I remember how they were removed. For cartridge-style pads, I ensure the curve of the pad matches the rim’s curve. I also check that any retention clips are properly installed. Smooth stud brakes may have convex and concave washer systems. These permit pad alignment. I must reinstall these correctly.
Here are the steps I follow:
I loosen the brake pad mounting bolt.
I align the pad so it is parallel to the rim. It should strike its center.
I ensure the pad clears the tire. It should not be too close to the rim’s edge.
I tighten the bolt once the alignment is correct.
Caliper Centering
A centered brake caliper ensures even pad wear. It also provides consistent braking. I follow these steps to center my rim brake caliper:
I identify the bridge. It connects both arm pivots and the mounting nut.
I place an adjustable wrench on the brake bridge.
I place another wrench on the back mounting nut.
I simultaneously move both wrenches in the same direction. I move them by the same amount.
I adjust until both brake pads contact the rim’s braking surface at the same time. This ensures even pressure.
Adjusting Disc Brakes
I find adjusting disc brakes requires a slightly different approach than rim brakes. This section will guide you through the steps for both mechanical and hydraulic systems.
Initial Inspection and Cleaning
I always begin with a thorough inspection and cleaning for my disc brakes. I check the brake pads for wear and look for any contamination on the rotor. Dirt, oil, or grease on the rotor can severely reduce braking performance and cause annoying squealing. I use isopropyl alcohol and a clean rag to clean the rotor and pads. This step ensures optimal performance and helps me identify any underlying issues before I start adjusting.
Mechanical Disc Brake Cable Tension
Adjusting the cable tension on mechanical disc brakes is similar to rim brakes, but with specific considerations for the caliper and rotor. I find this process crucial for responsive braking.
Here is how I adjust the cable tension:
I position the caliper. With the brake arm at rest, I move the caliper so the moving pad (outer) is as close to the caliper as possible without rubbing. Then, I re-tighten the caliper mounting bolts alternately until secure. I spin the wheel to check for any rotor rubbing.
I set the stationary pad. I adjust the inner stationary pad using the nut on the back of the rotor. I turn it clockwise to move it closer and counter-clockwise to move it away. I aim for the stationary pad gap to be about twice as wide as the moving pad gap (a 2:1 ratio).
I test and fine-tune. I squeeze the brake lever. The brake should fully engage before the lever reaches the handlebar. If the lever pulls too far or feels soft, I move the stationary pad closer. To move the moving pad closer, I turn the barrel adjuster counter-clockwise to increase cable tension. In extreme cases, I loosen the cable pinch bolt and pull more cable through. However, this may cause slight engagement at rest, and manufacturers do not always recommend it. This helps me effectively tighten bike brakes.
Mechanical Caliper Alignment
Proper alignment of the mechanical brake caliper is essential to prevent rotor rub and ensure even pad wear. I follow a precise method to get this right.
First, I ensure the wheel is fully seated in the dropouts. This properly positions the rotor within the caliper. I inspect the rotor for excessive lateral movement. If I see any, it may need truing or replacement. I turn barrel adjusters fully clockwise at both the lever and caliper (if applicable). I loosen the cable pinch bolt to ensure the lever arm is relaxed and in its full travel position. I pull the cable tight to remove slack, then I tighten the cable pinch bolt, being careful not to move the lever arm.
Different caliper designs require slightly different approaches for alignment:
Caliper Design | Initial Steps |
|---|---|
Single Lever Arm with Inner and Outer Pad Adjusters | 1. I loosen caliper mounting bolts. 2. I squeeze the brake lever firmly and hold it. 3. I tighten caliper mounting bolts. 4. I release the brake lever. 5. I check for rotor rub. 6. I adjust inner and outer pads using their respective adjusters until pads are close to the rotor without rubbing. |
Single Lever Arm with Inner Pad Adjuster Only | 1. I loosen caliper mounting bolts. 2. I adjust the inner pad using its adjuster until it is close to the rotor without rubbing. 3. I squeeze the brake lever firmly and hold it. 4. I tighten caliper mounting bolts. 5. I release the brake lever. 6. I check for rotor rub. If it rubs, I loosen mounting bolts slightly, shift the caliper, and re-tighten. |
Dual Lever Arm (Both Pads Move) | 1. I loosen caliper mounting bolts. 2. I squeeze the brake lever firmly and hold it. 3. I tighten caliper mounting bolts. 4. I release the brake lever. 5. I check for rotor rub. If it rubs, I loosen mounting bolts slightly, shift the caliper, and re-tighten. |
Post-Mount Caliper with Adapters | 1. I ensure correct adapters are used for rotor size and frame/fork type. 2. I follow the appropriate alignment steps for the caliper design as described above. 3. Adapters should be securely mounted and not interfere with caliper movement. |
Flat-Mount Caliper | 1. I ensure correct bolts and washers are used for frame/fork type. 2. I follow the appropriate alignment steps for the caliper design as described above. 3. Flat-mount calipers often have less lateral adjustment range, so precise initial positioning is crucial. |
Integrated Caliper Adjustments (e.g., some TRP Spyre/Spyke) | 1. These calipers often have independent pad adjustments. 2. I adjust each pad individually until they are close to the rotor without rubbing. 3. Then, if necessary, I loosen caliper mounting bolts, squeeze the brake lever, and re-tighten to center the caliper over the rotor. |
Cable Tension Adjustment | 1. After aligning the caliper, I fine-tune cable tension using barrel adjusters. 2. I turn barrel adjusters counter-clockwise to increase tension and bring pads closer to the rotor. 3. I ensure the lever has a firm feel and the pads engage the rotor effectively without excessive lever travel. |
Pad Contact Point Adjustment (if available on lever) | 1. Some brake levers have a reach adjustment and/or a contact point adjustment. 2. I adjust reach to suit my hand size. 3. I adjust the contact point to determine where in the lever’s travel the pads begin to engage the rotor. |
Rotor Truing | 1. If the rotor is bent or warped, it will cause inconsistent braking and rub. 2. I use a rotor truing fork to carefully bend the rotor back into alignment. 3. I spin the wheel and observe the rotor’s path through the caliper, making small adjustments as needed. |
Pad Wear Inspection | 1. I regularly check brake pads for wear. 2. Worn pads can lead to poor braking performance and damage to the rotor. 3. I replace pads when they reach their wear limit, typically indicated by a groove or minimum thickness mark. |
Contaminated Pads/Rotor | 1. Contamination (oil, grease) on pads or rotor can cause squealing and reduced braking power. 2. I clean the rotor with isopropyl alcohol. 3. I replace contaminated pads as cleaning them is often ineffective. |
Bedding-in New Pads/Rotors | 1. New pads and rotors need to be bedded-in for optimal performance. 2. I perform several moderate to hard stops from speed, without locking up the wheel, to transfer pad material to the rotor. 3. I avoid sudden, hard braking or prolonged dragging of the brakes during this process. |
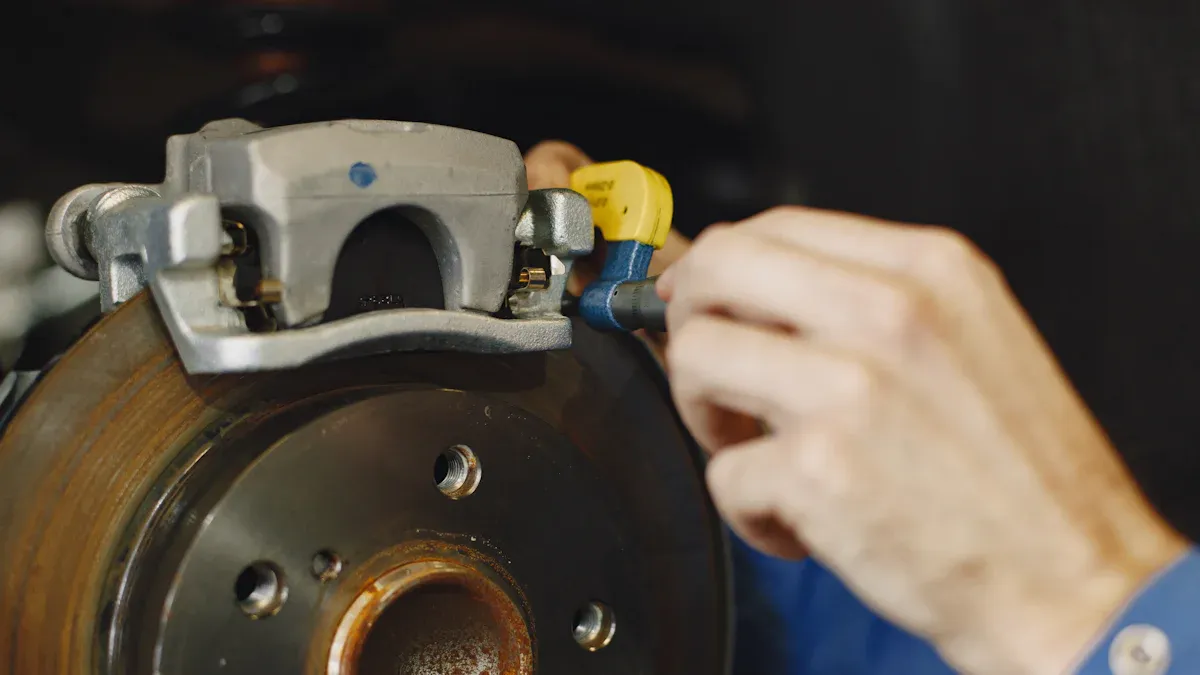
Hydraulic Caliper Alignment
Aligning hydraulic disc brake calipers is often simpler than mechanical ones. I focus on centering the brake caliper over the rotor.
I loosen the two bolts that secure the brake caliper to the frame or fork. I loosen them just enough so the caliper can move freely.
I firmly squeeze the brake lever. I hold it down. This action automatically centers the caliper over the rotor as the pads engage.
While still holding the lever, I re-tighten the caliper mounting bolts. I tighten them alternately and securely.
I release the brake lever. I spin the wheel to check for any rubbing. If I hear rubbing, I repeat the process. Sometimes, I need to slightly nudge the caliper by hand if it does not center perfectly.
When to Consider Bleeding Hydraulic Brakes
Bleeding hydraulic brakes involves removing air bubbles from the system and replacing old fluid. It is not a regular adjustment, but a maintenance task. I consider bleeding my hydraulic brakes when I notice specific symptoms.
I know it is time to bleed my brakes if I experience:
A spongy lever feel. This indicates air in the hydraulic lines.
The lever pulls to the handlebar before full braking engagement.
Inconsistent brake feel between applications.
A gradual loss of braking power during extended use.
Visible air bubbles in the brake fluid reservoir.
A spongy brake system.
An unresponsive brake system.
These signs tell me air has entered the system or the fluid has degraded. Bleeding restores the firm lever feel and consistent stopping power.
Testing Your Brake Adjustment
After I adjust my bike’s brakes, testing them is a critical step. This ensures my safety and confirms the adjustments work correctly. I always perform a series of checks to make sure everything is perfect before I ride.
Lever Feel Check
I start by checking the brake lever feel. I squeeze each brake lever firmly. I look for a consistent, firm feel. The lever should not feel spongy or pull all the way to the handlebar. It should engage the brake pads well before reaching the grip. This tells me the cable tension is correct for mechanical brakes. For hydraulic brakes, a firm lever indicates no air in the system. I want a responsive feel. This gives me confidence in my stopping power.
Roll Test for Rubbing
Next, I perform a roll test. This confirms the brakes are not dragging. I roll my bike forward slowly in a safe, open area. I gently apply the service brake. I observe for any issues. I check if the bike pulls to one side. I also look for any brake lag or delayed response. Unusual sounds like grinding or squealing can point to problems. These signs often mean uneven brake adjustment. After I tighten bike brakes, it is important to ensure the wheels roll freely. No brakes should drag. This confirms proper adjustment. It also shows the absence of any rub.
Emergency Stop Test
Finally, I conduct an emergency stop test. I do this in a safe, open space away from traffic. I ride at a moderate speed. Then, I apply both brakes firmly and quickly. I want to feel strong, controlled stopping power. The bike should stop smoothly and in a straight line. This test confirms the brakes can handle sudden stops. It gives me peace of mind for my rides.
Common Brake Issues and Troubleshooting
Even with proper adjustment, I sometimes encounter brake problems. Knowing how to troubleshoot these issues helps me keep riding safely.
Squealing Brakes Solutions
Squealing brakes can be annoying. I find several things cause this noise. Often, brake pad contamination is the culprit. Oil or dirt on the pads makes them squeal. I clean my brake components regularly to prevent this. Misaligned brake calipers also cause vibrations and noise. I make sure my calipers are positioned correctly. Sometimes, glazed brake pads are the problem. Excessive heat hardens the pads. I replace or sand down these pads. Wet conditions can cause temporary noise. Metallic pads are durable but can be noisy. Organic pads are quieter but wear faster. Ceramic pads offer a good balance.
Spongy Brake Levers Fixes
A spongy brake lever feels soft. It pulls too far before engaging. This often happens if my brake pads are too far from the rim. Shimano suggests a 3mm to 4mm total clearance. I increase cable tension using the barrel adjuster or by adjusting the cable anchor screw. Cable housing issues also cause sponginess. Poor quality or frayed housing can compress. I ensure my housing is good quality and cut straight. Worn brake pads also make the lever feel spongy. I replace them when they wear down.
Brakes Rubbing Remedies
Brakes rubbing on the wheel or rotor create unwanted friction. This slows me down.
Bent disc brake rotors often cause rubbing. Rotors can bend from crashes or heat. I use a truing tool to straighten them. If a rotor is very bent, I replace it.
Advanced brake pistons can also cause rubbing. This happens if I squeeze the lever with the wheel removed. I push the pistons back into the caliper. I use a piston press or a tire lever.
A misaligned brake caliper is another common cause. I loosen the caliper mounting bolts. Then I squeeze the brake lever to center the pads. I retighten the bolts while holding the lever.
When to Replace Brake Pads
I know when to replace my brake pads by several signs. I notice longer brake lever travel. My braking power also feels less effective. I hear more noise, especially metal-on-metal sounds. This means severe wear. If my pads absorb cleaners or grease, they are contaminated. I replace them immediately. For disc brake pads, I replace them when the material is less than 3mm thick. Rim brake pads have wear indicators. I replace them when these grooves disappear.
When to Replace Brake Cables
Brake cables also need replacement. I look for specific indicators. I have difficulty applying brakes. My brakes also do not fully rebound. I check for sharp bends in the cable housing. I also look for fraying or broken wires in exposed sections. Cables can rust and seize up. They also fatigue and fail from repeated bending. Frayed strands can prick my fingers. These are all signs I need new cables.
General Brake Maintenance Tips
I know regular maintenance keeps my bike brakes working perfectly. It also extends their lifespan. I follow a few simple practices. These practices help me avoid common issues.
Regular Cleaning Schedule
I always make sure to keep my brakes clean. Dirt and grime can build up. This affects performance. I wipe down my brake calipers and rotors or rims after every few rides. I use a clean rag and isopropyl alcohol. This removes any oil or residue. I also clean my brake pads. This prevents contamination. A clean brake system works more efficiently. It also lasts longer.
Inspecting for Wear
I regularly inspect my brake components for wear. I check my brake pads often. They wear down over time. I look for the wear indicator lines on rim brake pads. I replace them when these lines disappear. For disc brake pads, I check their thickness. I replace them if they are less than 3mm thick. I also inspect my brake cables. I look for fraying or rust. I check my rotors for any bends or deep grooves. Early detection of wear prevents bigger problems.
Lubrication Points
I lubricate specific points on my brake system. This ensures smooth operation. For mechanical brakes, I apply a light lubricant to the pivot points on the calipers. I also lubricate the brake cable where it enters the housing. I use a dry lubricant for this. It prevents dirt attraction. I avoid getting any lubricant on the brake pads or braking surfaces. This would reduce stopping power. Proper lubrication makes my brake levers feel smooth. It also helps the calipers move freely.
I know regular brake maintenance is vital for my safety and an enjoyable ride. I encourage you to confidently apply these steps. With practice, brake adjustment becomes a quick, easy task. Mastering this fundamental skill makes me a more self-sufficient, safer, and confident cyclist on every ride. You now have the knowledge to keep your brakes in top condition.