Code P0141 means the heater circuit in the downstream oxygen sensor on bank one is not warming properly, which slows sensor response and can hurt fuel economy and emissions. Common causes include a bad sensor, corroded connector, blown fuse, or damaged wiring. A quick fix starts with inspecting and cleaning the connector, checking fuse and wiring continuity, and replacing the sensor provided heater resistance is wrong. Follow up through clearing codes and test driving to confirm the repair and learn more.
What P0141 Means and How the O2 Sensor Heater Works
Often a driver notices the check engine light and feels a bit anxious, but P0141 points to a specific problem that can be grasped and fixed. The code means the bank one sensor two oxygen sensor heater circuit is not warming as expected. The o2 heater helps the sensor reach operating temperature quickly so the engine control unit gets accurate readings.
Whenever the heater fails the sensor lifespan shortens and the sensor responds slowly. The reader is not alone in facing this. Friendly repair shops and fellow drivers often help diagnose wiring, connectors, or the heater element itself. Clear testing steps follow from the diagnostic port to the sensor connector. Grasping how the heater works builds confidence and makes repair choices easier.
Common Causes of Code P0141
Common causes of code P0141 often trace back to problems with the oxygen sensor heater circuit or the sensor itself.
A failed heater circuit can stop the sensor from reaching proper operating temperature, which keeps it from sending the right signals to the engine computer.
A worn or contaminated oxygen sensor can also give false readings, so both issues are closely linked and should be checked together.
Heater Circuit Failure
A vehicle with code P0141 points to a problem in the oxygen sensor heater circuit, and drivers can feel worried once that warning light appears.
In many cases heater failure stems from worn wiring, a blown fuse, or poor connector contact. A community of drivers shares relief whenever simple checks narrow the issue.
Circuit diagnostics help identify whether power actually reaches the heater, and they guide which part needs attention. Technicians use a multimeter to measure resistance and voltage, trace bad grounds, and test continuity along looms.
Whenever connectors are corroded, cleaning and secure reconnection often restores function. In the event wiring is damaged, replacement of the wiring assembly or inline repair keeps everyone safer and closer to getting back on the road.
Faulty Oxygen Sensor
Faulty oxygen sensors cause code P0141 whenever the sensor itself stops heating or sending the right signals, and that can be upsetting for drivers who depend on a smooth ride.
A worn sensor can fail long before its expected sensor lifespan, especially should contaminants or heat stress shorten its life.
People who care about their cars often feel connected to simple fixes, so they welcome clear diagnostic tricks to find a bad sensor quickly.
A technician might watch heater voltage, response time, and switching rates with a scan tool.
Visual checks of wiring and connectors follow.
In the event the sensor shows slow response or no heater draw, replacement is likely.
Owners can join local groups to share tips and feel supported through the repair.
Typical Symptoms and How It Affects Performance
Once P0141 appears, the vehicle often shows reduced fuel efficiency as the engine control adjusts mixtures to compensate for a weak heater circuit in the oxygen sensor.
This change can lead to a rough idle or transient surges because the engine gets inconsistent readings and the computer keeps correcting the fuel delivery.
Together these symptoms make driving feel unstable and costly, prompting timely inspection and repair.
Reduced Fuel Efficiency
Often drivers notice the miles per gallon dropping before anything else, and that sinking feeling signals reduced fuel efficiency tied to code P0141. The vehicle begins to show poorer fuel economy and steady mileage loss as the oxygen sensor fails to report correct data. Owners feel worried because pumps cost more and trips become shorter.
Mechanics explain that the engine computer might add extra fuel to mask bad readings, which drains gas faster. That change also makes the catalytic converter work harder, linking fuel waste with potential downstream damage.
Drivers who travel together as a community can trade tips on checking sensor wiring, replacing the sensor, or clearing stored faults. Each small repair restores confidence, brings companions back on the road, and improves shared fuel savings.
Rough Idle/Transients
During idling, a rough or uneven feel can make the driver anxious and unsure, and that uneasy sensation often points to problems tied to code P0141. The engine might show an idle surge one moment and a transient stumble the next, creating a stop and go rhythm that feels unsettling.
People who rely on their vehicle together want it to feel steady and safe, so noticing these symptoms builds concern and a shared need for answers. A weakened oxygen sensor heater can cause slow feedback to the computer, so fuel trims shift and the engine hunts for balance. That hunting shows as uneven revs. Listening and describing the pattern helps technicians find the issue faster and restores confidence behind the wheel.
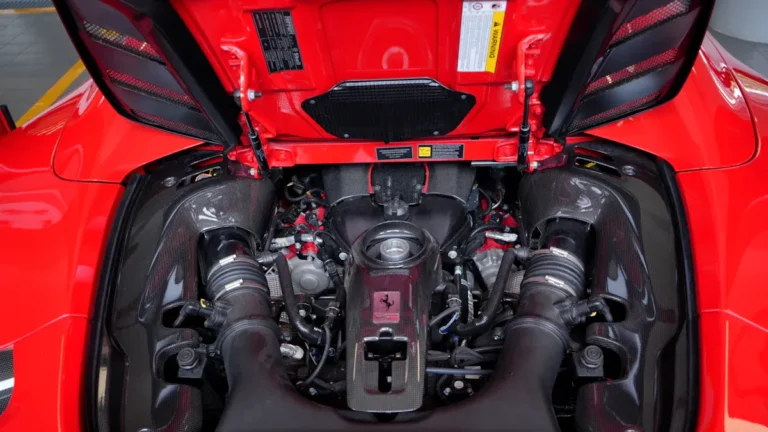
Which O2 Sensor Is Affected and How to Locate It
In the engine bay of most cars, the O2 sensor tied to trouble code P0141 is the downstream sensor located after the catalytic converter, and it plays a quiet but significant role in monitoring converter efficiency. The friendly guide notices upstream placement of the front sensor for background, then focuses on sensor identification and location. Readers who care about shared learning will feel included and capable.
| Component | Location |
|---|---|
| Downstream O2 | After catalytic converter |
| Upstream O2 | Before catalytic converter |
| Wiring plug | Near exhaust pipe heat shield |
| Mounting bung | Threaded into exhaust tubing |
The paragraph ties sensor identification to simple visual checks and explains how downstream behavior differs from upstream placement, building confidence without pushing tools or steps.
Tools You’ll Need for Basic Diagnosis
A simple OBD-II scanner is the initial tool recommended because it reads the P0141 code and shows live oxygen sensor data, giving a clear starting point for diagnosis.
Alongside the scanner, a set of basic hand tools such as ratchets, sockets, penetrating spray, and an extension will be needed to access and remove the affected O2 sensor without exasperation.
These tools work together to make checking codes and swapping parts straightforward, which helps the user feel more confident and less inundated.
OBD-II Scanner Use
One reliable tool that calms most drivers facing a P0141 trouble code is an OBD-II scanner, and learning to use one removes a lot of guesswork and worry.
The scanner’s clear display helps someone feel part of a community that cares for its cars. It supports OBD II maintenance routines, reads live data, and stores codes. Scanner features include code lookup, freeze frame, and real time sensor graphs that guide the next steps.
A person plugs the scanner into the port, follows prompts, and watches for oxygen sensor related P0141 entries. The device links to simple repair steps and suggests whenever to seek help. With a friendly tool, confidence grows and troubleshooting becomes less lonely and more manageable.
Basic Hand Tools
Comfort-kit reflection helps a person face a P0141 diagnosis with less worry and more control, and basic hand tools are the initial friends in that process.
A modest socket set offers quick access to stubborn bolts and makes removing sensors less scary. A torque wrench prevents over tightening and protects threads, which helps maintain trust in the repair.
Simple pliers, screwdrivers in different heads, and a flashlight let someone inspect connectors and wiring with confidence. Gloves and rags keep hands clean and show care for the vehicle.
A multimeter links to the diagnostic step, letting one confirm voltage and continuity before swapping parts. These tools work together to welcome a newcomer into shared repair work with calm, steady support and belonging.
Step-By-Step Electrical Tests With a Multimeter
Begin alongside gathering a digital multimeter, safety gloves, and the vehicle’s service manual so the tester feels prepared and calm before touching wires.
The guide walks a person through clear steps for voltage drop and continuity check, so teammates feel included and capable.
Simple checks build confidence.
- Set meter to DC volts, back-probe connector, start engine, observe resting voltage.
- Measure voltage drop across sensor cable while someone revs the engine slightly.
- Switch to resistance, perform continuity check between sensor pin and ECU ground with ignition off.
- Use diode mode to test sensor heater circuit, watching for expected forward voltage.
Each step links to the next, creating a steady flow that keeps a group engaged and reassured.
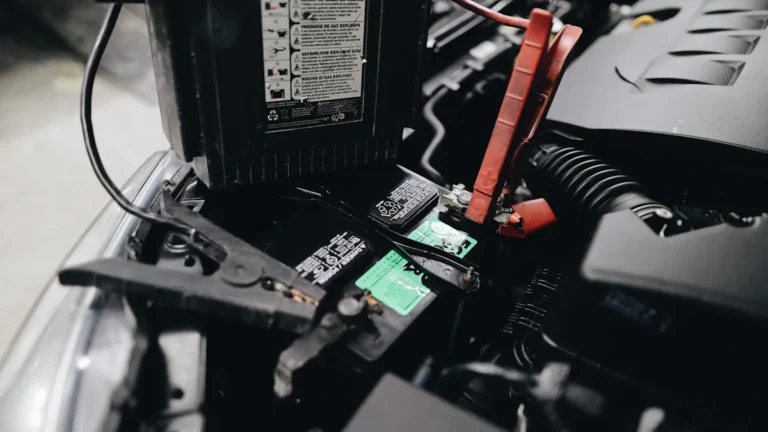
Inspecting Wiring, Connectors, and Grounds
Start upon inspecting closely at the wiring cable and connectors for signs of wear, damage, or corrosion, because small problems here often cause the P0141 code and are easier to fix than many expect.
The reader is guided to check for frayed wires, loose clips, and bent terminals in the cable. Look inside connectors for corroded pins and terminal corrosion that block good contact. Measure for voltage drops along suspect circuits and observe abnormal readings.
Clean mild corrosion with contact cleaner and a small brush, and secure loose grounds to restore proper flow. Should multiple areas show damage, trace wiring to find the root cause.
This steady, careful approach helps people feel capable and supported while diagnosing electrical faults.
When to Replace the Oxygen Sensor
Occasionally an oxygen sensor needs replacement whenever symptoms grow clear and simple checks point to failure, and identifying those signs can save time and money. The owner feels relief once choices are obvious. Practical cues help decide based on sensor lifespan and replacement interval guidance.
- Persistent check engine light after wiring checks indicates aging sensor element.
- Poor fuel economy or rough idle that resists tuning means the sensor might be beyond its replacement interval.
- Failed emissions test or strong exhaust smell shows the sensor is not reading correctly.
- Visual damage or heavy contamination found during inspection confirms need for swap.
These items link inspection findings to timeline expectations. The tone stays friendly so readers feel supported while choosing to replace.
Resetting the Code and Verifying the Repair
Frequently, after replacing an oxygen sensor the code will clear but the fundamental issue may not be fully fixed, so the technician or owner should reset the code and then verify the repair with a calm, steady routine.
The diagnostic procedure begins when recording the repair in the service log and noting the reset method used. Next, clear codes using a scanner or battery disconnect and start the engine.
Drive through a steady route that repeats city and highway conditions. Use confirmation steps to watch for code return, rough idle, or check engine light.
Should symptoms persist, recheck wiring, connectors, and exhaust leaks. Keep the service log updated with findings and mileage. This approach builds trust and helps everyone feel included in the repair process.
When to Seek Professional Help and Expected Costs
Upon a vehicle showing a persistent P0141 oxygen sensor heater code, it helps to know at what point a technician should take over and what the likely costs will be. A driver and their community want clear guidance. Professional intervention is prudent whenever the code returns after basic checks, whenever multiple sensors act up, or whenever electrical testing is needed.
Diagnostic pricing often ranges from modest scan fees to more if fault tracing is complex. Warranty considerations matter for parts and labor and should be confirmed before work begins. Shop selection affects trust and price. Consider these steps:
- Confirm code persistence and recent repairs
- Ask about diagnostic pricing and what it covers
- Check warranty considerations on parts
- Choose a trusted local shop based on reviews and referrals