P0445 signals a fault in the EVAP purge control circuit whenever the engine computer cannot properly command the purge valve. It often starts with a check engine light, odd fuel smells, or failed emissions tests. Common causes include a faulty purge valve, cracked hoses, bad connectors, or a loose gas cap. Simple inspections usually help, then electrical tests and valve bench checks follow. Follow stepwise diagnostics and repairs to restore emissions control and driveability, and more detail ensues.
What P0445 Means for Your Vehicle
A P0445 code appears anytime the vehicle’s computer detects a problem with the evaporative emissions system vent control circuit. It tells the owner that vapor control is not working as designed.
The issue affects how the car handles fuel vaporization and meets strict emission regulations. Someone reading this can feel part of a community that cares for reliable, clean running cars.
The code does not always mean a big repair. It can point to a loose cap, a faulty vent valve, damaged wiring, or a clogged line.
A calm approach helps. Start with simple checks, then move to tests that check circuitry and components. Sharing experiences with others often makes the process less lonely and more confident.
How the EVAP Purge Control Valve Works
The EVAP purge control valve opens and closes to let fuel vapor move from the charcoal canister into the engine so it can be burned rather than released into the air. It receives electrical activation signals from the engine computer that tell it at what times to allow flow, and the valve must seal tightly whenever it is not commanded to prevent leaks.
Explaining both the signal side and the physical flow path helps connect why a stuck or leaking valve can trigger a P0445 code and affect drivability.
Purge Valve Function
Once you turn on the engine, the EVAP purge control valve quietly takes charge of a small but significant job: it controls the flow of fuel vapors from the charcoal canister into the intake manifold so those vapors burn cleanly inside the engine. The valve opens and closes with a vacuum response that matches engine needs. It welcomes gentle changes so the car feels steady and reliable.
Inside, parts protect themselves from heat with thermal protection features that keep performance stable. The device links to the fuel system and the canister, so each move matters. People who care for their vehicles feel connected to this simple rhythm. Familiarity builds confidence, and routine checks keep the purge valve doing its modest, essential work.
Valve Activation Signals
Moving from how the purge valve quietly manages vapor flow, attention now turns to the signals that tell it at what time to act.
The valve listens for a pulse width command from the engine computer. That pulse width controls how long the valve stays open. The module sends short pulses for small purges and longer pulses for heavier purges.
Signal integrity matters here. Clean wiring and solid connections keep the pulse shape true. Whenever the group feels unsure, they look for broken wires, corroded pins, or poor grounds. Testing tools capture the pulse width and check for noise.
Shared comprehension helps: a team that inspects together learns the signs faster. That sense of belonging makes troubleshooting feel less lonely and more confident.
Flow Path and Sealing
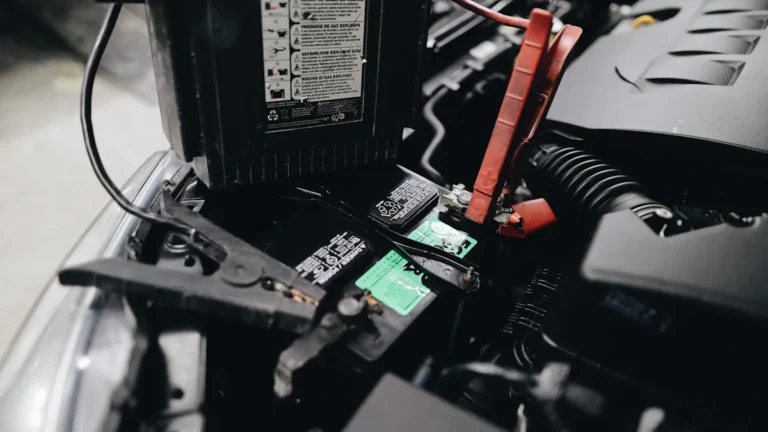
In a simple path from the charcoal canister to the intake manifold, the EVAP purge control valve guides fuel vapors so they do not escape into the air and so the engine can burn them safely. The valve sits between those components and opens on command to allow controlled flow.
It relies on precise flow sealing to stop leaks at times it is closed and on clear passages while open. Small seals and a clean bore protect pathway integrity so the system feels reliable to caretakers who depend on it. Wear, grime, or a torn seal breaks that trust and changes how vapors move. Technicians check sealing, inspect the path, and test operation to restore steady flow. That work keeps the group of drivers connected to safer emissions and smoother running.
Common Causes of P0445
Many drivers see code P0445 appear whenever a simple problem like a loose or damaged gas cap lets vapor escape from the fuel system.
Often the issue moves beyond the cap, with a faulty purge valve or cracked purge lines preventing the EVAP system from sealing correctly.
These causes link closely because a leaking cap or bad valve both allow vapors to leak and trigger the same warning, so the next step is a calm, step-by-step check of cap condition and purge components.
Loose or Damaged Gas Cap
A gas cap that is loose, cracked, or worn often causes the P0445 code via allowing fuel vapors to escape and confusing the vehicle’s evaporative emissions system. The cap might fail to seal, letting vapors leak and triggering sensors that monitor vapor recovery.
People who care for their cars want to belong to a community that trusts simple fixes, so inspecting the cap feels empowering. Check threads for damage, listen for a snap upon tightening, and replace the cap should it show cracks, heavy wear, or a missing seal.
Replacing the cap is affordable and can prevent fuel theft concerns through keeping the tank sealed. After replacement, the system often resets after a few drive cycles and the code could clear.
Faulty Purge Valve or Lines
Start via picturing the purge valve and its lines as the small team that keeps fuel vapors from wandering where they should not. The purge valve routes fuel vapor from the charcoal canister to the engine. If it or its lines fail, vapors escape or block flow. The vehicle senses the leak and could set P0445.
A common issue is solenoid failure inside the valve. It can stick open or closed. Cracked hoses let vapors leak before reaching the engine. The owner can listen for clicks near the valve and inspect hoses for splits or loose clamps.
Repair or replace the valve and damaged lines as a shared task between driver and mechanic. That teamwork restores proper vapor control and peace of mind.
Symptoms to Watch For
How can someone tell that the P0445 trouble code is present before a mechanic runs a scan? People perhaps notice subtle signs that something is off.
A persistent fuel smell near the vehicle can signal a vapor system leak. Engine hesitation during acceleration or at idle can appear whenever purge flow is wrong. The check engine light often comes on and could flicker. Drivers possibly hear a faint hissing or chuffing from the engine bay as vapors escape.
Fuel cap tightness checks can feel reassuring and still leave symptoms. Some will sense lower fuel economy and small performance dips. These signs often occur together and point to the EVAP purge circuit. Observing multiple symptoms helps build confidence prior to seeking help.
Tools and Equipment You’ll Need
Having noticed the warning signs, the next step is to gather the right tools and equipment so the repair can go smoothly and safely. A shared toolkit helps people feel prepared and connected.
Begin with safety glasses and gloves to protect eyes and hands. Add a vacuum gauge for testing EVAP system pressure and leaks. Include replacement sockets and a ratchet set sized for fuel and vapor line fittings. A torque wrench guarantees bolts are tightened to factory specs without guessing.
Keep a flashlight and small mirror for hard to see areas. Bring hose clamps, spare vacuum hoses, and dielectric grease for quick parts swaps. A basic multimeter can help with solenoid checks.
Pack a notebook and pen to log findings and maintain group trust during the fix.
Initial Visual Inspection Steps
A careful initial look helps catch common causes of a P0445 code before any tools are used.
The technician checks for loose filler and oil caps and then inspects vacuum lines for cracks, soft spots, or loose connections.
In the event visible damage or wear is found, the next step is to plan targeted repairs while keeping the owner informed and reassured.
Check for Loose Caps
Before any tool is picked up, the technician scans the engine bay with calm attention, looking for caps that sit loose or tilt whenever nudged. A gentle cap inspection reassures the owner and builds trust. The technician records fuel cap, EVAP canister cap, and filler neck cover. Should a cap rock, a seal replacement could be needed to restore fit and shared confidence.
| Fuel Cap | EVAP Cap | Filler Cover |
|---|---|---|
| Tightness | Cracks | Alignment |
| Seal feel | Wear | Movement |
This tactile check connects the technician and driver. Hands-on care feels inclusive. The next step explains how findings guide testing and parts ordering, linking this visual check to the following vacuum line inspection.
Inspect Vacuum Lines
With the cap checks complete, attention moves to the vacuum lines where small tears can cause big problems. The inspector calmly looks for cracked hoses, loose clamps, and odd bends that hint at poor line routing.
A shared sense of care helps everyone feel they belong while tackling the task together. Visual checks pair with vacuum testing whenever available, so leaks are not missed.
- Trace each hose from canister to valve checking for hard spots and pinholes.
- Confirm clamps are snug and routing avoids heat and moving parts.
- Observe mismatches in hose diameter or material that invite failure.
These steps build confidence. They guide an easy, methodical path prior to moving on to more detailed testing.
Scan for Damage
Start-to-finish scanning helps find damage that conceals in plain sight, and it keeps the process calm and steady. A careful visual sweep of the engine bay builds confidence and connection.
The person moves slowly, following hose routes, clips, and wire runs. They check for cracks, chafing, loose clamps, and worn connectors.
They trace from the EVAP canister toward the purge valve and use sensor mapping to confirm which wires belong together. Whenever a tear or disconnected line appears, the team feels relief because the problem is now visible and fixable.
Light taps reveal obscured splits. Gentle pulls show loose fittings. Remarks are taken and photos are kept.
This steady method lets everyone feel included and ready for the next repair step.
Testing the Purge Valve Mechanically
A simple hands-on check of the purge valve gives a lot of useful information and can ease worrying thoughts about a tricky P0445 code.
The writer describes a calm, practical approach that invites readers to learn together.
Manual actuation and bench testing are shown step by step so anyone can follow. Try these basic checks to feel confident:
- Disconnect the valve and move the plunger manually to confirm free motion and no sticking.
- Apply vacuum or compressed air during bench testing to see whether the valve holds and opens promptly.
- Listen for clicking whenever power is briefly applied to a known good source to confirm response.
These steps connect to scanning for damage and keep the focus on simple care and shared troubleshooting.
Diagnosing Electrical and Wiring Issues
At the time electrical faults are suspected, a careful inspection of the wiring loom often reveals cracked insulation, chafed wires, or loose routing that can cause intermittent purge valve failures.
Next, checking connector resistance with a multimeter helps confirm whether pin corrosion or poor contact is interrupting the signal to the purge valve.
Together these steps form a clear hands-on approach that reassures the user and makes further testing faster and more certain.
Wiring Harness Inspection
Begin through gently tracing the wiring loom with steady hands and clear focus, because most electrical faults hide where wires bend, rub, or meet connectors. The inspector looks for connector corrosion and follows harness routing to see whether clips are broken or wires chafe. The work feels communal, as provided caring for a shared machine.
- Check visible insulation for cracks, pinches, or exposed copper.
- Note any loose clips or altered harness routing that could stress terminals.
- Inspect connectors for corrosion, bent pins, or loose locks that interrupt signals.
A calm tone reassures the reader that repairs are doable. Simple tools and a friend can help. Small fixes often restore function and confidence. Visual inspection leads into testing, so organizing findings keeps the next steps clear.
Connector Resistance Check
Connector resistance check is a steady, hands-on step that helps pinpoint whether a sensor, wire, or connector is sending the wrong signal to the engine control module. A reader who cares about their car will learn to measure resistance across connectors with a multimeter.
Initially, disconnect the battery to stay safe. Then probe pins while avoiding terminal corrosion that can conceal real readings.
Watch for high resistance or sudden change that suggests a broken conductor or poor contact. Also perform a voltage drop test with the circuit under load to find concealed losses.
Should readings be out of range, clean contacts gently or replace the connector. The process is methodical and inclusive. It reassures people that small repairs often restore reliable signals and steady performance.
Checking EVAP Hoses and Canister
Start via looking over the EVAP hoses and canister closely, because small cracks or loose clamps often hide the causes of a P0445 code. The observer records the charcoal canister condition and inspects hose routing for pinches, kinks, or wrong connections. Friendly guidance reassures the reader they belong to a community that cares and helps.
- Check visual damage to hoses and canister for cracks or dents.
- Verify hose routing matches factory diagrams and that clamps sit tight.
- Listen for hissing while a partner gently presses hoses to reveal leaks.
A calm tone encourages asking for help if unsure. Practical steps follow one another so the task feels doable. Clear, simple directions reduce worry and connect people through shared experience.
Cleaning Vs Replacing the Purge Valve
Often people consider whether they can clean a stuck purge valve or whether it needs to be replaced, and that choice matters for both safety and budget.
A stuck valve can sometimes be rescued with chemical cleaning at deposits are light. Chemical cleaning soaks and dissolves grime, and it can restore movement in many cases.
For heavier build up, ultrasonic cleaning offers a deeper, gentler option that reaches small passages and can save a valued part.
Still, cleaning is not always reliable at electrical failure or internal wear exists.
Replacing the valve brings predictable performance and peace of mind, and it removes doubts about repeat trips to the shop.
The community of drivers often prefers replacement for long term confidence while reserving cleaning as a thoughtful, budget friendly step.
Resetting the Code and Verifying the Repair
After a repair, it helps to clear the trouble code so the vehicle can run its checks and prove the fix. The reset procedure can be simple and shared so everyone feels confident. A quick battery disconnect for a few minutes could clear memory, or a scan tool can erase the code and preserve settings. Then the system must prove itself through normal drive cycles to verify readiness.
- Use a scan tool to clear codes and record initial status.
- Should it be required, perform a brief battery disconnect and reconnect to reset modules.
- Complete several drive cycles under varied conditions and re-scan for pending or stored codes.
This approach builds trust and lets the owner join in confirming the repair.
When to Seek Professional Help
Who should be called whenever P0445 keeps returning or simple fixes feel uncertain? A trusted mechanic or dealership technician should be contacted for professional diagnosis. They bring tools, experience, and a community-minded approach that helps owners feel supported.
In the event the code returns after resets or the evap light blinks, the situation might hide deeper faults that DIY checks miss. Also consider warranty considerations before replacing parts.
Provided the vehicle is under warranty, calling the dealer initially can save money and guarantee authorized repairs. Whenever repairs touch sensors, hoses, or the EVAP canister, technicians can trace causes and test systems thoroughly.
Reaching out promptly prevents frustration and keeps people connected to reliable help they can trust.
Estimated Repair Costs
Repair costs for a P0445 code can vary widely, but a clear expectation helps ease worry and plan next steps. Repair cost depends on labor rates, parts availability, and how long a technician needs to diagnose the EVAP purge valve or related wiring. A friendly tone reassures vehicle owners that they are not alone.
- Diagnostic fee: typically $50 to $150 for scanner time and inspection.
- Parts and repair: purge valve replacement can range from $75 to $300 depending on parts availability and quality.
- Labor: expect $60 to $150 per hour with one to two hours common.
These figures guide choices, balance budget and safety, and help people feel supported whenever deciding on service.
Preventive Maintenance Tips
Whenever caring for a vehicle, simple regular checks can often stop a P0445 code before it starts and keep drivers calm instead of worried. Regular seasonal inspections build trust in the car and among neighbors who share tips. Include fluid checks for fuel and coolant, inspect hoses, and listen for unusual sounds. Encourage friends to join and share prompts so no one feels alone. Schedule valve and EVAP system checks during oil changes. Simple tools and clear prompts help maintain confidence. The table below organizes routines for easy use and belonging within a group of drivers.
| Task | Frequency | Who helps |
|---|---|---|
| Fluid checks | Monthly | Self or buddy |
| Hose inspection | Every 6 months | Mechanic or friend |
| EVAP test | Annually | Shop |
| Valve check | At service | Technician |
| Prompt system | Ongoing | Community app |