Trouble Code P2271 means low intake manifold vacuum on bank 1, usually from an intake leak that upsets the air metering and triggers a check engine light. Common causes include cracked vacuum hoses, loose clamps, bad gaskets, a stuck PCV valve, or split turbo couplers. Symptoms are rough idle, stalling, and poor acceleration. Simple checks use visual inspection, listen for hisses, spray carb cleaner, or run a smoke test. Tighten, replace, or reseal parts and recalibrate sensors to confirm the fix, and should you keep going you will learn more.
What P2271 Means and How the System Works
Understand P2271 as a specific fault code that points to low intake manifold vacuum on bank 1. It explains a mismatch between expected intake metering and actual air flow behavior. The vehicle senses less vacuum and flags the code so people can fix it together.
The intake system measures air and adjusts fuel to match, so whenever vacuum drops the engine runs differently and the computer records the change. This description helps readers feel included and capable of learning.
The system uses sensors, valves, and the intake path to balance air and fuel. Clear signals move from sensor to controller to injector. That chain shows how parts relate and why attention to intake metering and flow behavior matters without naming specific faults.
Common Causes Behind an Intake Air System Leak
Leaks in the intake air system can cause a car to feel off right away, and fortunately most of those leaks come from a few familiar places.
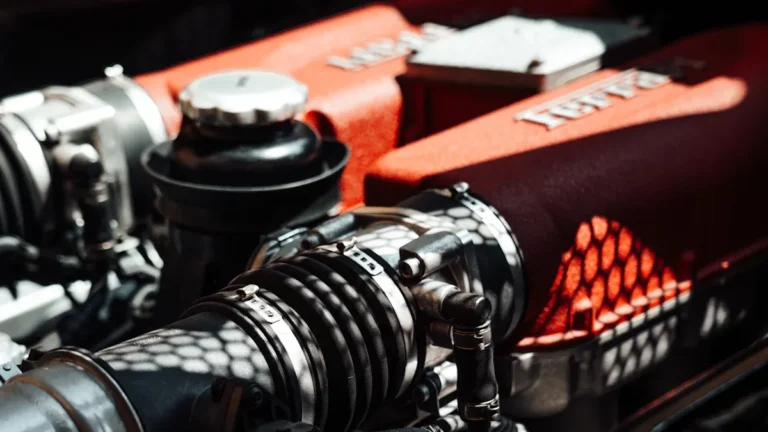
The usual suspects include cracked vacuum hoses, a loose throttle body clamp, or a damaged intake gasket. Each part links to the next, so a small tear can upset the whole system.
Faulty crankcase ventilation or a stuck PCV valve allows extra air enter where it should not. On turbo cars, intercooler piping often gets loose or split at the couplers.
Even the MAF sensor area can leak when its seal is worn. Owners want to belong to a community that fixes things together, so inspecting these parts gives confidence and clear next steps.
Warning Lights and Driveability Symptoms to Watch For
Often a warning light will appear on the dash before a car shows other signs, and that small glow can tell a lot about intake air troubles.
Drivers who care about their ride often notice dashboard alerts like the check engine lamp and feel uneasy together. Those alerts link directly to symptoms such as rough idle, reduced power, and unexpected stalling.
In many cases throttle hesitation shows during accelerating from a stop or passing another car. That sensation and the warning lamp should prompt calm action rather than panic.
The car community around the vehicle can offer support, and sharing observations helps find patterns. Clear records on whenever alerts and hesitation occur speed diagnosis and help technicians identify intake air leaks and related faults.
Tools and Safety Tips Before You Start Diagnosing
Before starting any checks for trouble code P2271, the technician should put on basic safety gear such as gloves and eye protection to stay safe and comfortable.
They should gather essential hand tools like a ratchet set, screwdrivers, and a multimeter so the job proceeds smoothly and without extra trips to the toolbox.
Also, they must take battery and engine precautions by disconnecting the battery as necessary and avoiding hot components, which keeps both the person and the vehicle safe while diagnosing.
Basic Safety Gear
A well-stocked safety kit sets the tone for calm, confident troubleshooting, and it helps keep a small problem from turning into a dangerous one.
The writer recommends safety glasses and snug work gloves to protect eyes and hands from sparks, fluids, and sharp edges. A simple respirator helps whenever fumes are present and ear protection is useful near loud tests.
A sturdy flashlight and a magnetic parts tray keep small fasteners in view and prevent frustrating losses. A basic initial aid kit sits nearby to address cuts or burns quickly.
Clearly labeled rags and a spill absorbent block reduce slip risks and protect the workspace. Together these items create a supportive environment where team members feel cared for and ready to diagnose.
Essential Hand Tools
Comfort and confidence grow whenever the right hand tools sit within reach, ready to make the diagnosis feel less fraught and more manageable.
A basic socket set brings quick access to fasteners. A quality torque wrench guarantees bolts are tightened to spec and protects fragile sensors. Combination wrenches and pliers let one grip oddly shaped parts without struggle.
A small pick set and brushes pair well with rust remover to free stuck connectors and reveal clean contacts. A flashlight and inspection mirror permit someone see tight spaces and avoid guessing.
Gloves and basic eye protection keep hands steady and worry low while working. Each tool supports the next, so assembling them ahead of time helps the team move calmly from one step to another.
Battery & Engine Precautions
Technicians should treat the battery and engine like two live partners in a careful dance, because simple mistakes can cause shocks, sparks, or ruined parts.
In shared work, Battery isolation and Engine shutdown are the initial steps. They protect people and parts and keep the team confident.
- Disconnect the negative terminal foremost and secure it away to guarantee Battery isolation before touching sensors or wiring.
- Confirm Engine shutdown with the key removed and ignition off. Wait for systems to go quiet and for fans to stop.
- Wear eye protection, gloves, and keep a small fire extinguisher nearby. Communicate with anyone helping so roles are clear and trust stays strong.
These steps link safety and teamwork, helping everyone feel included and prepared.
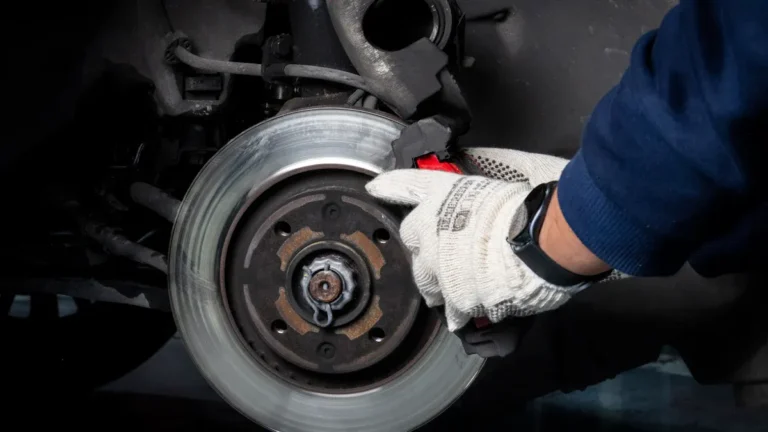
Simple DIY Checks to Find the Leak
Start near parking the car on a flat surface and letting the engine cool so hands stay safe and nerves calm.
A person can begin by gently tracing hoses and clamps for loose connections.
Feel for weak spots with fingers and inspect rubber for cracks.
Use vacuum sniffing to listen for faint hisses while someone revs the engine slowly.
Should available, try a can of carb cleaner sprayed briefly around joints to see RPM change.
For harder to find leaks, consider smoke testing at a local shop or mobile service that welcomes DIYers.
Keep records of where air escapes and take photos to share with the community.
Move from simple checks to more focused tests, linking observations so each step builds on the last without rushing.
How to Fix Typical Intake Air Leak Problems
Common intake air leaks often hide at hose clamps, intake boots, and vacuum lines, and a careful look can save a lot of worry.
Start with simple repair steps such as tightening clamps, replacing cracked hoses, and swapping brittle vacuum lines, and then test for leaks again to be sure the fix holds.
These straightforward actions connect directly to the earlier leak-finding checks and help someone feel confident that they can correct common problems without panic.
Common Leak Locations
Leaks in the intake air system often hide in a few predictable places, and being aware where to look can save time and worry. The writer notes common leak spots that friends who tinker together check initially. These areas link closely, so inspecting one often leads to another.
- Intake manifold boot, intake flange, throttle body gasket and O ring seals can crack or loosen, letting unmetered air past the MAP sensor and throttle body.
- Vacuum hose, PCV valve, crankcase breather and EGR valve fittings age and crack. A shared vacuum leak affects idle and performance and often shows across several parts.
- Turbo inlet, intercooler piping, charge pipe clamps and related joints work under pressure and can slip or tear, creating obvious surge leaks.
Simple Repair Steps
Whenever working through intake air leaks, a calm method helps people feel less swamped and more in control, so the repair steps follow a clear sequence anyone can follow.
The initial step is visual inspection of hoses clamps and connections, looking for cracks and loose fittings.
Next use vacuum diagnostics to find concealed leaks with a smoke machine or handheld pump.
Once a leak is found, clean the area and replace the damaged part or tighten the clamp.
After parts are fitted, start the engine and watch for steady idle and no whistling.
Then check sensors and perform sensor calibration as required so readings match actual conditions.
Share tasks with a friend for safety and confidence and keep a record on what was changed.
When to See a Professional and Estimated Repair Costs
At the initial sign of persistent rough idling, poor acceleration, or the check engine light returning after a reset, it is wise to contemplate professional help rather than hope the problem goes away. A trusted technician can respect diagnostic timelines and check warranty considerations while offering calm, clear next steps. They also join the owner in solving a shared problem.
- Bring the car for a professional scan once DIY checks fail or symptoms return. Expect a diagnostic fee and a clear timeline for repairs.
- Ask about warranty coverage and parts guarantees to protect the shared investment.
- Typical repairs range from simple sensor replacement to more involved intake work, with costs varying per model.
This approach keeps people connected and reassured.