
Can you really check your wheel alignment at home? Yes, you can perform basic checks. This helps you identify potential problems early. Wheel alignment ensures your tires point correctly. Proper alignment is crucial for even tire wear, good handling, and your safety on the road. Ignoring misalignment can lead to hundreds—or even thousands—of dollars in additional expenses due to uneven tire wear, suspension strain, and poor handling. For example, avoiding even 10% premature tire wear on a $900 steer pair and proportionate drive-tire impact can save over $300–$600 annually. This guide empowers you to spot issues, not to perform a full professional wheel alignment adjustment.
Key Takeaways
You can check your car’s wheel alignment at home. This helps you find problems early. It saves you money on tire wear and car repairs.
Simple tools like a tape measure, straight edge, and level help you check alignment. Always use jack stands for safety when working under your car.
Check your car’s toe and camber angles. Toe shows if wheels point inward or outward. Camber shows if wheels tilt inward or outward. These checks help you spot uneven tire wear.
Look for signs of bad alignment. These include uneven tire wear, a crooked steering wheel, or your car pulling to one side. These signs mean you might have an alignment problem.
Home checks help you find problems. However, professional tools are needed for exact adjustments. See a professional for precise alignment fixes.
Understanding Wheel Alignment Basics
What Is Wheel Alignment
Wheel alignment refers to the precise angles of your vehicle’s wheels. These angles ensure your tires meet the road correctly. A proper wheel alignment helps your car drive straight and handle well. Your car’s wheel alignment system includes several key components. These parts work together to control how your wheels sit. They include roll center kits, camber bolts, control arms, strut mounts, and Watts link kits. These parts allow for adjustments to the wheel angles.
Why Proper Alignment Matters
Proper alignment is very important for your safety and your car’s health. When your wheels are not aligned correctly, you face several risks. You might experience increased tire wear and slippage. This happens because uneven wear makes some tires more damaged faster. This increases the risk of a blowout or puncture. You will also find it harder to control your car. If your car pulls to one side, you must constantly fight the steering wheel. This makes driving challenging, especially at higher speeds. Misalignment also compromises your car’s handling and performance. This makes driving less safe overall.
Key Alignment Angles Explained
Three main angles define your wheel alignment: caster, camber, and toe. Each angle plays a specific role in how your car drives.
Angle | Definition | Function / Effect |
|---|---|---|
Caster | The angle of the steering axis when viewed from the side of the vehicle. | Influences steering stability, self-centering of the steering wheel, and high-speed handling. |
Camber | The inward or outward tilt of the wheel when viewed from the front of the vehicle. | Affects tire wear, handling, and stability during cornering. |
Toe | The inward or outward angle of the wheels when viewed from above the vehicle. | Primarily impacts tire wear and steering response. |
Caster: Positive caster improves straight-line stability. It makes the steering wheel return to the center after a turn. Negative caster makes steering feel lighter. However, it can reduce stability.
Camber: Positive camber means the top of the wheel tilts outward. This can cause wear on the outer edge of your tire. Negative camber means the top of the wheel tilts inward. This can improve grip during turns.
Toe: Toe-in means the front of the wheels are closer together. This can cause wear on the outer edges of your tires. Toe-out means the front of the wheels are farther apart. This can cause wear on the inner edges. Excessive toe, either in or out, leads to rapid and uneven tire wear. It also reduces fuel economy and causes poor handling.
DIY Wheel Alignment Tools
You can check your car’s alignment with simple tools. These wheel alignment tools are often found in your garage or are inexpensive to buy. You do not need fancy equipment for a basic diy wheel alignment check.
Tape Measure and Ruler
You will use a tape measure to find distances. It helps you compare measurements across your tires. A long, flexible tape measure works best. Look for one that extends at least 25 feet. A ruler can help with smaller, more precise measurements. You might use it to check small gaps.
Straight Edge and Level
A straight edge helps you see if surfaces are flat or straight. A long, sturdy metal or wood straight edge, about 4-6 feet long, is ideal. You will place it against your tires. A spirit level, or bubble level, shows if something is perfectly horizontal or vertical. You will use it to check camber.
Jack and Stands
You will need a jack to lift your vehicle. Jack stands then support the car’s weight. Remember, a jack lifts the car, but jack stands hold it up. Never rely on a jack alone to support your vehicle. Its hydraulic seal is not meant for long-term support. Always use jack stands after lifting. Before you use them, inspect your equipment. Check for bends, breaks, or metal damage on the stands. Replace any faulty tools. Place your jack stands on firm, flat ground. Position them near the front corners of the trailer, making snug contact with the smooth steel underbody on each side of the kingpin.
Chalk or Marker
Chalk or a marker helps you make clear marks on your tires. You will use these marks to measure distances accurately. Any standard chalk or permanent marker will work.
String or Line
A thin string or fishing line is useful for checking toe alignment. You will stretch it around your vehicle. This creates a straight reference line. A strong, non-stretching string gives you the best results.
Preparing Your Vehicle for Inspection
Before you begin any checks, prioritize safety. Always use jack stands to support your vehicle after lifting it. Never rely solely on a jack. Inspect your jack and stands for damage before use.
Parking on Level Ground
You must park your vehicle on a perfectly level surface. An uneven surface will give you inaccurate measurements. Find a flat garage floor or a level driveway. This ensures your car sits naturally, giving you a true starting point for your checks.
Correct Tire Pressure
Proper tire pressure is essential for accurate readings. Check all your tires. Inflate them to the manufacturer’s recommended PSI. You can find this information on a sticker inside your driver’s side door jamb or in your owner’s manual. For most passenger vehicles, the recommended tire pressure is generally between 30 to 35 PSI. Larger vehicles like SUVs or trucks may need up to 40 PSI. Incorrect pressure can distort tire shape. This will lead to false readings during your wheel alignment checks.
Check Suspension Components
Inspect your suspension components for any signs of wear or damage. Worn parts can directly affect your wheel alignment. Look for these visual indicators:
Uneven Tire Wear Patterns: Your tires should wear evenly. Irregular patterns like cupping, feathering, or shoulder wear point to suspension problems. These issues affect how your wheels sit.
Vehicle Height Variations When Parked: Your car should sit level. If one corner looks lower, a spring or strut might have failed. Compare the gaps between the tire and the body panel. They should be uniform.
Fluid Leaks Around Suspension Components: Look for oily residue near your wheels, shock absorbers, or struts. Leaks mean the hydraulic fluid is escaping. This reduces the component’s effectiveness. It leads to poor handling.
Steering Wheel Straight
Ensure your steering wheel is perfectly straight and centered. This provides a consistent reference point. If your steering wheel is off-center, your measurements for toe alignment will be incorrect. You can use a bungee cord or tape to hold it in place.
Checking Toe Alignment
Toe alignment is one of the most important measurements you can check at home. It directly affects tire wear and how your car steers. You can measure toe with a few simple tools.
Measuring Front Toe
You can measure front toe using a tape measure and toe plates. This method gives you a good indication of your toe setting.
Prepare Your Workspace: Make sure your car sits on a flat, level surface. Check your tire pressures. Center your steering wheel.
Place the Toe Plates: Put one toe plate against each front wheel. Ensure they sit flat and evenly against the tire’s sidewall.
Insert Measuring Tapes: Thread two tape measures through the slots on the toe plates. Place one tape at the front edge of the tires and the other at the rear edge. Make sure both tapes are at the same height.
Record Measurements: Read both tape measurements. Measure to the nearest 1/16 inch.
Calculate Total Toe: Subtract the front reading from the rear reading. This gives you your total toe.
Adjust Tie Rods (Optional): If you plan to adjust, loosen the lock nuts. Make small, equal turns on each tie rod. This changes the wheel angle. Then, remeasure.
Recheck Steering Wheel Center: After any adjustments, check if your steering wheel is still straight. Adjust tie rods slightly if needed to re-center it.
Test Drive and Fine Tune: Drive your car to see how it handles. Make small adjustments if necessary. Always remeasure after any changes.
Scribing Tires for Accuracy
Scribing a line on your tires helps you get more accurate toe measurements. This creates a consistent reference point.
Lift Each Wheel: Use your jack and stands to lift one front wheel off the ground.
Hold a Pointed Object: Take a pointed object, like a screwdriver or an awl. Hold it steady against the tire tread. You can rest your hand on a jack stand for stability.
Rotate the Tire: Slowly rotate the tire by hand. This creates a clear, visible line all the way around the tire. This line will be perfectly concentric.
Repeat for Other Wheel: Do the same for the other front wheel. Now you have precise lines to measure from.
Straight Edge Method for Toe
The straight edge method offers another way to check toe. You will use your straight edge and a tape measure.
Park Your Vehicle: Park your car on a level surface. Ensure your tires have the correct pressure.
Position Toe Plates: Place toe plates flush against the front edge of the tire tread on each front wheel.
Measure Front Distance: Use a measuring tape. Record the distance between the front edges of both plates.
Measure Rear Distance: Move the toe plates to the back edge of each tire tread. Measure the distance again.
Calculate Total Toe: Find the difference between your front and rear measurements. This is your total toe.
Determine Per-Wheel Offset: Divide the total toe by two. This tells you the offset for each wheel. A negative value means toe-in. A positive value means toe-out.
Using the String Method for Toe
The string method is a very effective way to check toe alignment. It helps you see the relationship between all your wheels.
Set Up Reference Points: You need a reference point that is square to your car. This prevents issues like steer-ahead or thrust angle.
Center Steering Wheel: Use a steering wheel holder. This keeps your steering wheel perfectly centered during the process.
Use Slip Plates: Place folded trash bags under your tires. These act as makeshift slip plates. They help relieve tension in your suspension.
String Setup:
Basic Method: Stretch a string across jack stands on both sides of your car. Make sure the strings run parallel to the car’s sides. You must re-center these strings if you jack up the car or roll it.
Advanced Method (Optional): You can use a string kit that attaches directly to your car. This keeps the strings centered even if you move the car.
Verify Centering: Double-check that your strings are precisely centered to your car. Do this before you start measuring.
Measure: Use a precise ruler. Measure from the front edge of each wheel to the string. Then, measure from the back edge of each wheel to the string.
Interpret Toe:
If the front measurement is greater than the rear measurement, you have toe-out.
If the rear measurement is greater than the front measurement, you have toe-in.
Adjust (If Needed): Adjust each wheel individually. Aim for your desired total toe. For example, 1/32″ toe-out per wheel gives you 1/16″ total toe-out on the front axle.
Repeat: Expect to adjust and remeasure several times. This back-and-forth process helps you achieve accuracy. Re-check your measurements multiple times before you finish.
Interpreting Toe Measurements
Understanding your toe measurements is key. Toe refers to how much your wheels point inward or outward.
Toe-in: The front of your wheels points slightly inward, towards each other. This setting often increases stability at high speeds. It can also lead to more understeer. Rear-wheel toe-in is common on rear-wheel drive cars. It reduces oversteer and improves high-speed stability.
Toe-out: The front of your wheels points slightly outward, away from each other. Front-wheel toe-out can improve turn-in response. It reduces understeer, especially on twisty roads. However, too much toe-out can make your car unstable at high speeds. Rear-wheel toe-out is sometimes used on front-wheel drive cars. It helps the car rotate and reduces understeer. Excessive rear toe-out can cause oversteer and instability.
For daily driving, many experts recommend setting your toe to 0. This means your wheels point perfectly straight ahead. A common static setting for toe-in is about 1/16 inch. This helps your wheels track straight when you drive on the highway. For racing, some drivers might use specific toe-out settings, like -0.5 degrees on both sides, to improve handling. Always refer to your vehicle’s manufacturer specifications for the ideal toe settings.
Checking Camber Alignment
Camber is another important wheel angle. It tells you if your wheels tilt inward or outward when you look at your car from the front. Checking camber helps you spot uneven tire wear early.
Level for Camber
You can use a simple spirit level to check your wheel’s camber. This tool helps you see the tilt.
First, park your car on a level surface. Make sure your tires have the correct air pressure.
To measure camber, hold a spirit level vertically against the side of your wheel. Make sure the level touches the wheel at both the top and the bottom.
If the top of the wheel tilts outward, you have positive camber. The bubble in your level will move towards the car. You will see a gap at the bottom of the level against the wheel.
If the top of the wheel tilts inward, you have negative camber. The bubble will move away from the car. You will see a gap at the top of the level against the wheel.
You can use a camber bubble gauge for more precise checks. This tool often has a magnetic base. You can attach it to your brake rotor. Zero the gauge. Then, you can perform work and adjust camber until it reads zero again.
If you cannot attach the gauge to the brake rotor, place a straight bar across two flat parts of the wheel. Put the gauge in the center of the bar. You can also attach the magnetic base directly to the hub if it has a flat surface. This usually means you need to remove the wheel. A digital inclinometer also works like a spirit level. You can zero it against a vertical surface to read camber directly.
DIY Camber Gauge
You can build your own simple camber gauge. This helps you get a more accurate reading than just a spirit level.
You can make a hands-free camber gauge using angle iron and two small spirit levels. This design uses a pivoting plate with a spirit level. This allows for small adjustments. This type of gauge can show you changes as small as 0.1 degrees. Each mark on the gauge can represent 0.1 degrees. An arrow on the gauge shows 0 degrees when the top plate is level with the frame edge.
To use your DIY gauge, place it against the wheel. Read the angle shown on the level. This tells you your camber measurement.
Camber Types
Camber affects how your tires meet the road. It also impacts your car’s handling. There are two main types of camber: positive and negative.
Positive Camber: The top of your wheel tilts outward, away from your car’s center.
This type of camber improves your car’s stability on rough ground. It is good for heavy-duty vehicles.
It gives you greater stability and better grip on uneven roads and highways. This provides a larger contact area.
Positive camber reduces steering effort. This makes your car easier to steer on tough roads.
However, too much positive camber can make your car drift. This makes it hard to stay in your lane.
It also wears out the outer edges of your front tires faster.
Your car’s performance during turns also gets worse. It reduces grip and makes handling less precise.
Negative Camber: The top of your wheel tilts inward, towards your car’s center.
This type of camber improves handling and road grip. It spreads the load evenly across the tire’s contact patch.
It helps your car corner better at high speeds. It maximizes tire grip and contact area. This counters the tire’s natural tendency to roll onto its outer edge.
Negative camber gives you more steering control, especially when turning. It increases the contact area for better grip and precise steering.
However, too much negative camber can cause your car to oversteer. It can also make your car pull towards bumps in the road.
It can quickly wear out the inside shoulder of your tire.
Your car might naturally pull towards its center line. This can make it less stable in a straight line. It can also lead to unintentional turns.
Excessive camber, whether positive or negative, causes uneven and early tire wear. Positive camber can improve stability on rough surfaces. Negative camber makes cornering better. However, too much of either type can reduce straight-line stability. Checking your camber is a key part of a good wheel alignment check.
Caster: What to Look For
Caster is another important wheel angle. It describes the forward or backward tilt of your steering axis. You view this from the side of your car. Caster affects how your steering feels and how stable your car is.
Visual Caster Check
You cannot easily see caster with your eyes. It is an internal angle of your suspension. You can look for signs of damage to your suspension components. Bent control arms or worn bushings can change your caster angle. If you see these issues, your caster is likely off.
Caster’s Effect
Caster angle is very important for your car’s stability. It helps your steering wheel return to the center. A positive caster angle means the steering axis tilts backward at the top. This improves straight-line stability. It reduces how much your steering wanders. It also helps your wheels straighten after a turn.
Positive caster creates a self-aligning force. This makes your car stable, especially at higher speeds. This force also helps your wheels return to a straight position after you turn. This makes transitions smoother. Positive caster also changes your wheel camber when you turn. The outside wheel gains negative camber. The inside wheel gains positive camber. This helps your car lean into the turn. It improves tire grip.
Straight-line Stability and Self-Centering: Positive caster makes your car stable in a straight line. It helps your steering wheel return to center.
Steering Effort: Positive caster can make steering feel heavier. Power steering systems usually handle this.
Jacking Effect: Positive caster causes a “jacking effect” when you turn. The inside front wheel lifts. The outside front wheel lowers. This shifts weight to the rear outside wheel. It can help your car turn in.
Camber Changes During Cornering: Positive caster changes wheel camber when you steer. The outside wheel gets negative camber. The inside wheel gets positive camber. This helps your tires grip better during turns.
Suspecting Caster Issues
You might suspect caster issues if your car shows certain behaviors. If your steering wheel does not return to the center easily after a turn, your caster might be off. If your car feels unstable at high speeds, or if you constantly correct your steering, caster could be the problem. These signs point to a need for a professional check.
Recognizing Signs of Misalignment

You can often spot wheel alignment problems before they become serious. Your car will give you clues. Pay attention to these signs. They tell you when to check your alignment.
Tire Wear Patterns
Your tires tell a story about your car’s alignment. Look closely at them. Uneven wear patterns are a big sign. Tire feathering appears as small flakes of tire peeling off the edges to one side of the tread. This creates a feather-like texture. Misalignment can cause this. Tire cupping is another wear pattern. It shows as large, U-shaped divots in the tire tread. A misaligned vehicle can also cause cupping. This happens when your tires have too much misalignment. The vehicle’s motion then causes uneven strain on the tire. This leads to cupping. Feathering also shows uneven tread wear. One side of a tread rib becomes rounded. The other develops a sharper edge. Poor wheel alignment often causes this. Issues with toe or camber create uneven friction. This leads to these sharp edges in feathered tires.
Steering Wheel Off-Center
Does your steering wheel sit crooked when you drive straight? This is a common sign of trouble.
Misalignment of the Wheels: This is a frequent cause. Impacts like potholes or curbs can knock your wheels out of alignment.
Worn or Damaged Components: Parts like tie rods or ball joints can wear out. This makes your steering wheel sit off-center.
Uneven Tire Wear: Tires that wear unevenly create an imbalance. This pulls the steering wheel to one side.
Steering Wheel Adjustment After Repairs: Sometimes, after suspension repairs, the steering wheel is not adjusted correctly.
Steering Rack or Power Steering Issues: Problems with these systems can also cause an off-center steering wheel.
Vehicle Pulling to One Side
If your car constantly drifts to one side, you likely have an issue. You must correct your steering to stay in your lane.
Tire Pressure Check: First, check your tire pressure. Improper inflation often causes pulling.
Wheel Alignment Assessment: If tire pressure is correct, think about your last wheel alignment. Look for uneven tread wear or a crooked steering wheel. These indicate misalignment.
Brake System Inspection: Does your car pull when you brake? Check for a sticking brake caliper. A caliper not applying proper pressure can cause pulling.
Professional Inspection: If pulling continues after these checks, get a professional inspection. Bad wheel bearings or worn steering linkage might be the cause.
Loose or Unresponsive Steering
Your steering should feel tight and responsive. If it feels loose or slow to react, you might have a problem. Worn tie rods often lead to affected alignment. This contributes to loose steering. Your car might pull to one side. You need constant steering correction to stay centered. Steering can feel loose or slow to respond. This indicates your wheel angles might be off.
When to Seek Professional Wheel Alignment
Limitations of Home Checks
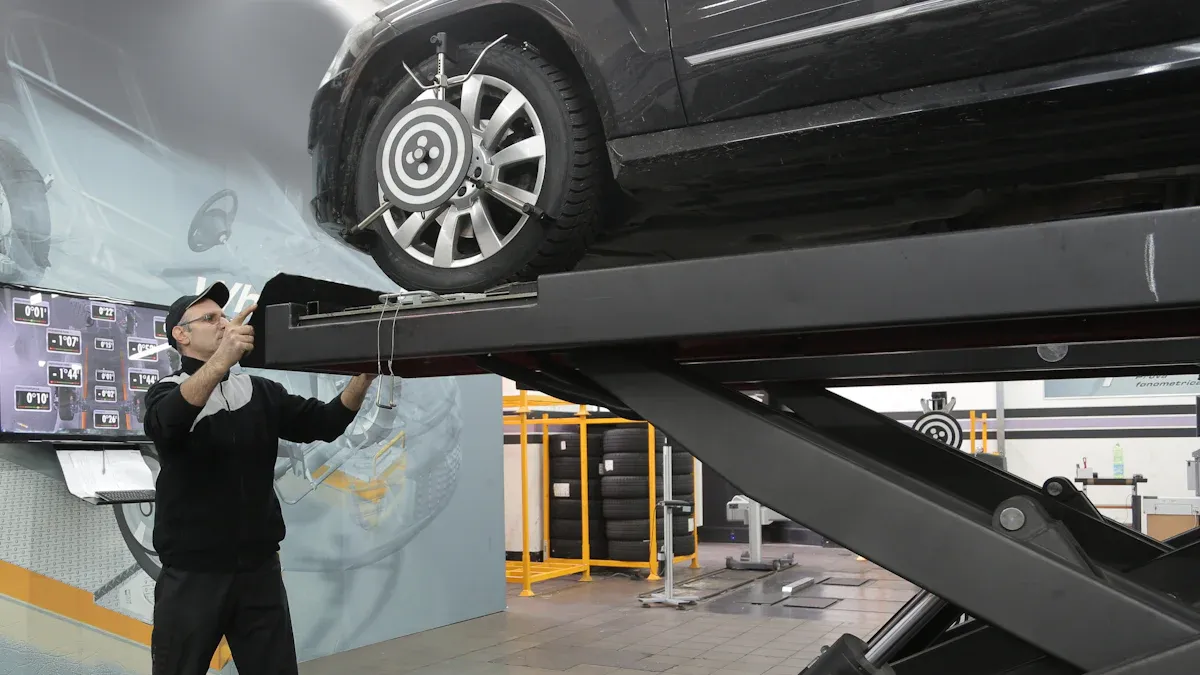
You can check your car’s alignment at home. However, you cannot perform precise adjustments. Adjusting angles like caster requires specialized tools. Toe settings also need exact measurements to prevent uneven tire wear. Modern wheel alignment uses advanced 3D machines. These include Hunter aligners and Hofmann 770 Imaging Wheel Aligners. These machines use innovative sensors for unmatched accuracy. Certified technicians perform these intricate adjustments. They often need training for unfamiliar vehicles. Your home tools simply cannot match this precision.
When Adjustments Are Needed
You need professional help when your home checks show significant issues. If you find major toe or camber problems, seek a professional. Advanced alignment services involve precise adjustments to camber, caster, and toe angles. They also adjust the thrust angle. These services are crucial for modified vehicles. They are also important for cars with unique suspension setups. Performance vehicles and specialty vehicles built for racing or heavy-duty tasks also need these precise adjustments.
Benefits of Professional Alignment
Professional wheel alignment offers many long-term benefits. It improves your tire lifespan and durability. Proper alignment distributes weight evenly across all tires. This prevents uneven wear. It helps tires maintain their grip longer. This also improves overall vehicle handling. Misaligned tires create unnecessary rolling resistance. This increases fuel consumption. Correct alignment reduces friction. Your engine does not work as hard. This leads to better gas mileage. Regular alignment checks improve driving efficiency. They also enhance safety. Your tires make solid contact with the road. This improves traction and your car’s response. Timely alignments prevent uneven tire wear. You get the maximum lifespan from your tires. This saves you money.
Regular home wheel alignment checks offer great benefits. You can detect problems early. This extends your tire life. Remember, home checks are excellent for diagnosis. However, professional equipment is necessary for precise adjustments. Use this knowledge to maintain your vehicle’s health. This also ensures your safety. Act on any issues you identify.
FAQ
How often should I check my wheel alignment?
You should check your wheel alignment every 6,000 miles or once a year. Also, check it after hitting a large pothole or curb. This helps you catch problems early. Regular checks extend your tire life.
Can I fix alignment issues myself?
You can identify alignment issues at home. However, professional equipment is necessary for precise adjustments. Do not attempt to adjust complex angles like caster yourself. Seek a certified technician for proper repairs.
What happens if I ignore misalignment?
Ignoring misalignment causes rapid, uneven tire wear. Your car’s handling will suffer. You might experience poor fuel economy. It also creates unsafe driving conditions. Address alignment issues quickly to avoid these problems.
Is DIY alignment accurate enough?
DIY checks help you diagnose potential problems. They are not as precise as professional tools. Use home checks to decide if you need a shop visit. Professionals use advanced machines for exact adjustments.


