
You might find misfires due to oil in spark plug wells incredibly frustrating. This common problem often comes from failing valve cover gaskets or spark plug tube seals. These issues compromise your spark and reduce engine performance. This blog reveals 11 practical secrets for effectively diagnosing, fixing, and preventing an Oil Leak Into Spark Plug Well. Follow these steps to restore your engine’s performance and reliability.
Key Takeaways
Oil in spark plug wells causes engine misfires. This happens when valve cover gaskets or spark plug tube seals fail. The oil stops the spark plug from working right.
You must find where the oil is leaking from. Check the valve cover gasket and the spark plug tube seals. Fixing the right part stops the leak.
Always clean all oil from the spark plug wells and parts. Replace any oil-covered spark plugs and damaged ignition coils. This makes sure your engine runs well.
Prevent future leaks by checking your engine often. Use good quality parts when you fix things. Follow your car’s service schedule to keep it healthy.
If the problem seems too big, get help from a professional mechanic. They have special tools and knowledge. This prevents more damage to your engine.
Understanding Oil Leak Into Spark Plug Well and Misfires

How Oil Contaminates Spark Plug Electrodes
When oil gets into your spark plug wells, it creates a big problem. This oil often comes from a failing valve cover gasket or worn spark plug tube seals. The oil then coats the ceramic insulator and metal electrodes of your spark plug. Think of it like trying to light a match that has oil on its tip; it becomes very difficult. This oil acts as an electrical insulator. It prevents the spark plug from creating a clean, strong spark. You will see a dark, greasy film on the plug itself. This film builds up over time, making the problem worse.
Impact on Spark Generation and Combustion
An Oil Leak Into Spark Plug Well directly affects how your engine runs. The oil coating on the spark plug makes it harder for electricity to jump the gap between the electrodes. This results in a weak or inconsistent spark. A weak spark cannot properly ignite the air-fuel mixture inside the cylinder. When the fuel does not burn completely, your engine experiences a misfire. This incomplete combustion wastes fuel and reduces engine power. Your engine struggles to perform efficiently.
Common Misfire Symptoms
You will notice several clear signs if your engine has misfires due to oil in the spark plug wells. Your engine might idle roughly, feeling shaky or vibrating more than usual. You may also experience a noticeable loss of power, especially when accelerating. The engine might hesitate or stumble. Often, your “Check Engine” light will illuminate on your dashboard. The car’s computer detects the misfire and stores a trouble code. You might also smell burning oil, as some of the leaked oil can burn off on hot engine parts.
Secret 1: Accurate Oil Leak Diagnosis
You must first accurately diagnose an oil leak. This step is crucial. You need to confirm oil is indeed leaking into your spark plug wells. This prevents you from fixing the wrong problem.
Visual Inspection of Spark Plug Wells
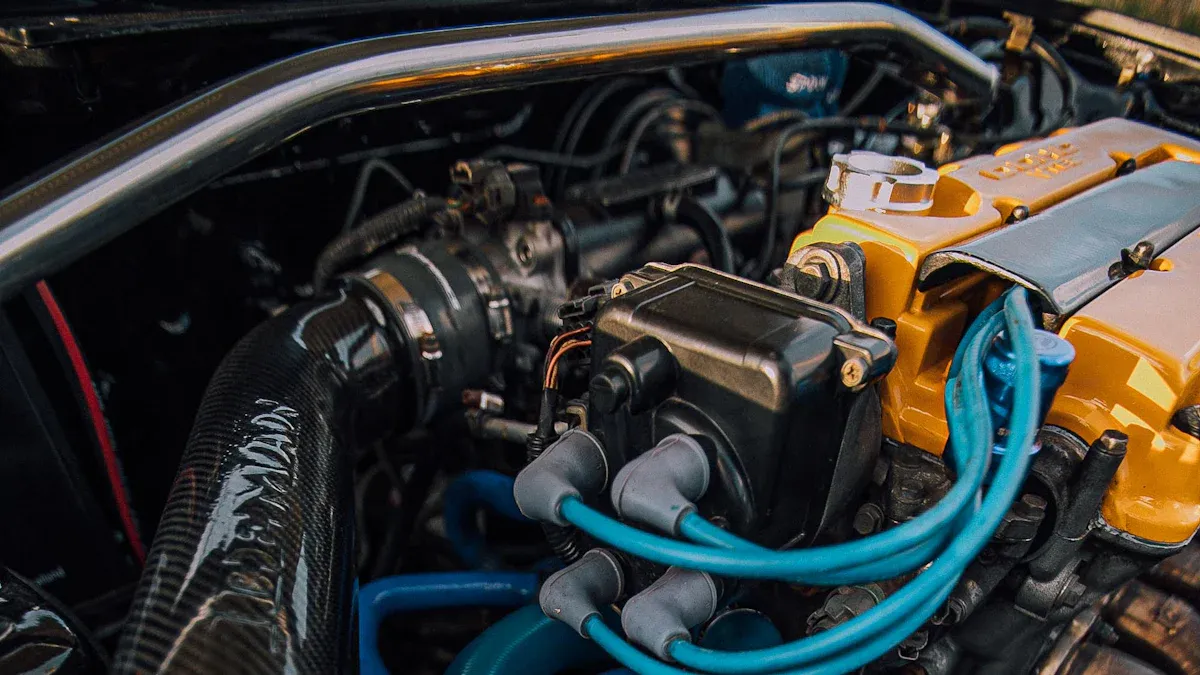
Begin with a visual inspection. Remove the engine cover if your car has one. Locate the spark plug wires or coil packs. These sit directly above the spark plugs. Carefully remove one coil pack or spark plug wire. Look down into the spark plug well. You are looking for oil. Oil will appear as a dark, greasy liquid. You might see residue on the sides of the well. Sometimes, the oil looks discolored. It can be dark brown or black. You might also smell burning oil. This smell often comes from oil leaking onto hot engine parts. Use good lighting for this inspection. A bright flashlight helps you see clearly into the well.
Checking Oil on Spark Plug Boots and Coils
Next, examine the spark plug boot and the coil pack. The boot is the rubber part that covers the spark plug. The coil pack sits on top of the boot. You will often find oil residue on these components. Look for a shiny, wet film. The boot might feel slippery. Oil can also seep into the coil pack itself. This damages the coil. Check for any discoloration on the boot or coil. A dark, oily stain indicates a leak. This oil prevents a strong electrical connection.
Using a Flashlight and Mirror for Access
Some spark plug wells are hard to see. They might be deep or located in tight spaces. Use a small, extendable mirror. This mirror helps you see around corners. Angle the mirror into the well. Use a powerful flashlight to illuminate the area. The mirror reflects the light. This allows you to spot oil that is otherwise hidden. This technique ensures you do not miss any leaks. You get a complete picture of the problem.
Secret 2: Identifying the Leak Source
After you confirm oil in your spark plug wells, you must pinpoint the exact source. Two main culprits cause this problem. You need to know which one is failing. This helps you fix the issue correctly.
Valve Cover Gasket vs. Spark Plug Tube Seals
You have two primary suspects for oil leaks into spark plug wells. The first is the valve cover gasket. This large gasket seals the entire valve cover to the cylinder head. It prevents oil from escaping the top of your engine. If this gasket fails, oil can leak from the edges of the valve cover. It then drips down into the spark plug wells.
The second suspect is the spark plug tube seals. These are smaller, circular seals. They sit around each spark plug tube. These tubes extend from the valve cover down to the spark plugs. Their job is to keep oil inside the engine and out of the spark plug wells. If these seals harden or crack, oil will seep directly into the wells.
Specific Signs of Component Failure
You can often tell which component is failing by looking closely.
Valve Cover Gasket Failure:
You will see oil around the entire perimeter of the valve cover.
Oil might also drip onto other engine components below the valve cover.
The valve cover itself might look greasy and dirty on the outside.
You might smell burning oil from oil dripping onto hot exhaust parts.
Spark Plug Tube Seal Failure:
You will find oil primarily inside the spark plug wells.
The valve cover gasket itself might appear dry and intact.
Oil will collect directly around the spark plug and its boot.
This type of leak often affects only one or a few spark plug wells, not necessarily all of them.
Tip: Sometimes, both the valve cover gasket and the spark plug tube seals fail at the same time. You should inspect both areas thoroughly. This ensures you address all leak points. You must identify the correct source. This prevents you from doing unnecessary repairs. It also ensures a lasting fix for your misfire problem.
Secret 3: Essential Tools for the Job
You need the right tools for this repair. Having them ready saves you time and frustration. You will perform the job more efficiently.
Hand Tools for Engine Work
You will use several basic hand tools. A socket set is crucial. You need various sizes for bolts and nuts. A ratchet helps you loosen and tighten fasteners. You also need wrenches, both open-end and box-end. A screwdriver set with flathead and Phillips bits is also necessary. A torque wrench is very important. You use it to tighten bolts to the correct specifications. This prevents overtightening or undertightening. Both can cause new problems.
Specialized Gasket and Seal Tools
Some specialized tools make the job easier. A gasket scraper helps you remove old gasket material. This ensures a clean surface for the new gasket. You can use a plastic scraper to avoid scratching aluminum surfaces. A pick set is also very useful. You use it to extract old, stubborn seals. These small, hooked tools help you get into tight spaces. They help you pry out old spark plug tube seals.
Cleaning Supplies for Oil Residue
You must clean all oil residue. This step is critical for a successful repair. You need several cleaning supplies. Brake cleaner works well for removing grease and oil. It evaporates quickly. You can also use specialized degreasers. For example, Signature Series Orange Degreaser is a heavy-duty, citrus-infused formula. It breaks down caked-on oil and road debris. It is safe for rubber, plastics, and metal components. It quickly eliminates motor oil from engine bays. Another option is Nonsense Invisible Super Cleaner. This clear, dye-free cleaner tackles grease and oil on all surfaces. It removes stains without changing the look of plastics or hoses. You will also need clean rags or shop towels.
Tip: Always wear gloves when handling cleaning chemicals. Ensure good ventilation in your workspace.
Secret 4: Replacing Spark Plug Tube Seals
Replacing spark plug tube seals fixes oil leaks directly into the wells. This process requires careful steps. You will ensure a proper seal.
Safely Removing Coils and Spark Plugs
First, disconnect your car’s battery. This prevents electrical shocks. Label each coil pack or spark plug wire. This helps you remember their original positions. Use a socket wrench to remove the bolts holding the coil packs. Gently pull each coil pack straight up. Avoid twisting them. Use a spark plug socket to remove the spark plugs. Turn the socket counter-clockwise. Place the removed spark plugs in order. This helps you inspect them later.
Techniques for Extracting Old Seals
Old spark plug tube seals are often brittle. They can be difficult to remove. Use a pick set. These tools have small hooks. Insert the hook under the edge of the old seal. Carefully pry it upwards. You can also use a small flathead screwdriver. Be careful not to scratch the aluminum valve cover. Work slowly around the seal’s perimeter. The goal is to lift it out without damaging the surrounding metal. Remove all pieces of the old seal.
Proper Installation of New Seals
Prepare your new seals for installation. Apply a thin layer of clean engine oil to the new seals. This lubrication helps them slide into place. It also prevents damage during installation. Press each new seal firmly into its opening. You can use a socket that matches the seal’s diameter. Gently tap the socket with a rubber mallet. This ensures the seal sits flush. It must be fully seated. After installing the new seals, apply dielectric grease. Put this grease inside the rubber boot of the coil pack. Spread it on the porcelain part of the spark plug. This grease helps seal out moisture and oil. It also improves electrical contact.
Tip: Always use new seals. Reusing old seals will likely cause another leak.
Secret 5: Replacing the Valve Cover Gasket
Replacing the valve cover gasket is a critical step. This fixes oil leaks from the top of your engine. You will ensure a proper seal.
Disconnecting Valve Cover Components
First, disconnect the battery. This ensures safety. You need to remove anything attached to the valve cover. This includes hoses, wires, and sometimes brackets. Take pictures before you start. This helps you remember where everything goes. Use a socket wrench to loosen the bolts holding the valve cover. Work slowly and carefully. Some bolts might be hidden.
Thorough Cleaning of Mating Surfaces
After removing the old gasket, clean the mating surfaces. This is very important. Use a gasket scraper to remove all old gasket material. You must get rid of any dried oil or debris. The surface on the cylinder head must be perfectly clean. The valve cover’s surface also needs cleaning. Use brake cleaner or a degreaser. Wipe the surfaces with a clean, lint-free cloth. A clean surface ensures the new gasket seals properly. Any old residue can cause a new leak.
Correct Gasket Placement and Torque Specs
Place the new valve cover gasket carefully. Make sure it sits correctly in its groove. Some gaskets have specific orientations. Check your vehicle’s service manual for details. Apply a small amount of RTV sealant in specific corners or areas. This helps seal tricky spots. Now, you will tighten the bolts. Use a torque wrench. This prevents overtightening.
For valve cover bolts with RTV sealant: Torque to 28 inch-pounds.
For valve cover bolts with a gasket: Torque to 55 inch-pounds.
The tightening pattern is important. Start tightening bolts from the middle. Then, work your way outwards in a spiral pattern. This ensures even pressure. Hand-tightening is often a good start. Then, recheck the bolts after about a week. This helps avoid snapping bolts. “Hand tight” is usually around 3-4 foot-pounds. “Finger tight” is about 1 foot-pound. If you use a socket and extension, tighten by hand as much as possible. Then, use an open-end wrench for a small additional turn. This might be about 1/16th of an inch. This gets you to approximately 5-6 foot-pounds. Do not exceed 10 foot-pounds. This can break the bolt. Be careful with cork gaskets. They can crack if you overtighten them.
Secret 6: Thorough Cleaning of Spark Plug Wells and Components
You must clean everything thoroughly. This step is crucial for a lasting repair. Any leftover oil can cause future misfires. It can also damage new parts.
Removing All Oil Residue from Wells
You need to remove all oil from the spark plug wells. This is a critical step. First, use a shop vac with a narrow attachment. This helps you extract most of the standing oil. You can also use a small sprayer. Spray brake cleaner or a degreaser into the well. Let it sit for a moment. Then, use the shop vac again to suck out the dirty liquid. Repeat this process until the wells appear clean. Use a clean, lint-free rag wrapped around a screwdriver or stick. Wipe down the inside of each well. Ensure no oil residue remains.
Cleaning Spark Plug Boots and Coils
Oil can damage spark plug boots and ignition coils. You must clean them carefully. Wipe down each spark plug boot with a clean cloth. Use brake cleaner or a mild degreaser. Look for any signs of cracking or swelling on the rubber boots. Oil causes rubber to degrade. Clean the coil packs too. Remove any oil or grime from their surfaces. Ensure the electrical contacts on the coils are clean and dry.
Inspecting Electrical Connectors
You should also inspect all electrical connectors. Oil can seep into these connections. This causes poor electrical contact. Disconnect each connector. Look for oil, dirt, or corrosion inside. Use an electrical contact cleaner to spray inside the connectors. Let them dry completely. Ensure the pins are straight and not bent. Reconnect them firmly. You will hear a click when they are properly seated. This ensures a strong electrical signal.
Secret 7: Inspecting and Replacing Contaminated Spark Plugs
You must inspect and replace any spark plugs contaminated by oil. Oil-fouled plugs cannot create a strong spark. This directly causes misfires.
Recognizing Oil-Fouled Spark Plugs
When you remove your spark plugs, look closely at the electrodes. An oil-fouled spark plug will have black, greasy deposits. These deposits cover the ceramic insulator and the metal tip. The oil prevents proper electrical conduction. You might also see a wet, oily film on the plug body. This indicates oil has been sitting in the well. A healthy spark plug usually has a light tan or gray color on its tip. This shows it is burning fuel efficiently.
Choosing Correct Spark Plug Type
Selecting the right spark plug is crucial for your engine’s performance. You need to consider several factors:
Heat Range: This dictates how quickly the plug dissipates heat. Performance engines often need colder plugs. These plugs prevent pre-ignition. Street vehicles need plugs warm enough to burn off carbon. A change of one heat range affects tip temperature by 75-100 degrees Celsius.
Electrode Materials: Different materials offer varying conductivity and lifespan.
Copper provides excellent heat transfer. It has a shorter lifespan.
Platinum offers a longer life. It is less conductive than copper.
Iridium is a ‘gold standard’ for modified engines. It has a high melting point and excellent conductivity.
Gap Settings: This affects ignition performance. Wider gaps create more powerful sparks. They require higher voltage. Narrower gaps fire more easily. Forced induction engines often need smaller gaps. This prevents spark ‘blowout.’
You can start with a common copper spark plug. Set it to a known gap. Then, you can tune your engine. This helps you assess performance. You can adjust the heat range, gap, and material based on these results.
Proper Gapping and Installation
Always check the gap on new spark plugs. Use a spark plug gapping tool. Your vehicle’s manufacturer specifies the correct gap. Adjust the gap carefully. Do not bend the center electrode. This can damage the plug. Apply a small amount of anti-seize compound to the spark plug threads. This prevents them from seizing in the cylinder head. Hand-tighten the spark plug first. Then, use a torque wrench. Tighten it to the manufacturer’s specifications. Overtightening can strip threads. Undertightening can cause leaks.
Secret 8: Checking and Replacing Ignition Coils
You must check your ignition coils. Oil leaks can damage them. This damage leads to misfires.
How Oil Damages Coil Packs
Oil is a conductor of electricity. When oil leaks into the spark plug wells, it can coat the ignition coil boots. It can also seep into the coil pack itself. This oil acts as an insulator. It prevents the coil from sending a strong spark to the spark plug. Oil can also cause the coil to overheat. It can create short circuits within the coil’s windings. This degrades the coil’s internal components. Over time, the coil fails completely. You will experience consistent misfires.
Testing Coil Resistance or Spark
You can test your ignition coils. This helps you determine if they are working correctly.
Visual Inspection: Look at the coil. Check for cracks. Look for corrosion. See if the insulation is melted. These are signs of damage.
Resistance Testing: Use a multimeter. Measure the resistance of the coil’s windings. Compare your measurements to the manufacturer’s specifications. For example, measure resistance between the side terminals. It should be around 0.75 to 0.81 ohms. Measure resistance between a side terminal and the center high tension terminal. It should be around 10,000 to 11,000 ohms. Deviations mean a bad coil.
Spark Test: Connect a spark tester to the coil’s output. Crank the engine. Watch the spark. It should be strong and consistent. A weak or irregular spark means the coil is faulty.
Diagnostic Scan Tool: Use a scan tool. Check for trouble codes. These codes relate to the ignition system.
When to Consider Coil Replacement
You should replace an ignition coil if it fails any of these tests. If you see visible damage, replace it. If your engine continues to misfire after you fix the oil leak and replace the spark plugs, the coil is likely bad. Sometimes, oil damage is not visible. The internal components still fail. Replacing a faulty coil restores proper spark. This eliminates misfires.
Secret 9: Post-Repair Checks and Test Drive
You finished the repair. Now, you must perform crucial post-repair checks. These steps confirm your work. They ensure your engine runs correctly.
Double-Checking Connections and Fasteners
You need to re-check everything. Go back over your work. Make sure all electrical connectors are secure. You should hear a click when they seat properly. Check all vacuum lines and hoses. Ensure you reconnected them. Look at the valve cover bolts. Confirm you tightened them to the correct torque specifications. Loose connections cause new problems. They can lead to vacuum leaks or electrical issues. A thorough check prevents future headaches.
Monitoring for New Leaks
Start your engine. Let it run for a few minutes. Look for any new oil leaks. You can use a flashlight. Check around the valve cover gasket. Look at the spark plug wells. Watch for any drips or wet spots. You might smell a slight burning odor. This often comes from residual oil burning off hot engine parts. This is usually normal. A persistent smell or visible smoke indicates a new leak. Turn off the engine. Investigate any suspicious areas immediately.
Checking Engine Lights and Misfires
Clear any stored trouble codes from your car’s computer. You can use an OBD-II scanner for this. Start the engine again. Listen for smooth operation. The engine should idle steadily. Take your car for a test drive. Drive at various speeds. Pay attention to engine performance. Feel for any hesitation or loss of power. The “Check Engine” light should remain off. If the light comes back on, or you feel misfires, you need further diagnosis. This means the problem is not fully resolved. You might have missed something. Or, another component needs attention.
Secret 10: Preventing Future Oil Leak Into Spark Plug Well
You can take steps to prevent an Oil Leak Into Spark Plug Well. Proactive measures save you time and money. They keep your engine running smoothly.
Regular Inspection of Valve Cover Area
You should regularly inspect your engine. Look for signs of oil leaks. It is recommended to perform visual inspections for oil leaks between oil changes. You can easily do this yourself. During every oil change, ask your technician to check for any seepage or residue around the engine. This is a standard practice. It helps detect potential leaks. This includes leaks from the valve cover gasket. Look for wet spots or dark residue. Check around the valve cover. Also, inspect the areas near the spark plug wells. Early detection helps you fix small issues. This prevents them from becoming bigger problems.
Adhering to Manufacturer’s Service Intervals
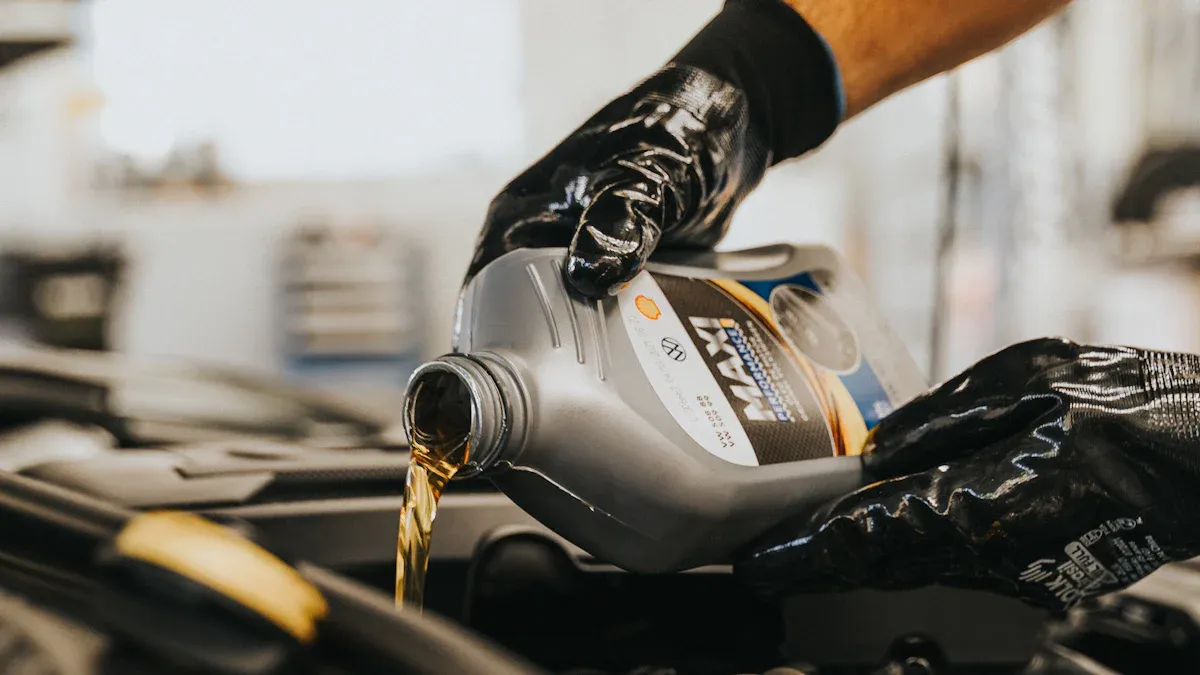
Your car’s manufacturer provides a service schedule. You should follow this schedule. It includes recommended maintenance tasks. These tasks often involve inspecting or replacing components. This includes gaskets and seals. These parts wear out over time. Replacing them at the recommended intervals prevents failures. This proactive approach keeps your engine healthy. It reduces the chance of unexpected oil leaks.
Using Quality Replacement Parts
When you replace parts, choose quality ones. Cheap gaskets and seals often fail quickly. They do not last as long. Quality parts fit better. They are made from durable materials. This ensures a proper seal. It prevents future leaks. Invest in good valve cover gaskets and spark plug tube seals. This small investment saves you from repeated repairs. It gives you peace of mind.
Secret 11: When to Seek Professional Help
You might encounter problems beyond a simple gasket replacement. Sometimes, the issue is more complex. You need to know when to call a professional.
Recognizing Complex Issues Beyond DIY
You can fix many oil leaks yourself. However, some signs point to bigger problems. You might have a blown head gasket. Look for white smoke from the exhaust. You might see coolant mixing with oil. Worn piston rings also cause oil in spark plug wells. This often happens in high-mileage cars. You will notice excessive oil consumption. Your engine might burn oil. Active Fuel Management (AFM) issues can also cause problems. Some cylinders, like #1 or #7, might show oil leaks. This indicates a deeper engine problem. A bad turbocharger can also leak oil. You will see blue smoke from the exhaust. You might hear a whining sound. These issues require professional expertise. You cannot fix them with basic tools.
Benefits of Professional Diagnosis
A professional mechanic offers many benefits. They have specialized diagnostic tools. They can accurately pinpoint the root cause. They possess extensive experience. They understand complex engine systems. You get a precise diagnosis. This saves you time and money. You avoid guessing games. They ensure the correct repair. You gain peace of mind.
Avoiding Further Engine Damage
Ignoring complex issues leads to more damage. A small problem can become a major repair. You risk severe engine failure. Professionals fix the problem correctly the first time. They prevent cascading failures. You protect your investment. You ensure your engine’s longevity. You avoid costly breakdowns.
You must address an Oil Leak Into Spark Plug Well promptly. This maintains engine health and performance. Our 11 secrets give you a complete roadmap. They guide you from diagnosis to prevention. Apply these tips. You will restore your engine’s reliability. You will avoid future misfire issues. Enjoy the satisfaction of a well-running engine.
FAQ
What causes oil to get into spark plug wells?
Failing valve cover gaskets or worn spark plug tube seals are the main culprits. These components keep engine oil contained. When they degrade, oil can seep past them. It then collects in the spark plug wells.
Can I drive my car with oil in the spark plug wells?
You can drive your car, but it is not advisable. Oil in the wells causes misfires. This reduces engine performance. It can also damage ignition coils and catalytic converters over time. Address the issue promptly.
How often should I check for an Oil Leak Into Spark Plug Well?
You should perform visual inspections regularly. Check for leaks during every oil change. Look for oil residue around the valve cover and spark plug areas. Early detection helps prevent bigger problems.
What happens if I ignore an Oil Leak Into Spark Plug Well?
Ignoring this issue leads to persistent misfires. Your engine will run poorly. It can damage ignition coils and spark plugs. Over time, it might harm your catalytic converter. This results in more expensive repairs.


