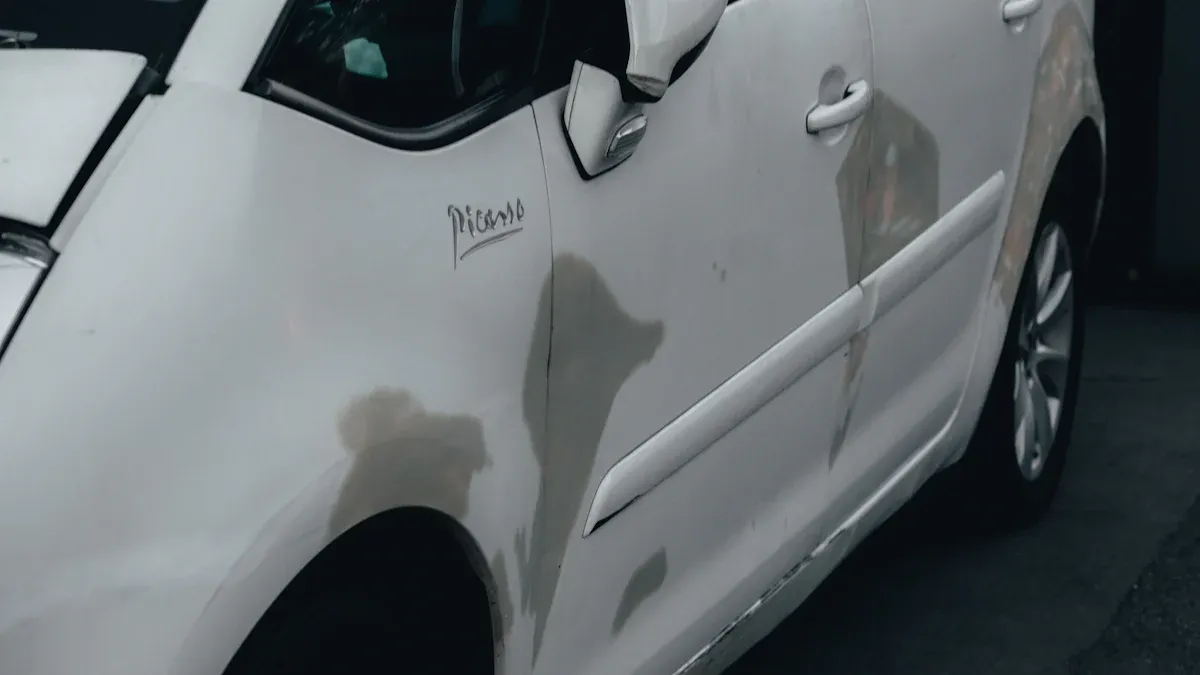
Car scratches are incredibly frustrating. You want to restore your vehicle’s pristine look. However, not all scratches are the same. Clear coat scratches, for example, differ significantly from paint scratches that delve deeper. Understanding these differences is crucial to correctly buff out scratches. Proper assessment and technique prevent further damage to your car’s finish. This guide will show you how to fix scratches effectively. You will learn to remove scratches from your car with clear, step-by-step instructions for various scratch types, ensuring a successful car scratch repair.
Key Takeaways
First, check how deep a car scratch is. This helps you choose the right way to fix it.
Use special car products for scratches. Do not use household cleaners, as they can harm your car’s paint.
Clear coat scratches are easy to fix with polish. Deeper scratches need paint and primer.
Always clean the area well before you start. This helps new paint stick better.
For very deep or large scratches, ask a professional for help. They have special tools.
Assessing Car Scratches for Effective Removal
Before you begin any car scratch removal, you must first understand the scratch. You need to determine its depth and type. Always start with a clean surface. Wash the affected area thoroughly to remove dirt and debris. This ensures an accurate assessment.
Identifying Clear Coat Scratches
Clear coat scratches are superficial. They only affect the top protective layer of your car’s paint. You can often identify them by touch. If your fingernail does not catch on the scratch, it is likely a clear coat scratch.
Scratch Type | Appearance | How to Identify (Tactile) |
|---|---|---|
Clear Coat (Level 1A) | Barely visible, only noticeable under direct light | Fingernail does not catch on the surface |
Clear Coat (Level 1B) | More visible than 1A, still within clear coat | Fingernail catches only slightly |
Recognizing Paint Scratches
Paint scratches go deeper than the clear coat. They reach the colored base coat. You will see the car’s actual paint color within the scratch. Your fingernail will catch more easily on these.
Scratch Type | Layer Affected | Appearance |
|---|---|---|
Clear Coat (Level 2) | Clear Coat | Deeper scratches, clearly visible. Fingernail catches slightly. |
Base Coat (Level 3) | Base Coat | Scratches that penetrate the clear coat and reach the base coat. Color of the base coat is visible. Fingernail catches noticeably. |
Detecting Deep Scratches
Deep scratches are the most severe. They penetrate all paint layers. You will see the primer or even bare metal. Primer often appears as dull gray or white lines. If you see bright metallic silver, the scratch has reached the metal. These deep scratches feel jagged and rough to the touch. Your fingernail catches deeply.
Scratch Layer | Appearance |
|---|---|
Primer | Dull gray or white lines |
Metal | Bright metallic silver, jagged and rough |
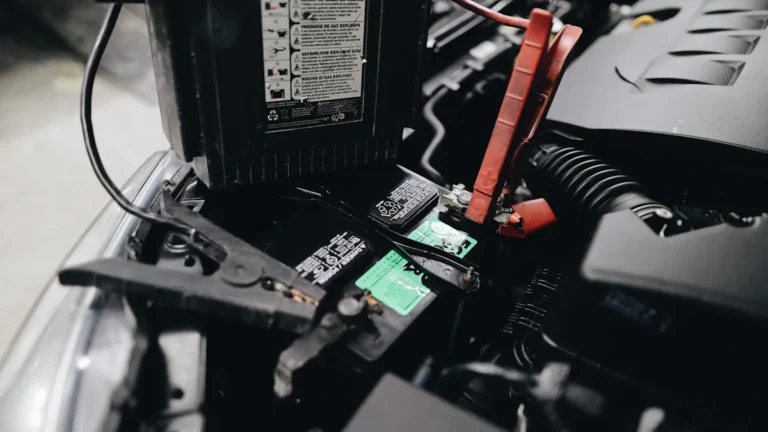
Essential Tools and Materials
You need specific tools for effective scratch removal. Gather microfiber cloths and polishing pads. You will also need various compounds. Look for polishing compound, rubbing compound, and scratch remover. Brands like Meguiar’s, Turtle Wax, or Formula 1 offer good options. For precise assessment, consider specialized tools:
Paint Depth Gauge: This measures paint layer thickness. It tells you if buffing is safe.
Scratch Depth Gauge: This tool measures the exact depth of a scratch. It identifies the affected layer.
Digital Microscope: Use this for close examination. It reveals the true nature of a scratch.
Spectrophotometer: This reads your car’s exact color. It helps find perfect paint matches.
These tools help you choose the right car scratch repair kits and methods for removing car scratches.
Buffing Out Clear Coat Scratches
You can effectively address superficial clear coat scratches. These scratches have not penetrated your car’s protective clear coat layer. When you work on these, always work in small sections. Apply light pressure to avoid further damage. This approach helps you achieve the best results.
Preparing the Area
Proper preparation is key to successful scratch removal. First, thoroughly wash your car. Use a strong wash solution. This strips away old waxes and sealants. You need a clean, wax-free surface for optimal polishing. Remove license plates and brackets. This helps you clean hidden gritty dirt. It also prevents obstructions during polishing. Ensure you remove all dirt, debris, bugs, and leaves. This prevents them from causing more damage during the buffing process.
Next, clay the surface. This step removes embedded contaminants. Regular washing cannot eliminate these. Finally, tape up sensitive areas. Protect rubber trim, uneven seams, and protruding parts like door handles. Also, cover emblems and any other areas. This prevents polish stains or damage from your buffer.
Applying Polish or Remover
Now, you are ready to apply your chosen product. You need a high-quality car scratch remover or a fine polishing compound. Apply a small amount of this product directly onto the scratched area. You can use a polishing pad or a clean microfiber cloth for this. Do not apply too much product. A little goes a long way.
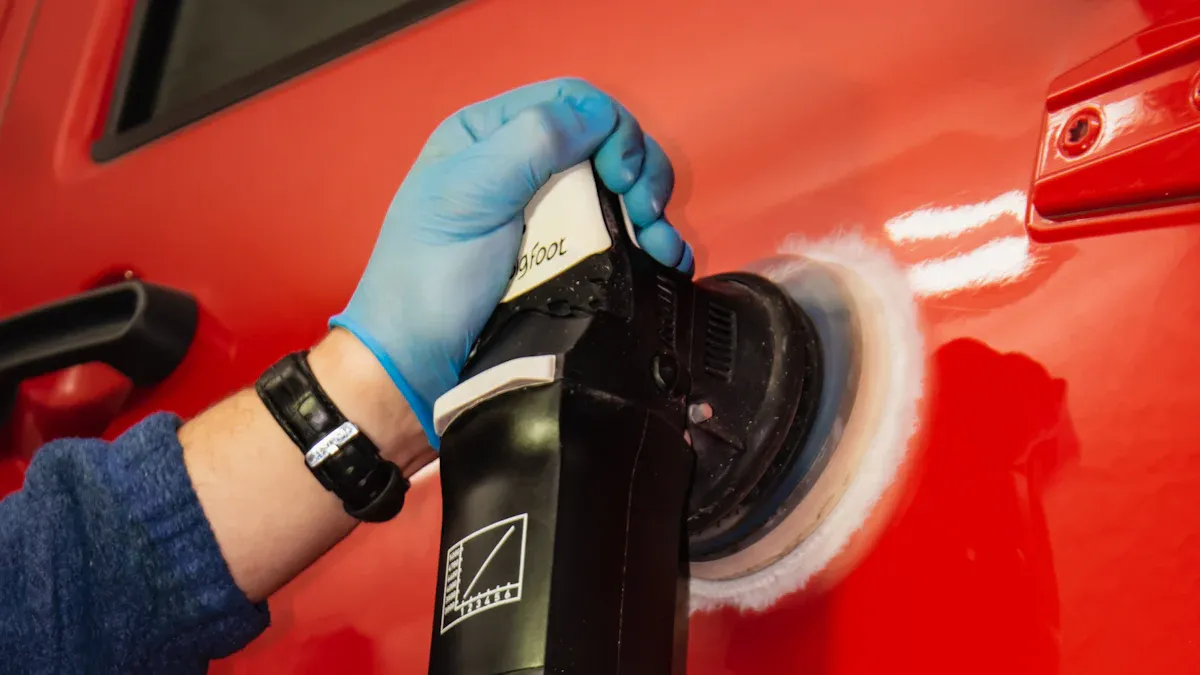
Buffing Techniques
You have two main options for buffing: a microfiber cloth or a dual-action polisher.
If you use a microfiber cloth to buff out scratches:
Apply rubbing compound to a clean microfiber cloth.
Buff the scratch in small, circular motions.
Wipe off any excess compound with a separate clean, damp microfiber cloth.
Repeat if necessary until you see improvement.
Alternatively, you can apply a small amount of rubbing compound directly onto the scratched area. Then, use firm pressure. Rub the compound in a back-and-forth motion over the scratch. Continue rubbing until the scratch begins to fade or disappear. Wipe off any excess compound with a clean, damp microfiber cloth.
If you use a dual-action polisher, follow these steps for effective clear coat scratch removal:
Maintain a wet film. Ensure you see a visible wet film behind the polisher’s path of travel. This prevents dry buffing. Dry buffing can dull or mar your paint.
Use a slow arm speed. Move the polisher slowly over the surface. This allows the buffing pad, the polisher’s action, and the abrasives in the product enough time to work on the paint. This is especially important with modern, harder clear coats. Moving too quickly will not effectively remove defects.
Inspecting and Finishing
After buffing, inspect the area carefully. Wipe away any remaining polish or compound with a clean microfiber cloth. Check the scratch under different lighting conditions. This helps you see if the scratch is gone or significantly reduced. If you still see the scratch, you can repeat the application and buffing process. Remember to use light pressure. Once you are satisfied, you can apply a layer of car wax. This protects the newly buffed area and enhances its shine. This is how to fix clear coat scratches effectively.
Car Scratch Repair for Paint Damage
You face a different challenge when scratches go through the clear coat and into the paint layer. These require more than just polishing. You need to address the underlying paint. If the scratch is significant, you will need color-matched paint. This ensures a seamless repair.
Cleaning and Prepping
Before you begin any car scratch repair, you must thoroughly clean the area. This removes dirt, grime, or old wax. A clean surface ensures new paint adheres properly. You can use a mild soap and water solution. Then, dry the area completely.
For deeper imperfections, you might need to repair body damage. Address dents and scratches using body filler. Sand it smooth. For minor scratches, specific repair services can help. You should also check for rust, especially in moisture-prone areas. Remove rust by sanding to bare metal. Then, treat it with a rust converter and inhibitor before priming.
Sanding the surface creates a smooth, even base for paint adhesion. You will use sandpaper with varying grits. Start with coarse (80-120 grit) for old paint or filler. Move to medium (220-320) for smoothing. Finish with fine (400-600) for primer readiness. For superficial damage, gently sand the area in a circular motion with fine-grit sandpaper. Ensure evenness to avoid further damage. You can also use wet sanding. Use fine-grit sandpaper (600-1000 grit) soaked in water. Sand gently in a circular motion. Keep the area wet to achieve a finer finish.
After sanding, a primer is applied to bare metal or plastic. It acts as an intermediate layer. Primer enhances grip and longevity for the new paint. Have wax and grease remover on hand for thorough surface cleaning. Use microfiber cloths for wiping the surface between each repair step. Finally, mask and tape off areas you do not want to paint. Cover windows, tires, mirrors, and trim. This prevents overspray and ensures clean, sharp edges.
Applying Touch-Up Paint
Once the area is clean, prepped, and primed, you can apply touch-up paint. Make sure you have color-matched paint. Apply the paint in thin coats. Allow proper drying time between each coat. This prevents runs and ensures an even finish. Follow the product instructions for drying times.
Using Rubbing Compound
A rubbing compound is an abrasive material. You use it for paint correction on vehicles. Its main purpose is to remove a thin top layer of paint or clear coat. This eliminates significant surface imperfections. It acts like ‘liquid sandpaper’ to smooth uneven paint. It reduces deep scratches and restores oxidized surfaces. Unlike regular car polish or wax, rubbing compounds contain coarse abrasive particles. These particles ‘cut’ into the paint surface. This effectively reduces blemishes.
You can use a “cutter” for more stubborn paint scratches. This is a more aggressive rubbing compound. Brands like Meguiar’s Pro Series compounds (M105 Ultra-Cut Compound, M100 Pro Speed Compound, M110 Ultra Pro Speed Compound) use ‘SMAT’ (Super Micro Abrasive Technology). This minimizes self-inflicted scratches. 3D ACA Compounds (ACA 500 X-Tra Cut Compound, ACA 510 Premium Rubbing Compound) feature ‘ACA’ (Alpha Ceramic Alumina) technology. They offer fast cutting with a longer working time. Dr. Beasley’s Nano Surface Primer CoreCut and CoreCut+ use high-quality, faceted microsphere abrasives. They provide heavy cut with minimal micro-marring.
To apply rubbing compound:
Clean the surface: Start with a smooth, dry surface. Thoroughly wash and dry the vehicle.
Inspect Paint: Use good lighting. Assess swirl marks, scratches, and oxidation.
Apply rubbing compound: Use a small amount on a foam pad or a microfiber cloth. Work on a small section at a time. Apply moderate pressure in circular or cross-hatch movements. Buff in a circular pattern with light pressure until the scratch is less visible. Wipe off any remaining compound with a microfiber towel.
Polishing and Protecting
After using the rubbing compound, the area might look a bit dull or hazy. This is normal. You need to follow up with a polishing compound. This refines the finish and restores shine. Apply a small amount of polishing compound to a clean applicator pad. Work it into the repaired area. Use light pressure and circular motions.
Once you achieve the desired shine, wipe away any residue with a clean microfiber cloth. To protect your hard work, apply a layer of car wax or sealant. This adds a protective barrier. It also enhances the gloss. This completes your car scratch repair. You have learned how to fix paint scratches effectively.
Fixing Deep Scratches on a Car
Deep scratches are the most challenging to repair. They go through the paint to the primer or even the metal. These repairs demand patience and precision. You can successfully restore your car’s finish with careful work. This section will guide you on how to fix deep scratches.
Cleaning and Taping
Begin by thoroughly cleaning the damaged area. Use a mild car wash soap and water. This removes all dirt, grease, and wax. A clean surface is crucial for proper adhesion of new materials. After cleaning, dry the area completely.
Next, mask off the surrounding area. Use painter’s tape and newspaper or plastic sheeting. This protects the undamaged paint from sanding dust and overspray. Ensure the tape creates a clean, crisp edge around the scratch. This precision prevents accidental damage to your car’s good paint.
Light Sanding
You will now gently smooth the scratch. This prepares the surface for new paint. For scratches that catch your fingernail, use 3000-grit sandpaper. If the scratch is shallower, opt for 5000-grit sandpaper.
Follow these steps for proper sanding:
Clean the area with soapy water. Wipe it dry.
Spray soapy water onto the scratch and the sandpaper. This is called wet sanding.
Sand from bottom to top for about 15 seconds.
Wipe the area with a cloth to check the scratch. Repeat sanding if necessary.
Once the scratch is almost gone and the area looks hazy, use 5000-grit sandpaper. Softly feather out the edges.
Spray with soapy water again and wipe dry.
Be careful not to over-sand. You only want to smooth the edges of the scratch. This process helps to fix scratches on a car by creating a smooth base.
Applying Primer and Paint
For deep scratches that reach the metal, you need primer. Primer creates a strong bond for the new paint. A local paint and bodyshop supplier can help you find the correct primer color. They can also mix base coat to match your car’s factory color. If your car color is not metallic, any color primer might work. For metallic colors, the primer color needs to match the base. Dealerships or local shops can provide the paint code for the primer.
Follow these steps to apply primer and paint:
Clean out the chip using an abrasive tip or grit paper. This creates a clean surface.
Apply one coat of primer. If using spray can primer, spray it onto a surface to create a puddle. Then, apply it with a toothpick into the scratch.
Allow the primer to dry according to the instructions. Consider weather and temperature.
Apply the color-matched paint carefully. Start from the top of the scratch, allowing it to drip. Start with a small amount.
Apply 2-3 thin coats of color. Allow proper drying time between each coat. This prevents runs and ensures an even finish.
This careful application helps you to fix scratches on a car effectively.
Clear Coat and Buffing
After the color paint dries, apply a thin layer of clear coat. This protects the freshly painted area from sun and weather damage. The clear coat also restores the shine.
Once the clear coat is dry, you can carefully buff and polish the repaired area.
Wet-sand the area with very fine-grit sandpaper (e.g., 3000-grit or higher). This smooths any imperfections in the clear coat.
Apply a polishing compound to a clean microfiber cloth or a polishing pad.
Gently buff out scratches in the repaired area. Use light pressure and circular motions.
Follow with a finer polish to enhance the shine.
Finally, apply a car wax or sealant. This protects the repair and blends it seamlessly with the surrounding paint.
This process shows you how to fix scratches and how to fix deep scratches, restoring your car’s appearance.
You can feel great restoring your car’s finish. This diy approach to car scratch repair empowers you. Remember, proper assessment always dictates the best repair method. Approach each task with patience and attention to detail. For ongoing care, regularly wash your car. Apply wax or a ceramic coating. This prevents future scratches and maintains your paint’s integrity. While many products offer quick results for superficial damage, deeper gouges may require professional attention.
FAQ
Can I use household products to remove car scratches?
You should avoid household products. They often contain harsh chemicals. These chemicals can damage your car’s paint or clear coat. Always use products specifically designed for car scratch repair. This protects your vehicle’s finish.
When should I get professional help for car scratches?
Seek professional help for very deep scratches. These scratches go through the paint to the metal. You also need help for large areas of damage. Professionals have specialized tools and expertise. They ensure a perfect, long-lasting repair.
How long does a DIY scratch repair last?
A DIY scratch repair can last for years. This depends on the scratch depth and your repair quality. Proper preparation and product application are key. Regular car washing and waxing also extend the repair’s life. ✨
What is the best product for a beginner to use?
For beginners, start with a good quality scratch remover. Look for brands like Meguiar’s or Turtle Wax. These products are easy to apply. They effectively remove light clear coat scratches. Always follow the product instructions carefully.